Compaq Evo n610c Compaq Evo Notebook N410c Series and Evo Notebook N610c Serie - Page 57
Setting MultiBoot Preferences, Setting a New Default Boot Sequence
 |
View all Compaq Evo n610c manuals
Add to My Manuals
Save this manual to your list of manuals |
Page 57 highlights
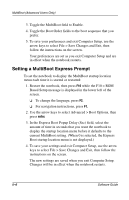
MultiBoot (Advanced Users Only) ■ Changing the boot sequence also changes the logical drive designations. For example, if you start up from a hard drive in the notebook MultiBay, that hard drive becomes drive C, and a hard drive in the hard drive bay becomes drive D. ■ Starting up from a NIC does not affect logical drive designations since no drive letter is associated with the NIC. ■ Drives in a Port Replicator are treated like external USB devices in the boot sequence and must be enabled in F10 Computer Setup. ■ Drives in a Mobile Expansion Unit are treated like notebook MultiBay devices, and no additional steps are required to include them in a boot sequence. Setting MultiBoot Preferences There are two ways to use MultiBoot: ■ Set a new default boot sequence the notebook uses each time it starts up. ■ Use variable boot sequences using MultiBoot Express. This feature prompts you for a startup device each time it is started or restarted. Setting a New Default Boot Sequence To set a startup sequence that the notebook will use each time it is started or restarted: 1. Restart the notebook, then press F10 while the F10 = ROM Based Setup message is displayed in the lower left of the screen. ❏ To change the language, press F2. ❏ For navigation instructions, press F1. 2. Use the arrow keys to select Advanced > Boot Options, then press enter. Software Guide 5-5
-
 1
1 -
2
-
3
-
4
-
5
-
6
-
7
-
8
-
9
-
10
-
11
-
12
-
13
-
14
-
15
-
16
-
17
-
18
-
19
-
20
-
21
-
22
-
23
-
24
-
25
-
26
-
27
-
28
-
29
-
30
-
31
-
32
-
33
-
34
-
35
-
36
-
37
-
38
-
39
-
40
-
41
-
42
-
43
-
44
-
45
-
46
-
47
-
48
-
49
-
50
-
51
-
 52
52 -
 53
53 -
 54
54 -
 55
55 -
 56
56 -
 57
57 -
 58
58 -
 59
59 -
 60
60 -
 61
61 -
 62
62 -
63
-
64
-
65
-
66
-
67
-
68
-
69
-
70
-
71
-
72
-
73
-
74
-
75
-
76
-
77
-
78
-
79
-
80
-
81
-
82
-
83
-
84
-
85
 |
 |