Dell 964 Owner's Manual - Page 33
Viewing or Printing Photos, Saving Photos to Your Computer, Photo, Photo Mode, Select, Arrow, Start
 |
UPC - 940356014026
View all Dell 964 manuals
Add to My Manuals
Save this manual to your list of manuals |
Page 33 highlights
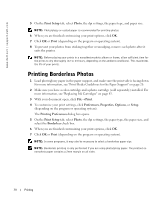
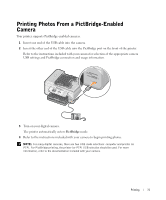
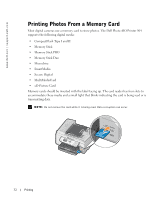
The connector that is used for PictBridge may also be used for accessing information that is stored on USB Flash Drive devices. The USB Flash Drive devices that have been certified for operation with this AIO are as shown: • DELL - 256 MB High Speed USB 2.0 Memory Key, Part Number 311-4341 • DELL - 128 MB High Speed USB 2.0 Memory Key, Part Number 311-4340 • DELL - 64 MB High Speed USB 2.0 Memory Key, Part Number 311-4339 When you insert a memory card or USB key, the printer automatically switches to Photo mode. NOTE: Do not insert more than one memory card or USB key at a time. NOTE: The printer supports FAT32 data format. Files stored in NTFS should be converted to FAT32 data format. Viewing or Printing Photos 1 Insert a memory card or USB key. The printer automatically switches to Photo Mode. 2 Press Select to access the Photo Mode menu. 3 From the Photo Mode menu, use the up or down Arrow buttons Browse and Print Photos, and then press Select . to scroll to 4 Press the left or right Arrow buttons or in the digital camera. to scroll through the photos on the media card 5 Press Select to select a photo for printing. Press the up or down Arrow buttons to specify the number of copies. 6 Press Start to print. NOTE: Only photos in JPG format can be printed directly from the memory card or USB key. If you want to print photos stored on the memory card or USB key in a different file format, the photos must be transferred to your computer before printing. Saving Photos to Your Computer From the Photo Mode menu on the display, use the up or down Arrow buttons to scroll to Save Photos to Computer, and then press Select . All photos on the memory card or USB key are transferred to your computer and are opened in the Memory Card Manager. Printing 33
-
 1
1 -
2
-
3
-
4
-
5
-
6
-
7
-
8
-
9
-
10
-
11
-
12
-
13
-
14
-
15
-
16
-
17
-
18
-
19
-
20
-
21
-
22
-
23
-
24
-
25
-
26
-
27
-
 28
28 -
 29
29 -
 30
30 -
 31
31 -
 32
32 -
 33
33 -
 34
34 -
 35
35 -
 36
36 -
 37
37 -
 38
38 -
39
-
40
-
41
-
42
-
43
-
44
-
45
-
46
-
47
-
48
-
49
-
50
-
51
-
52
-
53
-
54
-
55
-
56
-
57
-
58
-
59
-
60
-
61
-
62
-
63
-
64
-
65
-
66
-
67
-
68
-
69
-
70
-
71
-
72
-
73
-
74
-
75
-
76
-
77
-
78
-
79
-
80
-
81
-
82
-
83
-
84
-
85
-
86
-
87
-
88
-
89
-
90
-
91
-
92
-
93
-
94
-
95
-
96
-
97
-
98
-
99
-
100
-
101
-
102
-
103
-
104
-
105
-
106
-
107
-
108
-
109
-
110
-
111
-
112
-
113
-
114
-
115
-
116
-
117
-
118
-
119
-
120
-
121
-
122
-
123
-
124
-
125
-
126
-
127
-
128
-
129
-
130
-
131
-
132
-
133
-
134
-
135
-
136
 |
 |