Dell 964 Owner's Manual - Page 48
Editing Scanned Images, Saving an Image on Your Computer
 |
UPC - 940356014026
View all Dell 964 manuals
Add to My Manuals
Save this manual to your list of manuals |
Page 48 highlights
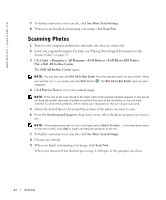
www.dell.com | support.dell.com Editing Scanned Images With most graphics programs, you can customize your image. 1 Click Start→ Programs or All Programs→ Dell Printers→ Dell Photo AIO Printer 964→ Dell All-In-One Center. The Dell All-In-One Center opens. NOTE: You can also open the Dell All-In-One Center from the operator panel on your printer. When your printer is in Scan mode, press the Start button . The Dell All-In-One Center opens on your computer. 2 From the Send scanned image to: drop-down menu, select your scan destination. 3 Click Scan Now. When the image has finished processing, it opens in the program you selected. 4 Edit the image using the tools available in your program. You may be able to: - Remove red eye - Crop your image - Add text to your image - Adjust the brightness and contrast of your image For help, see the documentation that came with your graphics program. Saving an Image on Your Computer 1 Click Start→ Programs or All Programs→ Dell Printers→ Dell Photo AIO Printer 964→ Dell All-In-One Center. The Dell All-In-One Center opens. NOTE: You can also open the Dell All-In-One Center from the operator panel on your printer. When your printer is in Scan mode, press the Start button . The Dell All-In-One Center opens on your computer. 2 From the Productivity Tools section, click Save an image on my computer. 3 Follow the instructions on your computer screen to save an image on your computer. 48 Scanning
-
 1
1 -
2
-
3
-
4
-
5
-
6
-
7
-
8
-
9
-
10
-
11
-
12
-
13
-
14
-
15
-
16
-
17
-
18
-
19
-
20
-
21
-
22
-
23
-
24
-
25
-
26
-
27
-
28
-
29
-
30
-
31
-
32
-
33
-
34
-
35
-
36
-
37
-
38
-
39
-
40
-
41
-
42
-
 43
43 -
 44
44 -
 45
45 -
 46
46 -
 47
47 -
 48
48 -
 49
49 -
 50
50 -
 51
51 -
 52
52 -
 53
53 -
54
-
55
-
56
-
57
-
58
-
59
-
60
-
61
-
62
-
63
-
64
-
65
-
66
-
67
-
68
-
69
-
70
-
71
-
72
-
73
-
74
-
75
-
76
-
77
-
78
-
79
-
80
-
81
-
82
-
83
-
84
-
85
-
86
-
87
-
88
-
89
-
90
-
91
-
92
-
93
-
94
-
95
-
96
-
97
-
98
-
99
-
100
-
101
-
102
-
103
-
104
-
105
-
106
-
107
-
108
-
109
-
110
-
111
-
112
-
113
-
114
-
115
-
116
-
117
-
118
-
119
-
120
-
121
-
122
-
123
-
124
-
125
-
126
-
127
-
128
-
129
-
130
-
131
-
132
-
133
-
134
-
135
-
136
 |
 |