Dell B1265dfw Dell Users Guide - Page 208
Printing files, Configuring Printer Properties, Unified Driver Configurator
 |
View all Dell B1265dfw manuals
Add to My Manuals
Save this manual to your list of manuals |
Page 208 highlights
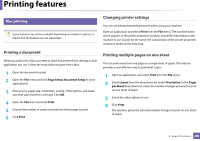
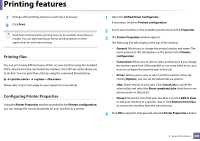
Printing features 7 Change other printing options in each tab, if necessary. 8 Click Print. Automatic/manual duplex printing may not be available depending on models. You can alternatively use the lpr printing system or other applications for odd-even printing. Printing files You can print many different types of files on your machine using the standard CUPS, directly from the command line interface. The CUPS lpr utility allows you to do that. You can print these files by using the command format below. lp -d -o Please refer to lp or man page on your system for more details. Configuring Printer Properties Using the Printer Properties window provided by the Printers configuration, you can change the various properties for your machine as a printer. 1 Open the Unified Driver Configurator. If necessary, switch to Printers configuration. 2 Select your machine on the available printers list and click Properties. 3 The Printer Properties window appears. The following five tabs display at the top of the window: • General: Allows you to change the printer location and name. The name entered in this tab displays on the printer list in Printers configuration. • Connection: Allows you to view or select another port. If you change the machine port from USB to parallel or vice versa while in use, you must re-configure the machine port in this tab. • Driver: Allows you to view or select another machine driver. By clicking Options, you can set the default device options. • Jobs: Shows the list of print jobs. Click Cancel job to cancel the selected job and select the Show completed jobs check box to see previous jobs on the job list. • Classes: Shows the class that your machine is in. Click Add to Class to add your machine to a specific class or click Remove from Class to remove the machine from the selected class. 4 Click OK to apply the changes and close the Printer Properties window. 4. Special Features 208
-
 1
1 -
2
-
3
-
4
-
5
-
6
-
7
-
8
-
9
-
10
-
11
-
12
-
13
-
14
-
15
-
16
-
17
-
18
-
19
-
20
-
21
-
22
-
23
-
24
-
25
-
26
-
27
-
28
-
29
-
30
-
31
-
32
-
33
-
34
-
35
-
36
-
37
-
38
-
39
-
40
-
41
-
42
-
43
-
44
-
45
-
46
-
47
-
48
-
49
-
50
-
51
-
52
-
53
-
54
-
55
-
56
-
57
-
58
-
59
-
60
-
61
-
62
-
63
-
64
-
65
-
66
-
67
-
68
-
69
-
70
-
71
-
72
-
73
-
74
-
75
-
76
-
77
-
78
-
79
-
80
-
81
-
82
-
83
-
84
-
85
-
86
-
87
-
88
-
89
-
90
-
91
-
92
-
93
-
94
-
95
-
96
-
97
-
98
-
99
-
100
-
101
-
102
-
103
-
104
-
105
-
106
-
107
-
108
-
109
-
110
-
111
-
112
-
113
-
114
-
115
-
116
-
117
-
118
-
119
-
120
-
121
-
122
-
123
-
124
-
125
-
126
-
127
-
128
-
129
-
130
-
131
-
132
-
133
-
134
-
135
-
136
-
137
-
138
-
139
-
140
-
141
-
142
-
143
-
144
-
145
-
146
-
147
-
148
-
149
-
150
-
151
-
152
-
153
-
154
-
155
-
156
-
157
-
158
-
159
-
160
-
161
-
162
-
163
-
164
-
165
-
166
-
167
-
168
-
169
-
170
-
171
-
172
-
173
-
174
-
175
-
176
-
177
-
178
-
179
-
180
-
181
-
182
-
183
-
184
-
185
-
186
-
187
-
188
-
189
-
190
-
191
-
192
-
193
-
194
-
195
-
196
-
197
-
198
-
199
-
200
-
201
-
202
-
 203
203 -
 204
204 -
 205
205 -
 206
206 -
 207
207 -
 208
208 -
 209
209 -
 210
210 -
 211
211 -
 212
212 -
 213
213 -
214
-
215
-
216
-
217
-
218
-
219
-
220
-
221
-
222
-
223
-
224
-
225
-
226
-
227
-
228
-
229
-
230
-
231
-
232
-
233
-
234
-
235
-
236
-
237
-
238
-
239
-
240
-
241
-
242
-
243
-
244
-
245
-
246
-
247
-
248
-
249
-
250
-
251
-
252
-
253
-
254
-
255
-
256
-
257
-
258
-
259
-
260
-
261
-
262
-
263
-
264
-
265
-
266
-
267
-
268
-
269
-
270
-
271
-
272
-
273
-
274
-
275
-
276
-
277
-
278
-
279
-
280
-
281
-
282
-
283
-
284
 |
 |
