Dell PowerVault 130T DLT Service Manual - Page 56
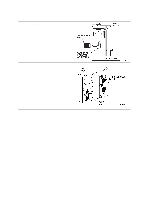
Refer to Powering, select View Configuration.
 |
View all Dell PowerVault 130T DLT manuals
Add to My Manuals
Save this manual to your list of manuals |
Page 56 highlights
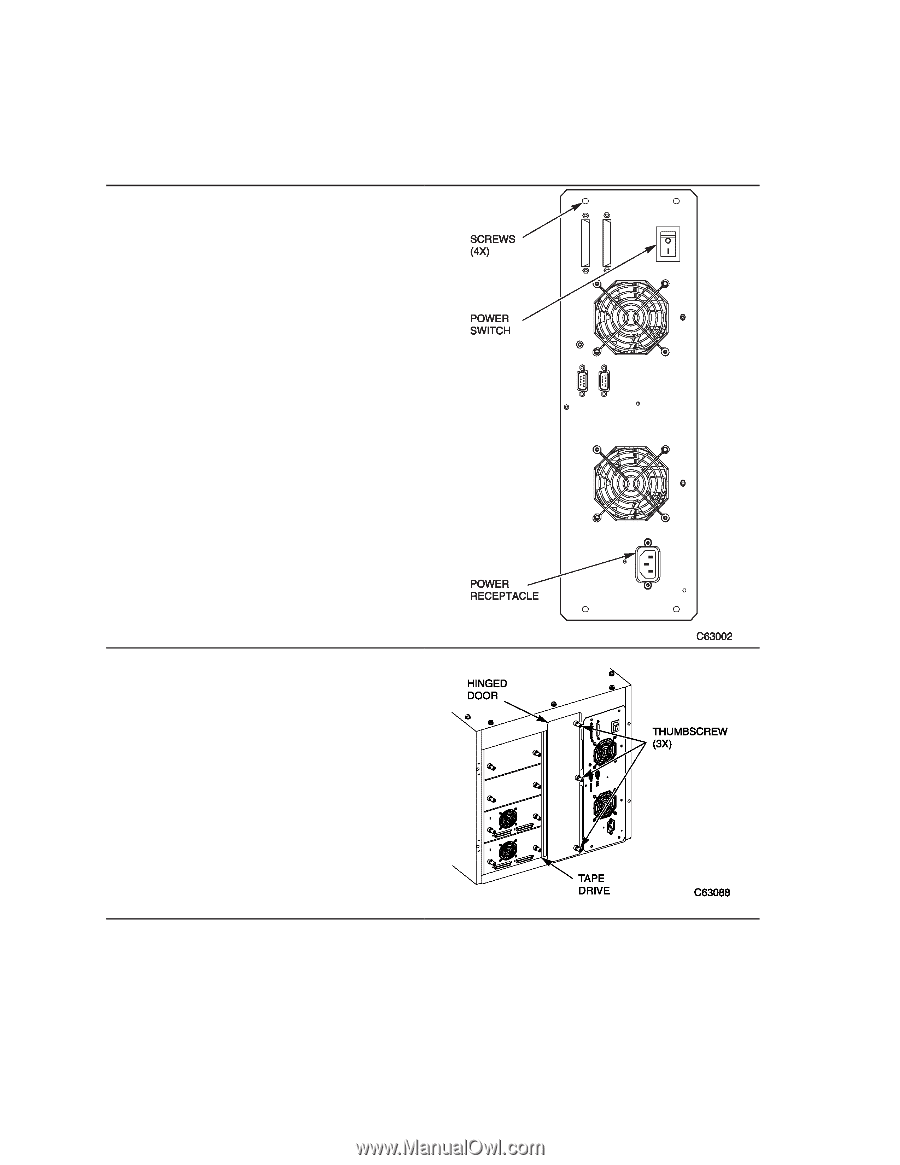
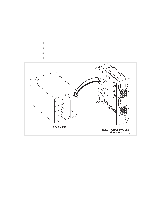
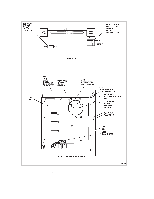
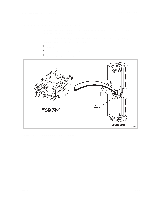
Electronics Module Removal 1. Review the information under "Preparation" at the beginning of this chapter before starting this procedure. 2. Power off the library. Refer to "Powering On and Off the Library" on page 3-2. 3. Try to view the library configuration information by accessing Library Utilities from the Operator Panel menu. Then select View Configuration. 4. Manually log all of the configuration information, including library SCSI ID, tape drive SCSI IDs, etc. 5. Disconnect the SCSI connectors from the electronics module. 6. Disconnect the AC power cable from the electronics module. 7. Remove the four screws from the top and bottom of the electronics module using a Torx driver with a T-15 bit. 8. Loosen the three thumbscrews on the hinged access door at the rear of the library. 9. Open the door. PowerVault 130T Service Manual 3-20 4473D
-
 1
1 -
2
-
3
-
4
-
5
-
6
-
7
-
8
-
9
-
10
-
11
-
12
-
13
-
14
-
15
-
16
-
17
-
18
-
19
-
20
-
21
-
22
-
23
-
24
-
25
-
26
-
27
-
28
-
29
-
30
-
31
-
32
-
33
-
34
-
35
-
36
-
37
-
38
-
39
-
40
-
41
-
42
-
43
-
44
-
45
-
46
-
47
-
48
-
49
-
50
-
 51
51 -
 52
52 -
 53
53 -
 54
54 -
 55
55 -
 56
56 -
 57
57 -
 58
58 -
 59
59 -
 60
60 -
 61
61 -
62
-
63
-
64
-
65
-
66
-
67
-
68
-
69
-
70
-
71
-
72
-
73
-
74
-
75
-
76
-
77
-
78
-
79
-
80
-
81
-
82
-
83
-
84
-
85
-
86
-
87
-
88
-
89
-
90
-
91
-
92
-
93
-
94
-
95
-
96
 |
 |