Dell PowerVault 130T DLT Service Manual - Page 78
to remove the screw holding it to the Z, column baseplate.
 |
View all Dell PowerVault 130T DLT manuals
Add to My Manuals
Save this manual to your list of manuals |
Page 78 highlights
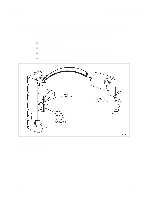
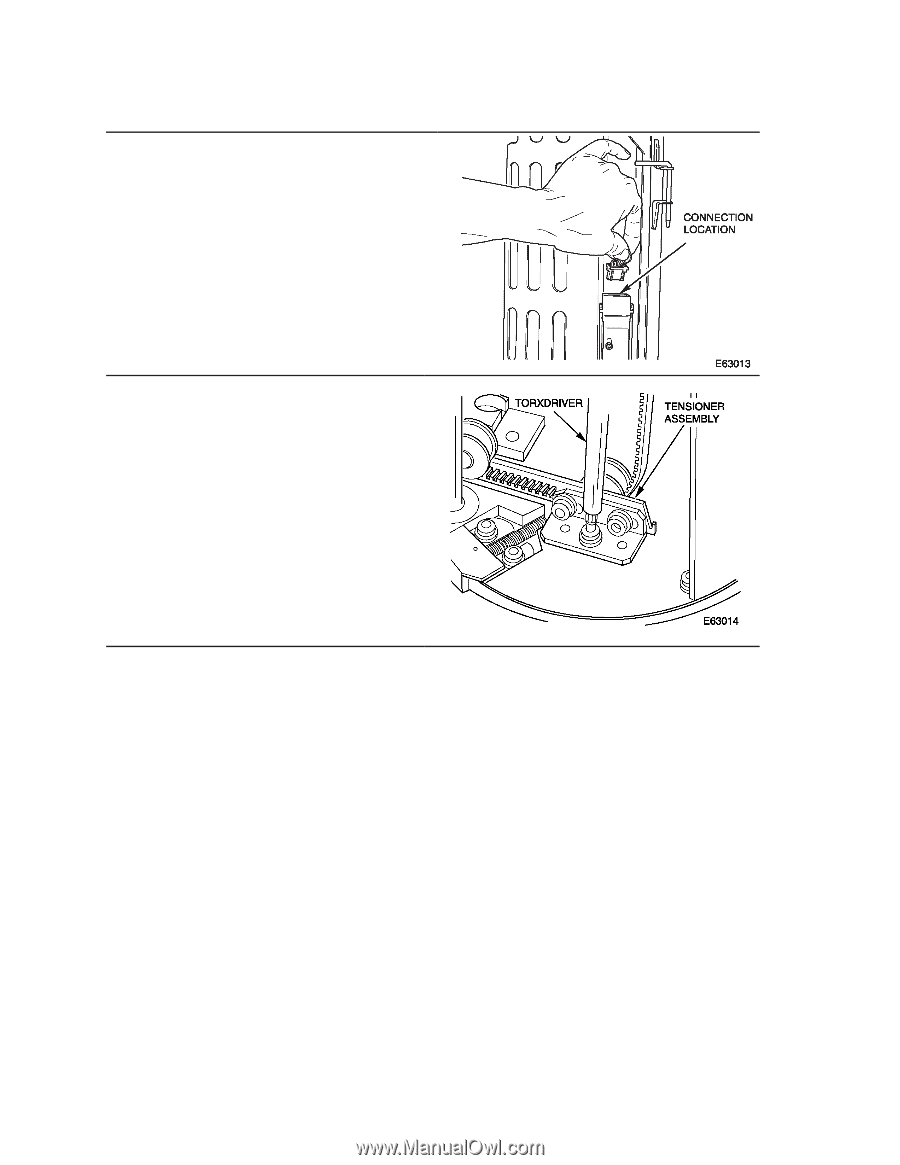
Z Motor 6. Connect the Z motor cable. NOTE: Be sure that the cable is routed directly to the connector and not through the ribbon cable near the connector. 7. Replace or tighten the Z belt tensioner assembly located at the base of the Z column using a Torx driver with a T-15 bit to remove the screw holding it to the Z column baseplate. NOTE: Do not change the tensioner setting by loosening the two tensioner adjustment screws, so you can replace the tensioner with the same belt tension as before. 8. Proceed to the checkout procedures on page 3-43. PowerVault 130T Service Manual 3-42 4473D
-
 1
1 -
2
-
3
-
4
-
5
-
6
-
7
-
8
-
9
-
10
-
11
-
12
-
13
-
14
-
15
-
16
-
17
-
18
-
19
-
20
-
21
-
22
-
23
-
24
-
25
-
26
-
27
-
28
-
29
-
30
-
31
-
32
-
33
-
34
-
35
-
36
-
37
-
38
-
39
-
40
-
41
-
42
-
43
-
44
-
45
-
46
-
47
-
48
-
49
-
50
-
51
-
52
-
53
-
54
-
55
-
56
-
57
-
58
-
59
-
60
-
61
-
62
-
63
-
64
-
65
-
66
-
67
-
68
-
69
-
70
-
71
-
72
-
 73
73 -
 74
74 -
 75
75 -
 76
76 -
 77
77 -
 78
78 -
 79
79 -
 80
80 -
 81
81 -
 82
82 -
 83
83 -
84
-
85
-
86
-
87
-
88
-
89
-
90
-
91
-
92
-
93
-
94
-
95
-
96
 |
 |
Z Motor
PowerVault 130T Service Manual
3–42
4473D
6.
Connect the Z motor cable.
NOTE: Be sure that the cable is routed
directly to the connector and not through the
ribbon cable near the connector.
7.
Replace or tighten the Z belt tensioner
assembly located at the base of the Z
column using a Torx driver with a T-15 bit
to remove the screw holding it to the Z
column baseplate.
NOTE: Do not change the tensioner
setting by loosening the two tensioner
adjustment screws, so you can replace the
tensioner with the same belt tension as
before.
8.
Proceed to the checkout procedures on
page 3–43.