Dell PowerVault 130T DLT Service Manual - Page 62
with a T-15 bit., ceiling of the library using a Torx driver
 |
View all Dell PowerVault 130T DLT manuals
Add to My Manuals
Save this manual to your list of manuals |
Page 62 highlights
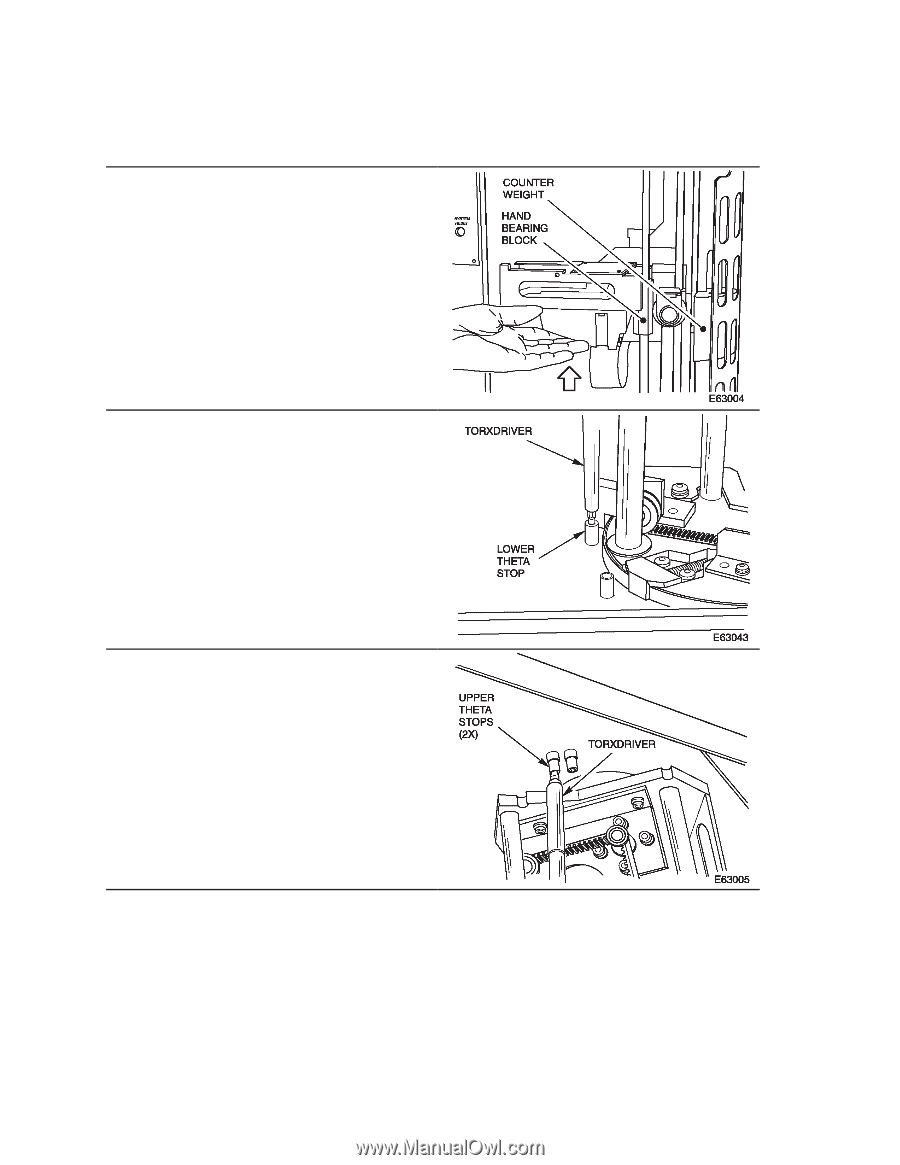
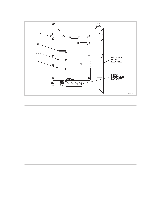
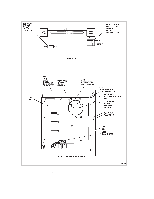
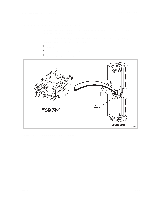
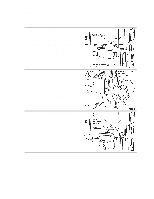
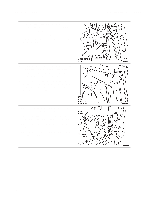
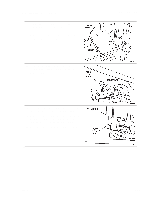
Hand/Camera Assembly Removal 1. Review the information under "Preparation" at the beginning of this chapter before starting this procedure. 2. Power off the library. Make sure all system activity is stopped before proceeding. 3. Unlock and open the library front door. 4. Carefully raise the hand/camera assembly with your hand, as shown in the figure, to the middle of the Z column assembly. 5. Remove the lower theta stop from the floor of the library using a Torx driver with a T-15 bit. 6. Remove both upper theta stops from the ceiling of the library using a Torx driver with a T-15 bit. 7. Rotate the robot counterclockwise so that the hand extends beyond the front opening of the library. This allows more convenient access to the cable connectors on the CYH card (on the hand). PowerVault 130T Service Manual 3-26 4473D
-
 1
1 -
2
-
3
-
4
-
5
-
6
-
7
-
8
-
9
-
10
-
11
-
12
-
13
-
14
-
15
-
16
-
17
-
18
-
19
-
20
-
21
-
22
-
23
-
24
-
25
-
26
-
27
-
28
-
29
-
30
-
31
-
32
-
33
-
34
-
35
-
36
-
37
-
38
-
39
-
40
-
41
-
42
-
43
-
44
-
45
-
46
-
47
-
48
-
49
-
50
-
51
-
52
-
53
-
54
-
55
-
56
-
 57
57 -
 58
58 -
 59
59 -
 60
60 -
 61
61 -
 62
62 -
 63
63 -
 64
64 -
 65
65 -
 66
66 -
 67
67 -
68
-
69
-
70
-
71
-
72
-
73
-
74
-
75
-
76
-
77
-
78
-
79
-
80
-
81
-
82
-
83
-
84
-
85
-
86
-
87
-
88
-
89
-
90
-
91
-
92
-
93
-
94
-
95
-
96
 |
 |