Dell PowerVault 130T DLT Service Manual - Page 72
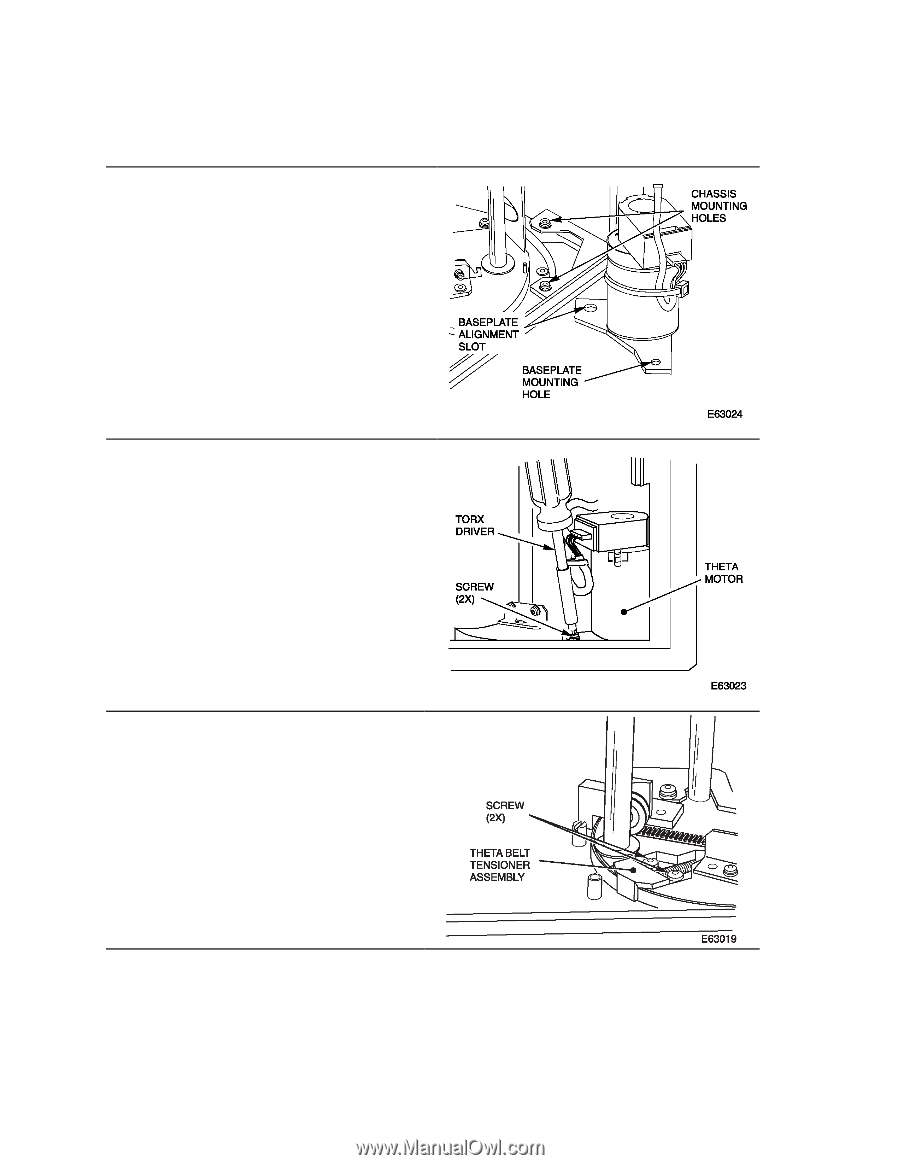
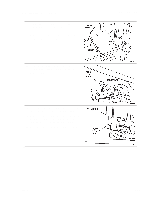
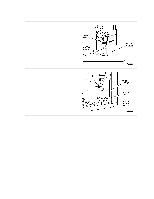
using a Torx driver with a T-15 bit, being, careful not to damage the theta motor power
 |
View all Dell PowerVault 130T DLT manuals
Add to My Manuals
Save this manual to your list of manuals |
Page 72 highlights
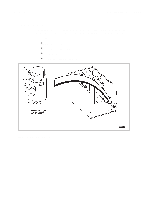
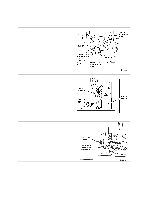
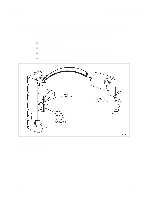
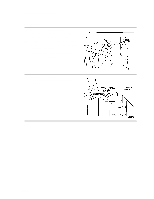
Theta Motor Replacement 1. Bundle the theta motor power cable using a tie wrap, to match the original cable. 2. Attach the mounting bracket (baseplate) to the bottom of the new theta motor, using the two screws taken from the original. Note the orientation of the alignment slot and mounting hole relative to the cable outlet on the motor. 3. Place the motor into the library so the theta belt loops around the motor pulley, and match the alignment slot and mounting hole on the baseplate with the chassis mounting holes. 4. Loop the theta motor belt around the theta motor pulley. Make sure it moves freely. 5. Aligning the front of the theta motor mounting bracket flush with the front edge of the chassis, replace the mounting screws using a Torx driver with a T-15 bit, being careful not to damage the theta motor power cable. NOTE: Make sure to use short screws. Using longer screws may cause the mechanism to bind. 6. Reinstall the tensioner spring, reposition the theta belt tensioner and reinstall the two screws using a Torx driver with a T-15 bit. Align the theta belt flush with the base plate of the Z column. 7. Test for free movement of the belt tensioner and spring by pressing on the belt retention flange on the tensioner. PowerVault 130T Service Manual 3-36 4473D
-
 1
1 -
2
-
3
-
4
-
5
-
6
-
7
-
8
-
9
-
10
-
11
-
12
-
13
-
14
-
15
-
16
-
17
-
18
-
19
-
20
-
21
-
22
-
23
-
24
-
25
-
26
-
27
-
28
-
29
-
30
-
31
-
32
-
33
-
34
-
35
-
36
-
37
-
38
-
39
-
40
-
41
-
42
-
43
-
44
-
45
-
46
-
47
-
48
-
49
-
50
-
51
-
52
-
53
-
54
-
55
-
56
-
57
-
58
-
59
-
60
-
61
-
62
-
63
-
64
-
65
-
66
-
 67
67 -
 68
68 -
 69
69 -
 70
70 -
 71
71 -
 72
72 -
 73
73 -
 74
74 -
 75
75 -
 76
76 -
 77
77 -
78
-
79
-
80
-
81
-
82
-
83
-
84
-
85
-
86
-
87
-
88
-
89
-
90
-
91
-
92
-
93
-
94
-
95
-
96
 |
 |