Dell PowerVault 130T DLT Service Manual - Page 71
mounting bracket baseplate to the theta, Remove the two screws holding
 |
View all Dell PowerVault 130T DLT manuals
Add to My Manuals
Save this manual to your list of manuals |
Page 71 highlights
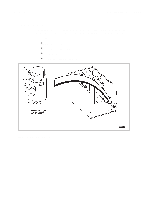
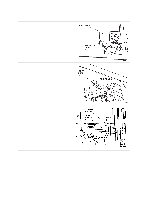
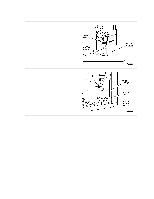
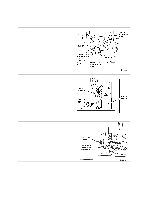
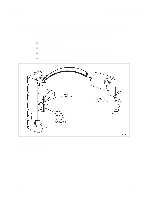
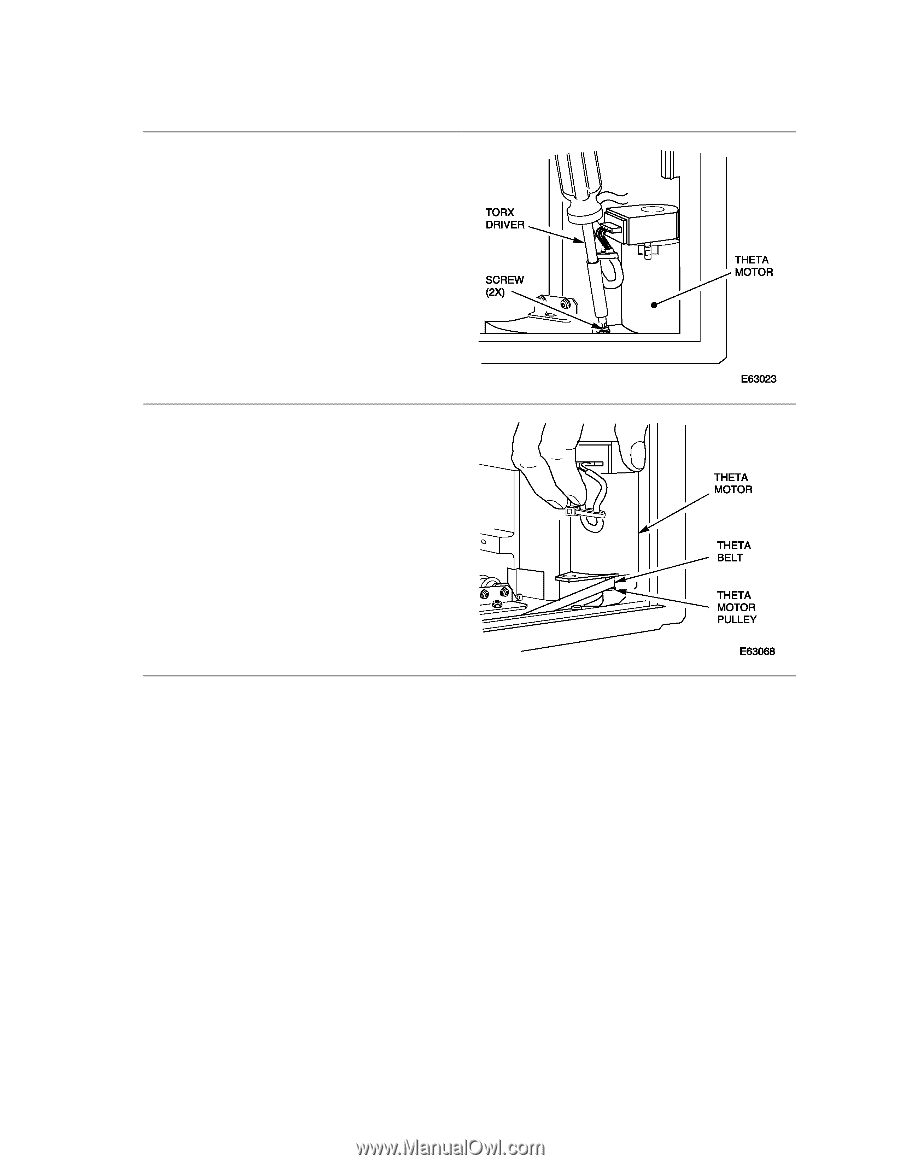
PowerVault 130T Service Manual 11. Remove the two screws from the theta motor mounting bracket (on the floor of the library) using a Torx driver with a T-15 bit, being careful not to damage the theta motor power cable. 12. Lift the motor up and toward the robot so that the theta motor pulley clears the theta belt. 13. Remove the two screws holding the mounting bracket (baseplate) to the theta motor, noting the orientation of the bracket (slotted alignment hole goes towards back of library). Theta Motor 4473D 3-35
-
 1
1 -
2
-
3
-
4
-
5
-
6
-
7
-
8
-
9
-
10
-
11
-
12
-
13
-
14
-
15
-
16
-
17
-
18
-
19
-
20
-
21
-
22
-
23
-
24
-
25
-
26
-
27
-
28
-
29
-
30
-
31
-
32
-
33
-
34
-
35
-
36
-
37
-
38
-
39
-
40
-
41
-
42
-
43
-
44
-
45
-
46
-
47
-
48
-
49
-
50
-
51
-
52
-
53
-
54
-
55
-
56
-
57
-
58
-
59
-
60
-
61
-
62
-
63
-
64
-
65
-
 66
66 -
 67
67 -
 68
68 -
 69
69 -
 70
70 -
 71
71 -
 72
72 -
 73
73 -
 74
74 -
 75
75 -
 76
76 -
77
-
78
-
79
-
80
-
81
-
82
-
83
-
84
-
85
-
86
-
87
-
88
-
89
-
90
-
91
-
92
-
93
-
94
-
95
-
96
 |
 |
PowerVault 130T Service Manual
Theta Motor
4473D
3–35
11. Remove the two screws from the theta
motor mounting bracket (on the floor of
the library) using a Torx driver with a T-15
bit, being careful not to damage the theta
motor power cable.
12. Lift the motor up and toward the robot so
that the theta motor pulley clears the theta
belt.
13. Remove the two screws holding the
mounting bracket (baseplate) to the theta
motor, noting the orientation of the bracket
(slotted alignment hole goes towards back
of library).