Epson PowerLite 715c User Manual - Page 116
Connecting to a PC Desktop Computer
 |
View all Epson PowerLite 715c manuals
Add to My Manuals
Save this manual to your list of manuals |
Page 116 highlights
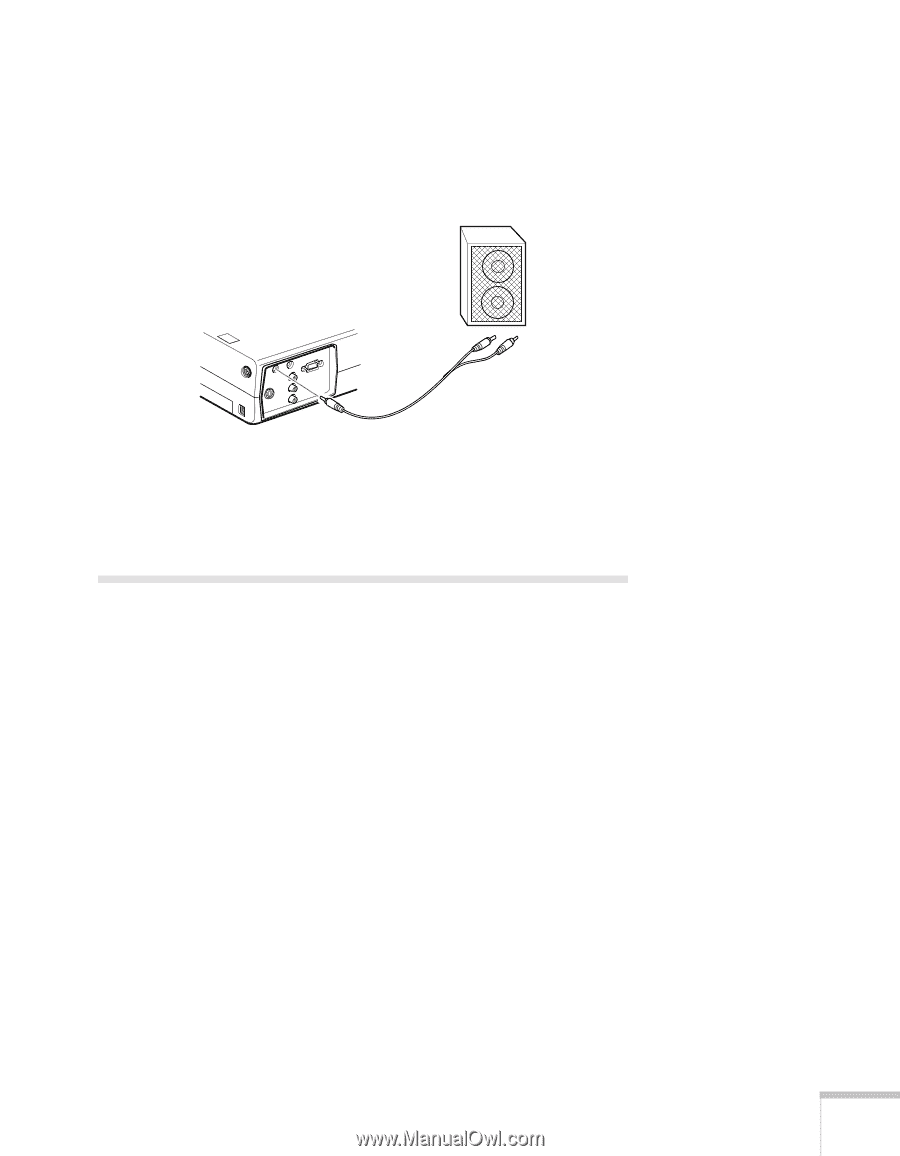
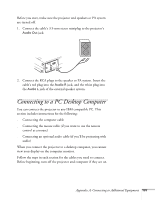
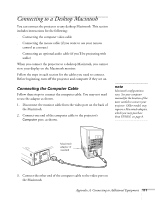
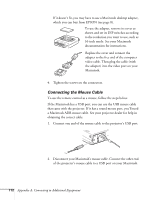
Before you start, make sure the projector and speakers or PA system are turned off. 1. Connect the cable's 3.5-mm stereo miniplug to the projector's Audio Out jack. 2. Connect the RCA plugs to the speaker or PA system. Insert the cable's red plug into the Audio R jack, and the white plug into the Audio L jack of the external speaker system. Connecting to a PC Desktop Computer You can connect the projector to any IBM compatible PC. This section includes instructions for the following: s Connecting the computer cable s Connecting the mouse cable (if you want to use the remote control as a mouse) s Connecting an optional audio cable (if you'll be projecting with audio) When you connect the projector to a desktop computer, you cannot view your display on the computer monitor. Follow the steps in each section for the cables you need to connect. Before beginning, turn off the projector and computer if they are on. Appendix A: Connecting to Additional Equipment 107
-
 1
1 -
2
-
3
-
4
-
5
-
6
-
7
-
8
-
9
-
10
-
11
-
12
-
13
-
14
-
15
-
16
-
17
-
18
-
19
-
20
-
21
-
22
-
23
-
24
-
25
-
26
-
27
-
28
-
29
-
30
-
31
-
32
-
33
-
34
-
35
-
36
-
37
-
38
-
39
-
40
-
41
-
42
-
43
-
44
-
45
-
46
-
47
-
48
-
49
-
50
-
51
-
52
-
53
-
54
-
55
-
56
-
57
-
58
-
59
-
60
-
61
-
62
-
63
-
64
-
65
-
66
-
67
-
68
-
69
-
70
-
71
-
72
-
73
-
74
-
75
-
76
-
77
-
78
-
79
-
80
-
81
-
82
-
83
-
84
-
85
-
86
-
87
-
88
-
89
-
90
-
91
-
92
-
93
-
94
-
95
-
96
-
97
-
98
-
99
-
100
-
101
-
102
-
103
-
104
-
105
-
106
-
107
-
108
-
109
-
110
-
 111
111 -
 112
112 -
 113
113 -
 114
114 -
 115
115 -
 116
116 -
 117
117 -
 118
118 -
 119
119 -
 120
120 -
 121
121 -
122
-
123
-
124
-
125
-
126
-
127
-
128
-
129
-
130
-
131
-
132
-
133
-
134
-
135
-
136
-
137
-
138
-
139
-
140
-
141
 |
 |