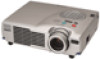
Epson PowerLite 715c User Manual - Page 83
Adjusting the Sound
 |
View all Epson PowerLite 715c manuals
Add to My Manuals
Save this manual to your list of manuals |
Page 83 highlights
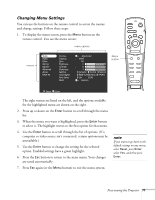
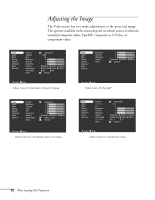
s Color (composite video or S-Video only) Adjusts the depth or intensity of the image. s Tint (video only) Adjusts the balance of green to magenta in the image. s Sharpness Sharpens or softens the image. s Gamma Choose Dynamic for computer images with bright colors (such as charts or graphs), Normal for the default, or Natural to enhance video images. s Input Signal Leave this setting on RGB when a computer is connected to the Computer/Component Video port. When a component video source is connected, choose YCbCr or YPbPr, depending on the type of signals produced by your source. (You can tell which setting is correct by the quality of the projected image.) s Auto Setup Leave this setting ON to automatically optimize the computer image. Turn it off if you want to save adjustments you have made to the video settings. 4. When the image is set correctly, press Esc or Menu. Your settings are automatically saved. Adjusting the Sound You can use the Audio menu to adjust the sound volume or treble/bass balance. 1. Press the Menu button. You see the main menu. 2. Use the Enter button to highlight Audio. 74 Fine-tuning the Projector
-
 1
1 -
2
-
3
-
4
-
5
-
6
-
7
-
8
-
9
-
10
-
11
-
12
-
13
-
14
-
15
-
16
-
17
-
18
-
19
-
20
-
21
-
22
-
23
-
24
-
25
-
26
-
27
-
28
-
29
-
30
-
31
-
32
-
33
-
34
-
35
-
36
-
37
-
38
-
39
-
40
-
41
-
42
-
43
-
44
-
45
-
46
-
47
-
48
-
49
-
50
-
51
-
52
-
53
-
54
-
55
-
56
-
57
-
58
-
59
-
60
-
61
-
62
-
63
-
64
-
65
-
66
-
67
-
68
-
69
-
70
-
71
-
72
-
73
-
74
-
75
-
76
-
77
-
 78
78 -
 79
79 -
 80
80 -
 81
81 -
 82
82 -
 83
83 -
 84
84 -
 85
85 -
 86
86 -
 87
87 -
 88
88 -
89
-
90
-
91
-
92
-
93
-
94
-
95
-
96
-
97
-
98
-
99
-
100
-
101
-
102
-
103
-
104
-
105
-
106
-
107
-
108
-
109
-
110
-
111
-
112
-
113
-
114
-
115
-
116
-
117
-
118
-
119
-
120
-
121
-
122
-
123
-
124
-
125
-
126
-
127
-
128
-
129
-
130
-
131
-
132
-
133
-
134
-
135
-
136
-
137
-
138
-
139
-
140
-
141
 |
 |
