Epson PowerLite 715c User Manual - Page 20
t need to read the rest of this from the projector, you don
 |
View all Epson PowerLite 715c manuals
Add to My Manuals
Save this manual to your list of manuals |
Page 20 highlights
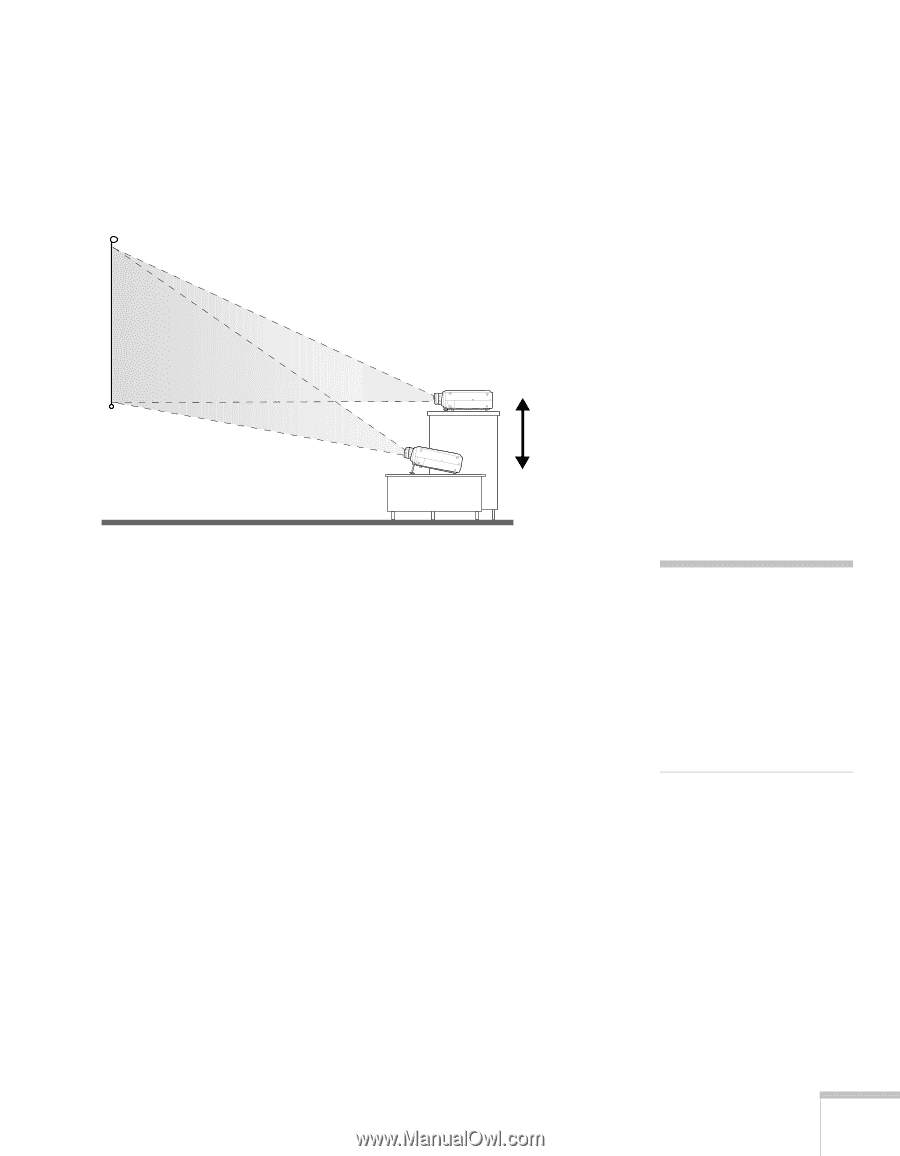
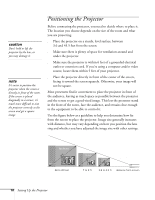
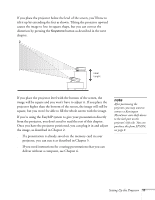
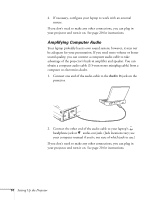
If you place the projector below the level of the screen, you'll have to tilt it up by extending the feet as shown. Tilting the projector upward causes the image to lose its square shape, but you can correct the distortion by pressing the Keystone button as described in the next chapter. ideal height If you place the projector level with the bottom of the screen, the image will be square and you won't have to adjust it. If you place the projector higher than the bottom of the screen, the image will still be square, but you won't be able to fill the whole screen with the image. If you're using the EasyMP system to give your presentation directly from the projector, you don't need to read the rest of this chapter. Once you have the projector positioned, you can plug it in and adjust the image, as described in Chapter 2. s If a presentation is already saved on the memory card in your projector, you can run it as described in Chapter 5. s If you need instructions for creating presentations that you can deliver without a computer, see Chapter 4. note After positioning the projector, you may want to connect a Kensington MicroSaver anti-theft device to the lock port on the projector's left side. You can purchase this from EPSON; see page 8. Setting Up the Projector 11
-
 1
1 -
2
-
3
-
4
-
5
-
6
-
7
-
8
-
9
-
10
-
11
-
12
-
13
-
14
-
 15
15 -
 16
16 -
 17
17 -
 18
18 -
 19
19 -
 20
20 -
 21
21 -
 22
22 -
 23
23 -
 24
24 -
 25
25 -
26
-
27
-
28
-
29
-
30
-
31
-
32
-
33
-
34
-
35
-
36
-
37
-
38
-
39
-
40
-
41
-
42
-
43
-
44
-
45
-
46
-
47
-
48
-
49
-
50
-
51
-
52
-
53
-
54
-
55
-
56
-
57
-
58
-
59
-
60
-
61
-
62
-
63
-
64
-
65
-
66
-
67
-
68
-
69
-
70
-
71
-
72
-
73
-
74
-
75
-
76
-
77
-
78
-
79
-
80
-
81
-
82
-
83
-
84
-
85
-
86
-
87
-
88
-
89
-
90
-
91
-
92
-
93
-
94
-
95
-
96
-
97
-
98
-
99
-
100
-
101
-
102
-
103
-
104
-
105
-
106
-
107
-
108
-
109
-
110
-
111
-
112
-
113
-
114
-
115
-
116
-
117
-
118
-
119
-
120
-
121
-
122
-
123
-
124
-
125
-
126
-
127
-
128
-
129
-
130
-
131
-
132
-
133
-
134
-
135
-
136
-
137
-
138
-
139
-
140
-
141
 |
 |