Epson PowerLite 715c User Manual - Page 54
Creating Presentations for Your Projector, EMP SlideMaker window
 |
View all Epson PowerLite 715c manuals
Add to My Manuals
Save this manual to your list of manuals |
Page 54 highlights
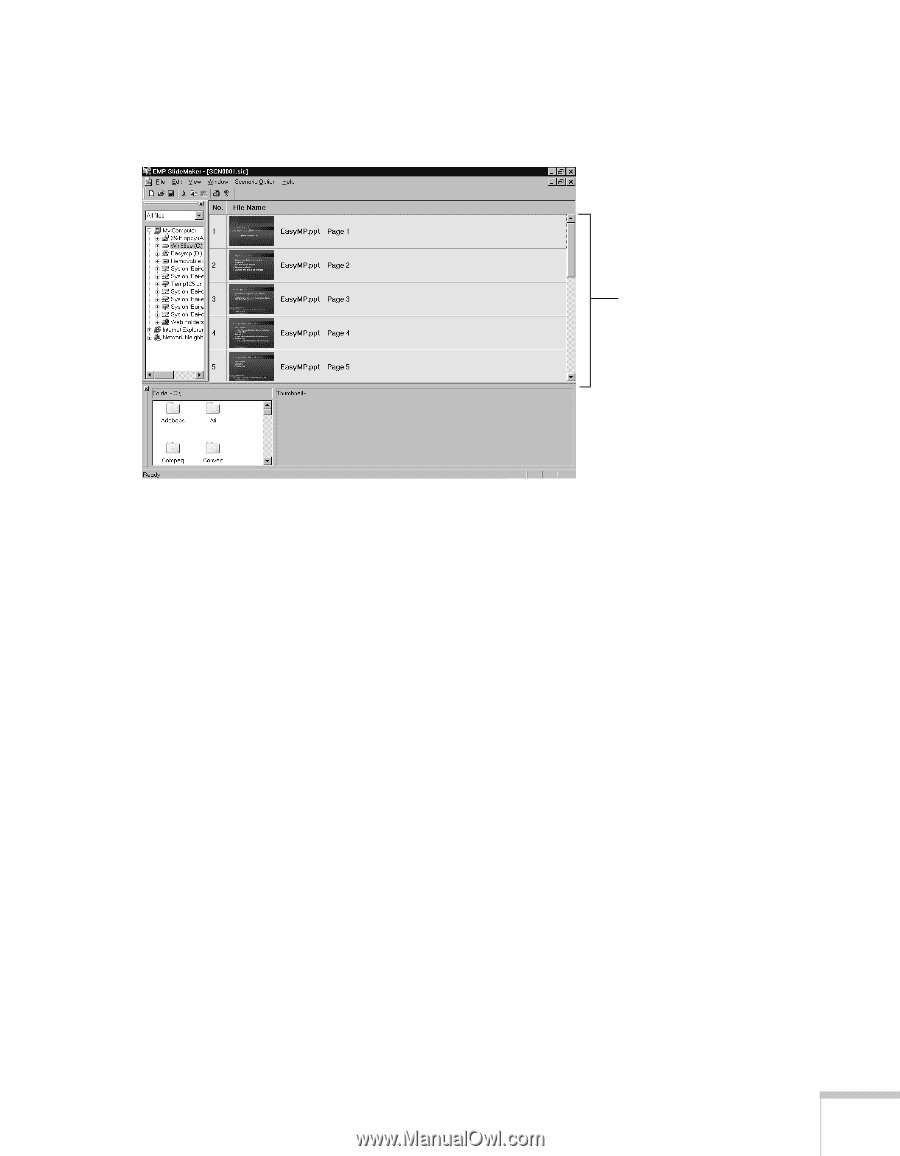
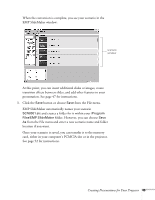
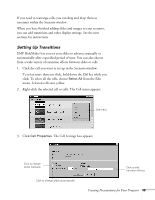
When the conversion is complete, you see your scenario in the EMP SlideMaker window: scenario window At this point, you can insert additional slides or images, create transition effects between slides, and add other features to your presentation. See page 47 for instructions. 3. Click the Save button or choose Save from the File menu. EMP SlideMaker automatically names your scenario SCN0001.sic and creates a folder for it within your \Program Files\EMP SlideMaker folder. However, you can choose Save As from the File menu and enter a new scenario name and folder location if you want. Once your scenario is saved, you can transfer it to the memory card, either in your computer's PCMCIA slot or in the projector. See page 52 for instructions. Creating Presentations for Your Projector 45
-
 1
1 -
2
-
3
-
4
-
5
-
6
-
7
-
8
-
9
-
10
-
11
-
12
-
13
-
14
-
15
-
16
-
17
-
18
-
19
-
20
-
21
-
22
-
23
-
24
-
25
-
26
-
27
-
28
-
29
-
30
-
31
-
32
-
33
-
34
-
35
-
36
-
37
-
38
-
39
-
40
-
41
-
42
-
43
-
44
-
45
-
46
-
47
-
48
-
 49
49 -
 50
50 -
 51
51 -
 52
52 -
 53
53 -
 54
54 -
 55
55 -
 56
56 -
 57
57 -
 58
58 -
 59
59 -
60
-
61
-
62
-
63
-
64
-
65
-
66
-
67
-
68
-
69
-
70
-
71
-
72
-
73
-
74
-
75
-
76
-
77
-
78
-
79
-
80
-
81
-
82
-
83
-
84
-
85
-
86
-
87
-
88
-
89
-
90
-
91
-
92
-
93
-
94
-
95
-
96
-
97
-
98
-
99
-
100
-
101
-
102
-
103
-
104
-
105
-
106
-
107
-
108
-
109
-
110
-
111
-
112
-
113
-
114
-
115
-
116
-
117
-
118
-
119
-
120
-
121
-
122
-
123
-
124
-
125
-
126
-
127
-
128
-
129
-
130
-
131
-
132
-
133
-
134
-
135
-
136
-
137
-
138
-
139
-
140
-
141
 |
 |