Epson PowerLite Pro Z8150NL User Manual
Epson PowerLite Pro Z8150NL Manual
 |
View all Epson PowerLite Pro Z8150NL manuals
Add to My Manuals
Save this manual to your list of manuals |
Epson PowerLite Pro Z8150NL manual content summary:
- Epson PowerLite Pro Z8150NL | User Manual - Page 1
PowerLite® Pro Z8150NL/Z8250NL/Z8255NL/ Z8350WNL/Z8450WUNL/Z8455WUNL User's Guide - Epson PowerLite Pro Z8150NL | User Manual - Page 2
2 Notations Used in This Guide • Safety indications The documentation and the projector use graphical symbols to show how to use the projector safely. Please understand and respect these menu The screen shots may be different from those shown in this manual depending on your projector model. - Epson PowerLite Pro Z8150NL | User Manual - Page 3
Interface 16 Control Panel 18 Remote Control 19 Unpacking the projector 21 Installing the batteries 22 Operating range of remote control Projecting images from a computer 30 Changing the Aspect Mode (PowerLite Pro Z8150NL/Z8250NL/Z8255NL 31 Projecting images from video equipment 31 Projecting - Epson PowerLite Pro Z8150NL | User Manual - Page 4
Menu Using the Configuration Menu 55 Configuration Menu 56 Network Menu 58 Image Menu 60 Signal Menu 62 Settings Menu 65 Troubleshooting Using the Help 93 Problem Solving 95 Reading the Indicators 96 t Indicator is lit or flashing red 97 m o n Indicator is flashing or lit 99 - Epson PowerLite Pro Z8150NL | User Manual - Page 5
to images 103 Problems when projection starts 107 Other problems 109 Interpreting Event IDs 112 Where to Get Help 114 Internet Support 114 Speak to a Support Representative 114 Purchase Supplies and Accessories 114 Maintenance Cleaning 116 Cleaning the Projector's Surface 116 Cleaning - Epson PowerLite Pro Z8150NL | User Manual - Page 6
the gamma adjustment graph 170 Frame Interpolation (PowerLite Pro Z8450WUNL/Z8455WUNL only 171 Super-resolution 171 Noise Reduction 171 Noise Reduction 171 Mosquito NR 172 Settings for Multiple Projectors 173 Preparation Flow 173 Requirements 173 Projector ID/Remote Control ID 173 Setting - Epson PowerLite Pro Z8150NL | User Manual - Page 7
SDI input port (PowerLite Pro Z8450WUNL/Z8455WUNL only 199 Supported Certificates 200 Client Certificate (PEAP-TLS/EAP-TLS 200 Server Certificate (PEAP/PEAP-TLS/EAP-TLS/EAP-Fast 200 Web Server Certificate (Secure HTTP 200 Specifications 201 Projector General Specifications 201 Appearance - Epson PowerLite Pro Z8150NL | User Manual - Page 8
8 Introduction This chapter explains the projector's features and the part names. - Epson PowerLite Pro Z8150NL | User Manual - Page 9
of installation locations. s p.159 The lens shift, zoom, and focus functions can be operated with a remote control so operation is easy even if the projector is mounted on the ceiling. Variety of optional lenses available You can select the best lens according to the projection distance and purpose - Epson PowerLite Pro Z8150NL | User Manual - Page 10
Reliability You can Depend on Dual lamps to reduce risk of shutdown The projector is equipped with two lamps. Even if one of the lamps breaks, temperature environment during operation and improve reliability in normal use. Depending on projector settings and environmental conditions, you can use this - Epson PowerLite Pro Z8150NL | User Manual - Page 11
Projector Features Meets a Wide Range of Needs Equipped with a high-resolution WUXGA panel (PowerLite Pro Z8450WUNL/Z8455WUNL only) You DICOMg standard. (The projector is not a medical device and cannot be used for medical diagnosis.) s p.34 Epson Cinema Filter supports the color gamut for digital - Epson PowerLite Pro Z8150NL | User Manual - Page 12
and control options are supported, such as the Epson EasyMP Monitor software. This software allows you to use the projector according to your system meetings more lively. See your EasyMP Multi PC Projection Operation Guide for more information. Transferring images over the network The included - Epson PowerLite Pro Z8150NL | User Manual - Page 13
Projector Features 13 Project using "Connect to a Network Projector" By connecting the projector to a network and using the Network Projector function in Windows Vista or Windows 7, multiple users on the network can share the projector. s p.143 - Epson PowerLite Pro Z8150NL | User Manual - Page 14
System manufactured by Kensington. s p.50 Takes in air to cool the projector internally. If dust collects here it can cause the internal temperature to rise, and this can lead to problems with operation and shorten the optical engine's service life. Be sure to clean the air filter regularly. s p.116 - Epson PowerLite Pro Z8150NL | User Manual - Page 15
1 Air exhaust vent (Lamp cover) 2 Rear foot 3 Lamp cover open tab Function Exhaust vent for air used to cool the projector internally. Also, open this cover to replace the projector's lamps. Caution Do not place objects that may become warped or otherwise affected by heat near the air exhaust vent - Epson PowerLite Pro Z8150NL | User Manual - Page 16
Receives signals from the remote control. s p.23 The color of the indicators and whether they are flashing or lit indicate the status of the projector. s p.96 s "Control Panel" p.18 Interface The following ports can be accessed by removing the interface cover. For information on how to remove the - Epson PowerLite Pro Z8150NL | User Manual - Page 17
the projector from a computer or controller, connect it with an RS-232C cable. This port is for control use and should not normally be used. s p.133 10 Wireless LAN unit port Connects to the optional wireless LAN unit. s p.190 Name 11 Monitor Out port 12 SDI port (PowerLite Pro Z8450WUNL - Epson PowerLite Pro Z8150NL | User Manual - Page 18
to cycle through the focus, zoom, and lens shift settings to adjust the lens. Changes to the next input source that is connected to the projector and is sending an image. s p.25 If pressed during projection of computer analog RGB signals, it automatically adjusts the Tracking, Sync., and Position to - Epson PowerLite Pro Z8150NL | User Manual - Page 19
Name 1 [t] button 2 [Computer] button 3 [BNC] button 4 [Video] button 5 [LAN] button 6 [Menu] button 7 [h] button 8 [Enter] button 9 [Page] buttons [[][]] Function Turns the projector power on or off. Changes to images from the Computer input port. s p.26 Changes to images from the BNC input port - Epson PowerLite Pro Z8150NL | User Manual - Page 20
Help screen which shows you how to deal with problems if they occur. s p.93 Connects the are not stable right after turning on the projector. s p.160 Name Function 22 Numeric buttons p.26 This button does not function when using PowerLite Pro Z8150NL/Z8250NL/ Z8255NL/Z8350WNL. 30 [ID] switch - Epson PowerLite Pro Z8150NL | User Manual - Page 21
to the projector and is sending projector After unpacking the projector, make sure you have all the parts shown below: Save all packaging in case you need to ship the projector projector to another location. Before you move the projector, see the moving and transportation instructions. Projector - Epson PowerLite Pro Z8150NL | User Manual - Page 22
and Functions 22 Installing the batteries The remote control uses the two AA batteries that came with the projector. Caution Make sure you read the Safety Instructions before handling the batteries. s p.209 Procedure A Remove the battery cover. While pushing the battery compartment cover catch - Epson PowerLite Pro Z8150NL | User Manual - Page 23
of the operation signals from the remote control, set the Remote Receiver on the Settings menu. s p.65 • When using a remote control provided with other Epson projectors, set the Remote Control Type on the Extended menu. s p.67 The operating range will depend on the remote control that you use. - Epson PowerLite Pro Z8150NL | User Manual - Page 24
24 Useful Functions This chapter explains useful tips for giving presentations, and the security functions. - Epson PowerLite Pro Z8150NL | User Manual - Page 25
in the following two ways. • Changing by Source Search The projector automatically detects signals being input from connected equipment, and the image projected. Using the Remote Control Using the Control Panel * PowerLite Pro Z8450WUNL/Z8455WUNL only When switching to LAN, images from computers - Epson PowerLite Pro Z8150NL | User Manual - Page 26
of image signals remains displayed when only the image that the projector is currently displaying is available, or when no image signal can LAN, images from computers connected through the network are projected. * PowerLite Pro Z8450WUNL/Z8455WUNL only Switch to the Target Image using the Remote - Epson PowerLite Pro Z8150NL | User Manual - Page 27
images. If the image resolution exceeds the panel resolution of this projector (PowerLite Pro Z8350WNL: 1280x800, PowerLite Pro Z8450WUNL/Z8455WUNL: 1920x1200), the edges of the image are not projected. PowerLite Pro Z8150NL/Z8250NL/Z8255NL Aspect mode Normal Auto 4:3 16:9 16:9 (Up) 16:9 (Down - Epson PowerLite Pro Z8150NL | User Manual - Page 28
Changing the Aspect Ratio of the Projected Image 28 Procedure Remote Control Changing the Aspect Mode (PowerLite Pro Z8450WUNL/Z8455WUNL) The aspect mode name is displayed on the screen by pressing the [Aspect] button. If you press the button while the aspect mode - Epson PowerLite Pro Z8150NL | User Manual - Page 29
Changing the Aspect Ratio of the Projected Image 29 Projecting images from a computer Each time the [Aspect] button on the remote control is pressed, the aspect mode changes in the order Normal, 16:9, 16:9 (Up), 16:9 (Down), Full, Zoom, and Native. s p.27 Projection examples for each aspect mode - Epson PowerLite Pro Z8150NL | User Manual - Page 30
Changing the Aspect Ratio of the Projected Image 30 Changing the Aspect Mode (PowerLite Pro Z8350WNL) Projecting images from video equipment or from the HDMI1/2 input port Each time the [Aspect] button on the remote control is pressed, the aspect - Epson PowerLite Pro Z8150NL | User Manual - Page 31
Image 31 Aspect mode Full Zoom Native XGA 1024X768 (4:3) Input Signal WXGA 1280X800 (16:10) SXGA 1280X1024 (5:4) Changing the Aspect Mode (PowerLite Pro Z8150NL/Z8250NL/Z8255NL) Projecting images from video equipment Each time the Aspect button on the remote control is pressed, the aspect mode - Epson PowerLite Pro Z8150NL | User Manual - Page 32
Changing the Aspect Ratio of the Projected Image 32 Projecting images from the HDMI1/2 input port Each time the [Aspect] button on the remote control is pressed, the aspect mode changes in the order Auto, 4:3, 16:9, 16:9 (Up), 16:9 (Down), and Native. s p.27 Example: 1080p signal input (resolution - Epson PowerLite Pro Z8150NL | User Manual - Page 33
Changing the Aspect Ratio of the Projected Image 33 Aspect mode 16:9 (Down) XGA 1024X768 (4:3) Input Signal WXGA 1280X800 (16:10) SXGA 1280X1024 (5:4) Native q If parts of the image are missing or it cannot project everything, set the Resolution setting to Wide or Normal from the - Epson PowerLite Pro Z8150NL | User Manual - Page 34
images. This produces images with clear shadows. The projector is not a medical device and cannot be used for medical diagnosis. Ideal for projecting from multiple projectors. Minimize the color tone difference between each projected image. *1 This - Epson PowerLite Pro Z8150NL | User Manual - Page 35
are listed below. Left Right Screen Screen Comp BNC S-Vide Video HDMI1 HDMI2 LAN SDI* uter o Comp - - uter BNC - - S-Vide o Video - - - - HDMI1 - - HDMI2 - - LAN - - SDI* - - * PowerLite Pro Z8450WUNL/Z8455WUNL only - Epson PowerLite Pro Z8150NL | User Manual - Page 36
Simultaneously (Split Screen) 36 Operating Procedures Projecting on a split screen Procedure A Press the [Split] button on the remote control while the projector is projecting. The currently selected input source will be displayed on the left screen. Remote Control B Press the [Menu] button on - Epson PowerLite Pro Z8150NL | User Manual - Page 37
Projecting Two Images Simultaneously (Split Screen) 37 E Select "Execute" and press the [Enter] button. To switch the projected image during split screen projection, start the procedure from step 2. q Analog RGB signals that are output from the left screen can be displayed on an external monitor. - Epson PowerLite Pro Z8150NL | User Manual - Page 38
Projecting Two Images Simultaneously (Split Screen) 38 Larger Right Restrictions during Split Screen Projection q • You cannot enlarge both the left screen and right screen images at the same time. • When one image is enlarged, the other image is reduced. • Depending on the video signals that - Epson PowerLite Pro Z8150NL | User Manual - Page 39
are changing between files during presentations from a computer. q • When the shutter is closed and no operations are performed for about 30 minutes, the projector enters Sleep Mode and turns off automatically. If you do not want Sleep Mode to activate, change the Shutter Timer setting to Off from - Epson PowerLite Pro Z8150NL | User Manual - Page 40
Functions for Enhancing Projection 40 Each time you press the button, Freeze turns on or off. q • The image source continues to play back the moving images even while Freeze is on, and so it is not possible to resume projection from the point where it was paused. • If the [Freeze] button is - Epson PowerLite Pro Z8150NL | User Manual - Page 41
Functions for Enhancing Projection 41 B Move the Pointer icon ( ). Remote Control Procedure A Start E-Zoom. Remote Control q You can choose from three different kinds of Pointer icon ( , , or ) in Settings - Pointer Shape from the configuration menu. s p.65 Enlarging Part of the Image (E-Zoom) - Epson PowerLite Pro Z8150NL | User Manual - Page 42
Functions for Enhancing Projection 42 C Enlarge. Remote Control Each time the button is pressed, the area is expanded. You can expand quickly by holding the button down. You can reduce the enlarged image by pressing the [x] button. Press the [Esc] button to cancel. q • The enlargement ratio - Epson PowerLite Pro Z8150NL | User Manual - Page 43
Saving a User's Logo 43 Saving a User's Logo You can save the image that is currently being projected as a User's Logo. The saved user's logo can be used as the display image when there is no video signal input or during starting up. q Once a User's Logo has been saved, the logo cannot be returned - Epson PowerLite Pro Z8150NL | User Manual - Page 44
Control Using the Control Panel 400% is displayed only when using PowerLite Pro Z8450WUNL/Z8455WUNL. G When the message "Save this image as the user's logo may take approximately 15 seconds. Do not use the projector or any connected equipment while it is saving, otherwise malfunctions may occur. - Epson PowerLite Pro Z8150NL | User Manual - Page 45
is not entered, projection does not start. 2. User's Logo Protect Even if someone tries to change the User's Logo set by the owner of the projector, it cannot be changed. When User's Logo Protect is set to On, the following setting changes for the User's Logo are prohibited. • Capturing a User - Epson PowerLite Pro Z8150NL | User Manual - Page 46
menu is displayed. s "Entering the Password" p.46 • When the password is set, stick the Password protect sticker in a visible position on the projector as a further theft-deterrent. B Turn on "Power On Protect". (1) Select Power On Protect, and then press the [Enter] button. (2) Select On, and - Epson PowerLite Pro Z8150NL | User Manual - Page 47
wrong Password thirty times in succession, the following message is displayed and the projector does not accept any more Password entries. "The projector's operation will be locked. Contact Epson." s p.114 Restricting Button Operation The following three kinds of operation restriction functions are - Epson PowerLite Pro Z8150NL | User Manual - Page 48
Security Functions 48 Lens Operation Lock This function locks the following buttons on the remote control related to the lens operation. Remote Control B Select either "Full Lock" or "Partial Lock" according to your purpose. C Select "Yes" when the confirmation message is displayed. The control - Epson PowerLite Pro Z8150NL | User Manual - Page 49
Security Functions 49 B Select "On". The buttons related to the lens operation are locked according to the setting you chose. Remote control button lock This function locks the following buttons on the remote control. Remote Control Procedure Remote Control Each time the [Help] button is - Epson PowerLite Pro Z8150NL | User Manual - Page 50
projector is often setup on ceiling mounts and left in rooms unattended, the projector includes the following security devices to prevent someone from taking the projector passed through the security cable installation point to secure the projector to a desk or pillar. Installing the wire lock Pass - Epson PowerLite Pro Z8150NL | User Manual - Page 51
HDMI Video Range SDI Video Range*1 Scale Overscan Power Consumption*2 Brightness Level*2 Edge Blending Multi-screen *1 PowerLite Pro Z8450WUNL/Z8455WUNL only *2 Not available on PowerLite Pro Z8150NL Saving/Loading/Erasing the Memory Saving to memory Use the following procedure to save your image - Epson PowerLite Pro Z8150NL | User Manual - Page 52
Memory Function 52 B Select "Save Memory", and then press the [Enter] button. C Select the desired memory, and then press the [Enter] button. The settings saved to the memory are applied to the projected image. C Select the memory name that you want to save your image settings to, and then press - Epson PowerLite Pro Z8150NL | User Manual - Page 53
Memory Function 53 C Select the desired memory, and then press the [Enter] button. D Enter the memory name using the soft keyboard. s "Soft Keyboard Operations" p.72 Press [Finish] to complete renaming. - Epson PowerLite Pro Z8150NL | User Manual - Page 54
54 Configuration Menu This chapter explains how to use the configuration menu and its functions. The screen shots may be different from those shown in this chapter depending on your projector model. - Epson PowerLite Pro Z8150NL | User Manual - Page 55
Using the Configuration Menu Using the Configuration Menu Selecting from the top menu Selecting from the sub menu 55 Setting each item Exit - Epson PowerLite Pro Z8150NL | User Manual - Page 56
Noise Reduction Mosquito NR HDMI Video Range SDI Video Range*1 Input Signal Video Signal Aspect Scale Overscan Items/Values On, Off Auto, Wide, Normal, Manual Off, Video, Film/Auto Off, Low, Normal, High 0 to 3 Off, NR1, NR2 On, Off Auto, Normal, Expanded Normal, Expanded Auto, RGB, Component Auto - Epson PowerLite Pro Z8150NL | User Manual - Page 57
Button, Shutter Timer, High Altitude Mode, BNC Sync Termination, Remote Control Type, Beep Communication On, Communication Off On, Off Brightness Level*2, Edge Blending, Multi-screen, Projector ID - 27 languages - Epson PowerLite Pro Z8150NL | User Manual - Page 58
Event ID Reset All Reset Memory Items/Values - *1 PowerLite Pro Z8450WUNL/Z8455WUNL only *2 Not available on PowerLite Pro Z8150NL Network Menu Top Menu Basic Menu s p.73 Sub Menu Items/Values Projector Name - Web Remote Password - Projector Keyword On, Off 58 Top Menu Wireless LAN Menu - Epson PowerLite Pro Z8150NL | User Manual - Page 59
- Secure HTTP On, Off Mail Notification - Manage Certificates - SNMP - Priority Gateway Wired, Wireless AMX Device Discovery On, Off Crestron RoomView On, Off Bonjour On, Off EPSON Message Broadcasting On, Off - Epson PowerLite Pro Z8150NL | User Manual - Page 60
Image Menu 60 Image Menu Items that can be set vary depending on the image signal or input source currently being projected as shown in the following screen shots. Setting details are saved for each image signal. RGB Signal/LAN Component Video Signalg/ Composite video Signalg/S-Video Signalg - Epson PowerLite Pro Z8150NL | User Manual - Page 61
Image Menu 61 Sub Menu Abs. Color Temp. Advanced Auto Iris* Reset Function You can adjust the overall tint of the image. You can adjust tints in 10 stages from 5000 K to 10000 K. When a high value is selected, the image becomes tinged with blue, when a low value is selected, the image becomes - Epson PowerLite Pro Z8150NL | User Manual - Page 62
Signal Menu 62 Signal Menu Items that can be set vary depending on the image signal or input source currently being projected as shown in the following screen shots. Setting details are saved for each image signal. - Epson PowerLite Pro Z8150NL | User Manual - Page 63
Composite video Signalg/S-Video Signalg 63 HDMI/SDI* * PowerLite Pro Z8450WUNL/Z8455WUNL only Sub Menu Auto Setup Resolution Trackingg Sync screen; Wide for wide screens and Normal for 4:3 or 5:4 screens. Manual: You can specify the resolution. This is ideal when connected computer is fixed - Epson PowerLite Pro Z8150NL | User Manual - Page 64
set to Auto, video signals are recognized automatically. If interference appears in the image or a problem occurs such as no image is being projected when set to Auto, select the appropriate signal according menu items to their default settings, see s p.91 * PowerLite Pro Z8450WUNL/Z8455WUNL only - Epson PowerLite Pro Z8150NL | User Manual - Page 65
to side and up and down. s p.176 You can split the screen into two screens. s p.35 You can use this to restrict operation of the projector's control panel. s p.47 You can use this to restrict the lens operation of the remote control. s p.48 You can select the shape of the pointer - Epson PowerLite Pro Z8150NL | User Manual - Page 66
] button. Power Consumption*, Info, Progressive, Test Pattern, Multi-screen, Resolution, Memory When the projector is setup, a Test Pattern is displayed so that you can adjust the projection without connecting other items to their default settings, see s p.91 * Not available on PowerLite Pro Z8150NL - Epson PowerLite Pro Z8150NL | User Manual - Page 67
Extended Menu 67 Extended Menu Sub Menu Display Closed Caption User's Logo*1 Projection Direction Function You can make settings related to the projector's display. Menu Position: Select the position to display the menu on the projected screen. Messages: The following messages are not displayed - Epson PowerLite Pro Z8150NL | User Manual - Page 68
of remote control. Set this item to Normal to use the remote control provided with the projector. When Simple is selected, you can use the remote control provided with other Epson projectors to operate this projector. This is useful if you want to use a remote control that you are already familiar - Epson PowerLite Pro Z8150NL | User Manual - Page 69
when projecting images from multiple projectors. s p.173 Brightness Level (not available on PowerLite Pro Z8150NL): Set the lamp brightness Multi-screen: You can adjust the hue and brightness of each projected image. s p.180 Projector ID: Set the ID within a range of 1 to 9. Off indicates that no ID - Epson PowerLite Pro Z8150NL | User Manual - Page 70
screen to set the network. s p.71 Function q By using the Web browser of a computer connected to the projector on a network, you can set the projector's functions and control the projector. This function is called "Web Control". You can easily enter text using a keyboard to make settings for "Web - Epson PowerLite Pro Z8150NL | User Manual - Page 71
Network Menu 71 Notes on Operating the Network Menu Selecting from the top menu and sub menus, and changing of selected items are the same as operations in the configuration menu. When done, make sure you go to the Setup complete, and select Yes, No, or Cancel. When you select Yes or No, you - Epson PowerLite Pro Z8150NL | User Manual - Page 72
during setup. In this case, the following software keyboard is displayed. Use the [h] button on the remote control or [w/ ], [v/ ], [/ ] on the projector to move the cursor to the desired key, and then press the [Enter] button to enter the alphanumeric. Enter figures by holding down the - Epson PowerLite Pro Z8150NL | User Manual - Page 73
a password to use Web Remote. You can enter up to 8 single-byte alphanumeric characters. Web Remote is a computer function that allows you to operate the projector by using the Web browser on a computer connected on a network. s p.127 When set to On, you have to enter the keyword when you try to - Epson PowerLite Pro Z8150NL | User Manual - Page 74
is selected automatically according to the access point settings. In an area that does not support 802.11n, only 802.11b/g is displayed. Set the connection mode to use when connecting the projector and a computer via a wireless LAN. If you select Quick, a small network is created automatically by - Epson PowerLite Pro Z8150NL | User Manual - Page 75
When an SSID is provided for the wireless WLAN network in which the projector participates, enter the SSID. You can enter up to 32 single- On you cannot set any more addresses. You can input the IP addressg assigned to the projector. You can input a number from 0 to 255 in each field of the address. - Epson PowerLite Pro Z8150NL | User Manual - Page 76
Point screen Detected access points are displayed in a list. Access points using WEP encryption cannot be connected to because this projector does not support the WEP encryption method. Sub Menu/Icon Refresh Starts detecting access points again. Indicates an already set access point. Function - Epson PowerLite Pro Z8150NL | User Manual - Page 77
SSID Auto Setting is On): Communication takes place using security by WPA2. Uses AES method for encryption. When establishing connection from computer to projector, enter the value set in the passphrase. When Advanced is selected Open: Connects to access points without security enabled. WPA/WPA2-PSK - Epson PowerLite Pro Z8150NL | User Manual - Page 78
Network Menu 78 When WPA/WPA2-PSK is selected Sub Menu Passphrase Function You can enter at least 8 and up to 63 single-byte alphanumeric characters for the passphrase. When the passphrase is entered and the [Enter] button is pressed, the value is set and displayed as an asterisk (*). When using - Epson PowerLite Pro Z8150NL | User Manual - Page 79
Network Menu When WPA/WPA2-EAP is selected PEAP/EAP-Fast PEAP-TLS/EAP-TLS 79 LEAP Sub Menu EAP Method User name Function Set the protocol for authentication. PEAP: Authentication protocol widely used in Windows Server. PEAP-TLS: Authentication protocol used in Windows Server. Set when using - Epson PowerLite Pro Z8150NL | User Manual - Page 80
the certificate during server certificate verification. If On is selected, the validity of the authentication server certificate is verified from the internal time of the projector. - Epson PowerLite Pro Z8150NL | User Manual - Page 81
set any static IP addresses. You can input the IP addressg assigned to the projector. You can input a number from 0 to 255 in each field of the x is a number from 0 to 255) You can input the Subnet Maskg for the projector. You can input a number from 0 to 255 in each field of the address. However - Epson PowerLite Pro Z8150NL | User Manual - Page 82
Control. You can enter up to 8 single-byte alphanumeric characters. Web Control is a computer function that allows you to set up and control the projector by using the Web browser on a computer connected on a network. s p.127 You can enter up to 16 single-byte alphanumeric characters. Apply security - Epson PowerLite Pro Z8150NL | User Manual - Page 83
For an explanation of the Bonjour service, see the Apple Web site. http://www.apple.com/ You can switch the EPSON Message Broadcasting function to enable or disable. Download the software and the User's Guide from the following website. http://www.epson.com You can download Message Broadcasting and - Epson PowerLite Pro Z8150NL | User Manual - Page 84
Network Menu 84 Mail Notification menu When this is set, you receive an e-mail notification if a problem or warning occurs in the projector. s "Reading Problem Mail Notification Function" p.131 Sub Menu Mail Notification SMTP Server Port Number Email Address 1/Email Address 2/Email Address 3 - Epson PowerLite Pro Z8150NL | User Manual - Page 85
Certificate is set. Select Refresh to update the self-signed certificate. Issued to/Issued by/Validity period Displays information on the certificates set in the projector, which are needed when Secure HTTP is set to On. It is not displayed if Self-signed Certificate is set. Select Clear to delete - Epson PowerLite Pro Z8150NL | User Manual - Page 86
Network Menu 86 q Web Control is used to set certificates. s "Setting Certificates" p.129 - Epson PowerLite Pro Z8150NL | User Manual - Page 87
a network administrator. Sub Menu SNMP Trap IP Address 1/Trap IP Address 2 Community Name Function Set this parameter to On when using SNMPg to monitor the projector. When SNMP is set to On, you can set up to two IP addresses as SNMP trap notification destinations. You can input a number from 0 to - Epson PowerLite Pro Z8150NL | User Manual - Page 88
Network Menu 88 Reset Menu Resets all of the network settings. Sub Menu Reset network settings. Function To reset all of the network settings, select Yes. When you reset the network settings, the Passphrase, Administrator Password and Manage Certificates menu settings change back to their - Epson PowerLite Pro Z8150NL | User Manual - Page 89
(Display Only) Lets you check the status of the image signals being projected and the status of the projector. Items that can be displayed vary depending on the image signal or input source being projected as shown the image signal information. This information may be needed if service is required. - Epson PowerLite Pro Z8150NL | User Manual - Page 90
on the problem is displayed using an Event ID. Refer to the following page for information on interpreting the Event ID. s p.112 * The cumulative use time is displayed as "0H" for the first 10 hours. 10 hours and above is displayed as "10H", "11H", etc. If you are using PowerLite Pro Z8250NL - Epson PowerLite Pro Z8150NL | User Manual - Page 91
Reset Menu 91 Reset Menu Sub Menu Reset All Reset Memory Function You can reset all items in the configuration menu to their default settings. The following items are not reset to their defaults: passwords, Input Signal, Memory, User's Logo, Multi-screen, all items for Network menus, Lamp Hours, - Epson PowerLite Pro Z8150NL | User Manual - Page 92
92 Troubleshooting This chapter explains how to identify problems and what to do if a problem is found. - Epson PowerLite Pro Z8150NL | User Manual - Page 93
Using the Help 93 Using the Help If a problem occurs with the projector, press the [Help] button. You can solve problems by answering the questions. Procedure A Press the [Help] button. The Help screen is displayed. Remote Control B Select a menu item. Remote Control - Epson PowerLite Pro Z8150NL | User Manual - Page 94
Using the Help 94 C Confirm the selection. Remote Control Questions and solutions are displayed as shown on the screen below. Press the [Help] button to exit Help. q If the Help screen does not provide a solution to the problem, refer to "Problem Solving" p.95. - Epson PowerLite Pro Z8150NL | User Manual - Page 95
Problem Solving 95 Problem Solving If you are having a problem with the projector, first check the projector's indicators and refer to "Reading the Indicators". s p.96 If the indicators do not show clearly what the problem might be, refer to "When the Indicators Provide No Help". s p.101 - Epson PowerLite Pro Z8150NL | User Manual - Page 96
Problem Solving 96 Reading the Indicators These indicators indicate the operating status of the projector. A Indicates the operating status. Standby condition When the [t] button is pressed in this condition, projection starts. Preparing network monitoring (maximum approx. 20 seconds) or cool - Epson PowerLite Pro Z8150NL | User Manual - Page 97
table to see what the indicators mean and how to remedy problems that they indicate. If all indicators are off, check continues after checking the points above, stop using the projector, disconnect the power cable from the electrical outlet, and contact Epson. s p.114 When using at an altitude of - Epson PowerLite Pro Z8150NL | User Manual - Page 98
Problem Solving 98 Status Cause Lamp Error Lamp Failure Filter Airflow Error error continues: Stop using the projector, disconnect the power cable from the electrical outlet, and contact Epson. s p.114 If it is cracked: Replace it with a new lamp, or contact Epson for further advice. If replacing - Epson PowerLite Pro Z8150NL | User Manual - Page 99
Problem Solving 99 m o n Indicator is flashing or lit : Lit : Flashing : Off : Varies according to the projector status Status the projector, disconnect the power cable from the electrical outlet, and contact Epson. s p.114 If it is cracked: Replace it with a new lamp, or contact Epson. (Only - Epson PowerLite Pro Z8150NL | User Manual - Page 100
Problem Solving 100 Status Cause No Air Filter Air Flow Sensor Err. Low Air Flow Air Filter Notice Remedy or Status Check that the air filter is securely installed. s p.122 The projector stop using the projector, disconnect the power cable from the electrical outlet, and contact Epson. s p.114 " - Epson PowerLite Pro Z8150NL | User Manual - Page 101
problems occur and the indicators do not offer a solution, refer to the pages given for each problem. Problems Projection stops automatically" s p.103 • "The message "Not supported" is displayed." s p.104 • ""No Signal" is colors projected by the projector and the colors appearing on the monitor - Epson PowerLite Pro Z8150NL | User Manual - Page 102
appears on the external monitor" s p.110 • "I want to change the language for messages and menus" s p.110 • "Mail is not received even if a problem occurs in the projector" s p.110 • ""The battery that saves your clock settings is running low." is displayed." s p.111 Interpreting Event IDs • s p.112 - Epson PowerLite Pro Z8150NL | User Manual - Page 103
Solving 103 Problems relating to images No images appear Check Did you press the The power cable is not connected correctly or power is not being supplied normally. Connect the projector's power cable correctly. Check that your electrical outlet or power source is functioning correctly. Press - Epson PowerLite Pro Z8150NL | User Manual - Page 104
Problem Solving 104 Check Is the air filter installed? Remedy Check that the air filter is securely installed. s p.122 The projector automatically turns off about one minute after it detects that there is no air filter. The message "Not supported" is displayed. Check Is the image signal format - Epson PowerLite Pro Z8150NL | User Manual - Page 105
when projecting computer analog RGB signals Is the Resolution set to Manual? Only when projecting on a split screen Remedy Change the setting using may be causing the problem. Set the computer so that the signals being output are compatible with the projector. s "Supported Monitor Displays" p.198 - Epson PowerLite Pro Z8150NL | User Manual - Page 106
Problem Solving 106 The image is truncated (large) or small, or the aspect is driver documentation Set the computer so that the signals being output are compatible with the projector. s "Supported Monitor Displays" p.198 s Computer documentation Image colors are not right Check Do the input - Epson PowerLite Pro Z8150NL | User Manual - Page 107
Brightness Level or Brightness Correct. on Multi-Projection could be set. If not projecting from multiple projectors, set Multi-Projection to Off. s Extended Menu Multi-Projection p.67 Problems when projection starts No power supplied Check Did you press the [t] button? Are the indicators switched - Epson PowerLite Pro Z8150NL | User Manual - Page 108
the power cable may be defective. Reinsert the touched? power cable. If this does not solve the problem, stop using the projector, disconnect the power cable from the electrical outlet, and contact Epson. s p.114 Is Control Panel Lock set to Full Lock? Press the [t] button on the remote control - Epson PowerLite Pro Z8150NL | User Manual - Page 109
Other problems The remote control does not work Check Remedy Is the remote control light-emitting area pointing towards Point the remote control towards the remote receiver. s p.23 the remote receiver on the projector when it is operated? Is the remote control too far from the projector? The - Epson PowerLite Pro Z8150NL | User Manual - Page 110
p.67 Mail is not received even if a problem occurs in the projector Check Is Standby Mode set to Communication On? Did a fatal abnormality occur Standby Mode p.67 When the projector comes to a sudden stop, e-mail cannot be sent. If the abnormal state continues, contact Epson. s p.114 Check that - Epson PowerLite Pro Z8150NL | User Manual - Page 111
Check Is Mail Notification function set correctly in the configuration menu? Remedy Mail notification of problems is sent according to the settings on the Mail Notification menu in the configuration menu. that saves your clock settings is Contact your local dealer or Epson. s p.114 running low. - Epson PowerLite Pro Z8150NL | User Manual - Page 112
instructions. Check the DHCP server to see if it is operating correctly and check the LAN cable to see if it is connected correctly. Turn off DHCP if it is not being used. s Network Menu - Wireless LAN Menu p.74, Wired LAN Menu p.81 If the problem cannot be solved by restarting the projector - Epson PowerLite Pro Z8150NL | User Manual - Page 113
Problem Solving Event ID 089A 089B 089C 089D Cause The EAP authentication type is not the same. EAP server authentication failed. EAP client authentication failed. Key - Epson PowerLite Pro Z8150NL | User Manual - Page 114
support services, use the following support options. Internet Support Visit Epson's support website at www.epson.com/support (U.S.) or www.epson.ca/support (Canada) for solutions to common problems with your projector. You can download utilities and documentation, get FAQs and troubleshooting - Epson PowerLite Pro Z8150NL | User Manual - Page 115
115 Maintenance This chapter explains the maintenance methods that are required to ensure a long projector service life. - Epson PowerLite Pro Z8150NL | User Manual - Page 116
air filter." Caution • If dust collects on the air filter it can cause the internal temperature of the projector to rise, and this can lead to problems with operation and shorten the optical engine's service life. Clean the air filter immediately when the message is displayed. • If the air filter is - Epson PowerLite Pro Z8150NL | User Manual - Page 117
Cleaning B Remove the air filter cover. Grip the air filter cover tab between your fingers, and pull up and remove the cover while pressing the tab. 117 D With the front (the side with tabs) of the air filter facing down, tap the air filter four or five times to shake off the dust. Turn it over and - Epson PowerLite Pro Z8150NL | User Manual - Page 118
Cleaning 118 E Remove any dust remaining on the air filter by using a vacuum cleaner from on front side. G Reinsert the air filter cover. Press until it clicks into place. F Reinsert the air filter. q If a message is frequently displayed, even after cleaning, it is time to replace the air - Epson PowerLite Pro Z8150NL | User Manual - Page 119
Normal 1: About 2400 hours When Power Consumption is set continually at ECO: About 3400 hours PowerLite Pro Z8150NL: About 2400 hours • Do not turn the projector on immediately after turning it off. Turning the projector on and off frequently may shorten the life of the lamps. • If you continue to - Epson PowerLite Pro Z8150NL | User Manual - Page 120
B Wait until the lamps have cooled down sufficiently before removing the lamp cover on the back of the projector. Pinch the tabs on the front of the lamp cover together to release the lock. When the lock lamp is cracked, replace it with a new lamp, or contact Epson. s p.114 A Lamp 1 B Lamp 2 - Epson PowerLite Pro Z8150NL | User Manual - Page 121
D Install the new lamp. Insert the lamp along the guide rail in the correct direction so that it fits in regulations regarding disposal or recycling. Do not put in the trash. Resetting the Lamp Hours The projector records lamp life and a message and indicator notify you when it is time to replace the - Epson PowerLite Pro Z8150NL | User Manual - Page 122
, and then press the [Enter] button. 122 Procedure A Press the [t] power button on the remote control or the back of the projector to turn off the projector's power. After the confirmation buzzer beeps twice, disconnect the power cable. B Remove the air filter cover. Grip the air filter cover tab - Epson PowerLite Pro Z8150NL | User Manual - Page 123
Replacing Consumables C Remove the air filter. D Install the new air filter. 123 E Replace the air filter cover. Press until it clicks into place. Caution • Air filters contain polypropylene. Dispose of used air filters according to local regulations. - Epson PowerLite Pro Z8150NL | User Manual - Page 124
to horizontally and vertically center the lens. Then, follow the instructions in "Moving Nearby", and the additional instructions below. • Remove the lens unit. • Attach the cover that was on the lens mount when you purchased the projector. • The vertical and horizontal lens shifts are positioned in - Epson PowerLite Pro Z8150NL | User Manual - Page 125
125 Monitoring and Controls This chapter explains the functions that can be used to monitor and control the projector. - Epson PowerLite Pro Z8150NL | User Manual - Page 126
status of multiple Epson projectors that are connected to a network from a computer monitor, and controlling the projectors from the computer attention, such as a problem, occurs with a projector that has been registered. • Sending messages to registered projectors The Message Broadcasting plugin for - Epson PowerLite Pro Z8150NL | User Manual - Page 127
Web Control, we recommend setting Secure HTTP to On. s p.82 Procedure A Start the Web browser on the computer. B Enter the IP address of the projector in the address field of the Web browser, and press the [Enter] key on the computer's keyboard. Web Control is displayed. When Web Control Password - Epson PowerLite Pro Z8150NL | User Manual - Page 128
input port. The input source will change to SDI. (PowerLite Pro Z8450WUNL/Z8455WUNL only) Turns the video on or off. s p.39 Images are paused or unpaused. s p.39 Displaying Lens Control The Lens Control function allows you to operate the projector's lens from a web browser. Procedure A Display Web - Epson PowerLite Pro Z8150NL | User Manual - Page 129
You can use a web browser to set the certificate settings used for wireless LAN authentication. Install the following certificates in the projector: Client Certificate and CA certificate for wireless LAN security settings, and Web Server Certificate for the Secure HTTP function. Procedure A Display - Epson PowerLite Pro Z8150NL | User Manual - Page 130
period Web Server Certificate Refresh/Clear Issued to Issued by Validity period q When installing a certificate, make sure the projector supports its format. s "Supported Certificates" p.200 Secure HTTP Notes When Secure HTTP is set to On, security using HTTPS protocol is automatically applied - Epson PowerLite Pro Z8150NL | User Manual - Page 131
mail is sent. Sender: Email Address 1 Subject: EPSON Projector Line 1: The name of the projector where the problem has occurred Line 2: The IP address set for the projector where the problem has occurred. Line 3 and on: Details of the problem The details of the problem are listed line by line. The - Epson PowerLite Pro Z8150NL | User Manual - Page 132
132 Management Using SNMP By setting SNMP from the projector's configuration menu, notification messages are sent to preset e-mail addresses when a problem or warning occurs with a projector. This is useful when controlling projectors centrally at a point distant from them. s p.87 q • SNMP should - Epson PowerLite Pro Z8150NL | User Manual - Page 133
bps • Data length: 8 bit • Parity: None • Stop-bit: 1 bit • Flow control: None Command List When the power ON command is transmitted to the projector, the power turns on and it enters warm-up mode. When the projector's power has turned on, a colon ":" (3Ah) is returned. When a command is input, the - Epson PowerLite Pro Z8150NL | User Manual - Page 134
returned. Power ON/OFF Signal selection Shutter Button Item On Off Computer Auto RGB Component BNC Auto RGB Component HDMI1 HDMI2 SDI (PowerLite Pro Z8450WUNL/ Z8455WUNL only) Video S-Video LAN Electric On Shutter/Blank Off Command PWR ON PWR OFF SOURCE 1F SOURCE 11 SOURCE 14 - Epson PowerLite Pro Z8150NL | User Manual - Page 135
projector sources Source Computer BNC Video S-Video HDMI1 HDMI2 SDI (PowerLite Pro Z8450WUNL /Z8455WUNL only) LAN PJLink Command INPT 11 INPT 13 INPT 23 INPT 22 INPT 32 INPT 33 INPT 34 INPT 52 • Manufacturer name displayed for "Manufacture name information query" EPSON - Epson PowerLite Pro Z8150NL | User Manual - Page 136
to monitor and control multiple devices connected on a network. The projector supports the control protocol, and can therefore be used in a the following website for details. http://www.crestron.com/getroomview This manual describes operating procedures in the computer window using a Web browser - Epson PowerLite Pro Z8150NL | User Manual - Page 137
, or if you do not want to show details such as when you are changing between files during presentations from a computer. s p.39 * This projector does not support the control of audio. 137 B Switch to the image from the selected input source. To display input sources that are not shown in the - Epson PowerLite Pro Z8150NL | User Manual - Page 138
Tools Function Displays the Help Desk window. Used to send and receive messages to the administrator using Crestron RoomView® Express. Displays information on the projector that is currently connected. Changes the settings in the projector that is currently connected. Refer to the next section. - Epson PowerLite Pro Z8150NL | User Manual - Page 139
that is currently connected on the network. (The name can contain up to 32 single-byte alphanumeric characters and symbols.) Enter a user name for the projector. (The name can contain up to 32 single-byte alphanumeric characters and symbols.) Select the Enabled check box to use DHCP. You cannot set - Epson PowerLite Pro Z8150NL | User Manual - Page 140
About Crestron RoomView® 140 C Admin Password Select the Enabled check box to require a password to open the Tools window. The following items can be set. Item New Password Confirm Send Function Enter the new password required to open the Tools window. (The password can contain up to 26 single- - Epson PowerLite Pro Z8150NL | User Manual - Page 141
Monitor. Message Broadcasting can be used to send a message (JPEG file) to project on all Epson projectors or specified projectors connected on the network. The data can be sent manually, or sent automatically using Timer Settings of EasyMP Monitor. Download the Message Broadcasting software from - Epson PowerLite Pro Z8150NL | User Manual - Page 142
142 Network Functions This chapter explains the additional functions for networks. - Epson PowerLite Pro Z8150NL | User Manual - Page 143
screen is displayed, enter the keyword shown at the bottom of the LAN standby screen. q • You can connect only one projector to a computer. • When using Network Projector from Options in Windows Meeting Space, set the colors for the computer screen you are using to the highest level (32bit). If - Epson PowerLite Pro Z8150NL | User Manual - Page 144
the computer and the access point in advance. For details on how to make this connection, refer to the manual provided with the access point. This method is recommended when the projector is mounted on the ceiling. q Refer to the documentation for the access point device and to the following section - Epson PowerLite Pro Z8150NL | User Manual - Page 145
Making a WPS (Wi-Fi Protected Setup) Connection with a Wireless LAN Access Point 145 B From "Wireless LAN" select "To Setup Wizard". Making a connection using the push button method Procedure A Select "Push Button Method". The following screen is displayed. The "Push Button Method" screen is - Epson PowerLite Pro Z8150NL | User Manual - Page 146
" screen is displayed. C Press the button on the access point when prompted by the screen. This completes the setup of the connection between the projector and the access point. Press the [Menu] button to close the configuration menu. Making a connection using the PIN Code Method q Before you can - Epson PowerLite Pro Z8150NL | User Manual - Page 147
Making a WPS (Wi-Fi Protected Setup) Connection with a Wireless LAN Access Point 147 Procedure A Select "PIN Code Method". B Enter the PIN code displayed on the "PIN Code Method" screen from the computer to the access point, and then select "Start Setup". The "PIN Code Method" screen is - Epson PowerLite Pro Z8150NL | User Manual - Page 148
Making a WPS (Wi-Fi Protected Setup) Connection with a Wireless LAN Access Point 148 D Select "Setup complete" - "Yes." This completes the setup of the connection between the projector and the access point. Press the [Menu] button to close the configuration menu. - Epson PowerLite Pro Z8150NL | User Manual - Page 149
149 Installation and Connections This chapter explains the projection installation methods and methods to connect to other equipment. - Epson PowerLite Pro Z8150NL | User Manual - Page 150
adhesives on the ceiling mount attachment points to prevent the screws from loosening, or if you use things such as lubricants or oils on the projector, the projector case may crack causing it to fall from its ceiling mount. This could cause serious injury to anyone under the ceiling mount and could - Epson PowerLite Pro Z8150NL | User Manual - Page 151
Installation Methods 151 When installing the projector, keep enough distance from the wall to the projector's air exhaust and intake vent. - Epson PowerLite Pro Z8150NL | User Manual - Page 152
. Projecting with the EasyMP Network Projection application software (provided with the projector). See your EasyMP Network Projection Operation Guide for more information. Projecting with the "Connect to a Network Projector" function provided with Windows Vista or Windows 7 s p.143 Computer port - Epson PowerLite Pro Z8150NL | User Manual - Page 153
the HDMI standard for the HDMI cable. Changing the video output from a laptop computer. When projecting images from a laptop computer connected to the projector with a computer cable, the output for the video signal must be changed at the computer. Refer to the documentation for your computer for - Epson PowerLite Pro Z8150NL | User Manual - Page 154
video equipment Connection 1 Component outputs Connecting cable RCA component video cable (commercially available) + BNC/RCA adapter (commercially available) Projector port BNC input port (R/Cr/Pr, G/Y, B/Cb/Pb) Connection 2 Component outputs Component-to-VGA cable (D-sub/component conversion - Epson PowerLite Pro Z8150NL | User Manual - Page 155
Connecting to Equipment Port on the video equipment Connecting cable Connection 3 S-Video output S-Video cable (commercially available) 155 Projector port S-Video input port Connection 4 Video output BNC video cable (commercially available) Video input port Connection 5 HDMI output HDMI - Epson PowerLite Pro Z8150NL | User Manual - Page 156
Connecting to Equipment Port on the video equipment Connecting cable Connection 6* SDI output BNC video cable (commercially available) 156 Projector port SDI input port * PowerLite Pro Z8450WUNL/Z8455WUNL only q • Set the Input Signal and Video Signal on the Signal menu according to the signal - Epson PowerLite Pro Z8150NL | User Manual - Page 157
Image Displaying a Test Pattern A test pattern can be displayed to adjust the projected image without connecting video equipment. This is useful when installing a projector. q If the [User] button on the remote control is set to Test Pattern, the test pattern will be displayed when the [User - Epson PowerLite Pro Z8150NL | User Manual - Page 158
Correction s p.161 Multi-Projection - Brightness Level*2 - Edge Blending s p.178 - Multi-screen s p.180 *1 Except for custom settings of gamma *2 Not available on PowerLite Pro Z8150NL q To set menu items that cannot be set while the test pattern is being displayed or to fine-tune the projected - Epson PowerLite Pro Z8150NL | User Manual - Page 159
the Position of the Projected Image (Lens Shift) The lens can be shifted to adjust the position of the projected image, for example, when the projector cannot be installed directly in front of the screen. Procedure A Press the [Lens Shift] button on the remote control. When using the control panel - Epson PowerLite Pro Z8150NL | User Manual - Page 160
Adjusting the Projected Image 160 *1 PowerLite Pro Z8150NL/Z8250NL/Z8255NL: V x 56% *2 PowerLite Pro Z8150NL/Z8250NL/Z8255NL: H x 6% A button on the remote control or press the [Lens] button on the back of the projector until "Adjust Focus" is displayed on the screen. B To adjust the focus, use - Epson PowerLite Pro Z8150NL | User Manual - Page 161
up on a desk, adjust the horizontal tilt of the projector with its front and rear feet. Correcting Distortion in the Projected Image There are four methods of correcting distortion in projected images as below. • Quick Corner This allows you to manually correct each of the four corners of the - Epson PowerLite Pro Z8150NL | User Manual - Page 162
Correction Corrects slight distortion which occurs partially, or adjusts the screen position in an overlapping area when projecting from multiple projectors. s "Point Correction" p.176 Quick Corner, H/V-Keystone, Arc Correction, and Point Correction cannot be performed at the same time. Select the - Epson PowerLite Pro Z8150NL | User Manual - Page 163
Adjusting the Projected Image B Select "Quick Corner", and then press the Enter button. Press the [Enter] button again to display the selection screen from which you can select one of the four corners. 163 C Use the [h] button on the remote control or the [w/ ], [v/ ], [/ ] buttons on - Epson PowerLite Pro Z8150NL | User Manual - Page 164
Adjusting the Projected Image 164 D To adjust the shape, use the [h] button on the remote control or the [w/ ], [v/ ], [/ ] buttons on the control panel. If the triangle in the direction you are adjusting the shape turns gray, as shown in the screenshot below, you cannot adjust the - Epson PowerLite Pro Z8150NL | User Manual - Page 165
tilt of up to 30° against the screen. 165 • Correcting horizontal keystone Horizontal keystone can be corrected to a horizontal projector tilt of up to 20° against the screen. If the [w/ ] and [v/ ] buttons are pressed simultaneously for at least 1 second, the results of any vertical keystone - Epson PowerLite Pro Z8150NL | User Manual - Page 166
zoom settings. And, the projected screen size may become smaller after performing the correction. Be careful about the projection distance when installing the projector. Correct the image using Quick Corner to precisely align the projected image with the screen or to fine-tune the image. s "Quick - Epson PowerLite Pro Z8150NL | User Manual - Page 167
Adjusting the Projected Image C Use the [h] button on the remote control or the [w/ ], [v/ ], [/ ] buttons on the control panel to select the area you want to adjust, and then press the [Enter] button. 167 D To adjust the shape, use the [h] button on the remote control or the [w/ ], [v/ - Epson PowerLite Pro Z8150NL | User Manual - Page 168
Adjusting the Projected Image 168 E Press the [Esc] button to return to the previous screen. F Repeat steps 3 to 5 as needed to adjust any remaining parts. G When you are done, press the [Esc] button to exit the correction menu. q If the [Esc] button is held down for about two seconds while - Epson PowerLite Pro Z8150NL | User Manual - Page 169
Adjusting the Image Quality 169 Adjusting the Image Quality Hue, Saturation, and Brightness Adjustment The Hue, Saturation, and Brightness for each of the R (red), G (green), B (blue), C (cyan), M (magenta) and Y (yellow) color components can be adjusted. The menu is displayed in the following - Epson PowerLite Pro Z8150NL | User Manual - Page 170
Adjusting the Image Quality 170 q The gamma graph's horizontal axis represents the input signal level and its vertical axis represents the output signal level. When Color Mode is set to DICOM SIM from the Image menu, select the correction value based on your screen size in reference to a 150 inch - Epson PowerLite Pro Z8150NL | User Manual - Page 171
Adjusting the Image Quality 171 Frame Interpolation (PowerLite Pro Z8450WUNL/Z8455WUNL only) The current and previous frames are used to create intermediate frames which help to produce smooth-moving images. You can resolve clumsy- - Epson PowerLite Pro Z8150NL | User Manual - Page 172
Adjusting the Image Quality 172 The menu is displayed in the following order. Signal Menu - Noise Reduction It is recommended that this is set to Off when viewing image sources in which noise is very low, such as for DVDs. Mosquito NR You can reduce the wavy noise that occurs in lines between - Epson PowerLite Pro Z8150NL | User Manual - Page 173
, but they can also be set by the control panel. V Projecting the same image from each projector, using the Scale function to project a large image Requirements • Two or more projectors that support Edge Blending • A dedicated computer with a GPU that has two or more outputs (VGA, DVI, HDMI, etc - Epson PowerLite Pro Z8150NL | User Manual - Page 174
projection, press the [Menu] button and select Extended - "Multi-Projection" from the configuration menu. s "Using the Configuration Menu" p.55 Remote Control B Select "Projector ID", and then press the [Enter] button. C Select of one of the numbers from 1 to 9 to use as the ID and then press the - Epson PowerLite Pro Z8150NL | User Manual - Page 175
[ID] button, press a number button to select a number to match the ID of the projector you want to operate. s "Checking the Projector ID" p.174 Remote Control When you press the buttons, the current Projector ID is displayed on the projection screen. It disappears in about three seconds. Once this - Epson PowerLite Pro Z8150NL | User Manual - Page 176
of the blend. Point Correction Corrects slight distortion which occurs partially, or adjusts the screen position in an overlapping area when projecting from multiple projectors. A grid is placed on top of the projected image and you can move the points of intersection on the grid left, right, up - Epson PowerLite Pro Z8150NL | User Manual - Page 177
Settings for Multiple Projectors 177 B Select "Point Correction", and then press the [Enter] button. C the point selection screen is displayed on the projected image. q You can change the color of the guide using the Pattern Color setting. G Move the [h] button to the point you want to correct, - Epson PowerLite Pro Z8150NL | User Manual - Page 178
Menu Edge Blending Top Edge/Bottom Edge/Right Edge/Left Edge Blend Curve Black Level Guide Display Function Set to On to activate the edge blending function. Set to Off when not projecting from multiple projectors. Blending: Enable this setting on the sides of the projected image you want to blend - Epson PowerLite Pro Z8150NL | User Manual - Page 179
Settings for Multiple Projectors 179 Sub Menu Guide Colors Function You can select from three guide colors. Procedure A Press the [Menu] button and select Extended menu "Multi-Projection" from the configuration menu. s "Using the Configuration Menu" p.55 Remote Control C Turn on " - Epson PowerLite Pro Z8150NL | User Manual - Page 180
Projectors 180 (5) In Blend Range, adjust the width of the blended area. The width should be set so that the guide projectors are lined up and projecting images, you can manually correct the brightness and color tone of each projector's image so that the colors projected from each projector - Epson PowerLite Pro Z8150NL | User Manual - Page 181
the Multi-Projection menu to correct the image. Sub Menu Brightness Level Multi-screen Function Adjust when the brightness of each projector is different. Adjustment Level: Change the adjustment level of the projected image. Brightness Correct.: Adjust the brightness. Color Correct. (G/R): Adjust - Epson PowerLite Pro Z8150NL | User Manual - Page 182
Settings for Multiple Projectors 182 C Select "Scale Mode", and then select the scale. Full Display When the image is not resized, it is projected the same as projected by - Epson PowerLite Pro Z8150NL | User Manual - Page 183
Setting Schedule Setting Schedule You can schedule turning the projector power on/off and switching the input source, as events in the schedule. Registered events are executed automatically at the specified time on the specified - Epson PowerLite Pro Z8150NL | User Manual - Page 184
Setting Schedule 184 Clock Sub Menu Function Date Set today's date in the projector. Time Set the current time in the projector. Time Difference (UTC) Set the time difference from Coordinated Universal Time. Change DST Settings Displays the screen to set the daylight saving time. Use - Epson PowerLite Pro Z8150NL | User Manual - Page 185
equipment connected to other ports and component video signals cannot be displayed. • The image cannot be displayed on an external monitor when the projector is on standby. • Setting gauges such as Keystone, the configuration menu, or Help screens are not output to the external monitor. Caution To - Epson PowerLite Pro Z8150NL | User Manual - Page 186
the lens unit when necessary. If dust or dirt enter the projector, projection quality deteriorates and it could cause a malfunction. • Try the interface cover. A Loosen the screw. (Thumb screw available on PowerLite Pro Z8255NL/Z8455WUNL only.) B While pulling up the interface cover open switch, - Epson PowerLite Pro Z8150NL | User Manual - Page 187
unit straight out. Attaching Caution Do not remove or attach the lens unit when the projector's lens area is facing up. Dust or dirt could enter the projector. A Loosen the two screws. B Loosen the screw. (Thumb screw available on PowerLite Pro Z8255NL/Z8455WUNL only.) C Pull the cover straight out. - Epson PowerLite Pro Z8150NL | User Manual - Page 188
Installing Optional and Supplied Accessories Procedure A Insert the lens unit straight into the lens insertion section with the white circle on the lens on top. 188 B While holding the lens unit firmly, turn the lock lever clockwise until it is locked. Check that the lens cannot be detached. - Epson PowerLite Pro Z8150NL | User Manual - Page 189
screw. (Thumb screw available on the PowerLite Pro Z8255NL/Z8455WUNL only.) A Install the cover along the guide. B Tighten the screw. Caution • Install the front cover before using the projector. • Store the projector with the lens unit installed. If the projector is stored without the lens unit - Epson PowerLite Pro Z8150NL | User Manual - Page 190
74 Reading the wireless LAN indicators There are two wireless LAN indicators, one on the projector and one on the Wireless LAN unit. A Loosen the screw. (Thumb screw available on the PowerLite Pro Z8255NL/Z8455WUNL only.) B While pulling up the interface cover open switch, pull the interface cover - Epson PowerLite Pro Z8150NL | User Manual - Page 191
connected to the projector, connected to the network, and communicating : Flashing : Lit : Off Indicator on projector Indicator on Wireless LAN unit Attaching and Removing the Interface Cover Removing Procedure A Loosen the screw. (Thumb screw available on the PowerLite Pro Z8255NL/Z8455WUNL - Epson PowerLite Pro Z8150NL | User Manual - Page 192
straight out. B Install the cover along the guide. Attaching Procedure A Remove the top cover when ejecting the connected cables upward. Remove the bottom cover when ejecting the connected cables downward. C Tighten the screw. (Thumb screw available on the PowerLite Pro Z8255NL/Z8455WUNL only.) - Epson PowerLite Pro Z8150NL | User Manual - Page 193
Installing Optional and Supplied Accessories 193 Removing the Feet When mounting the projector on the ceiling, you can remove the feet and attach the supplied foot covers for clean appearance. Procedure A Remove the feet. B Attach the supplied foot covers. - Epson PowerLite Pro Z8150NL | User Manual - Page 194
194 Appendix - Epson PowerLite Pro Z8150NL | User Manual - Page 195
Optional Accessories and Consumables Optional Accessories and Consumables Optional Accessories The following optional accessories and consumables are available. Product Standard zoom lens (ELPLS04) Long throw zoom lens (ELPLL07) Middle throw zoom lens 1 (ELPLM06) Middle throw zoom lens 2 ( - Epson PowerLite Pro Z8150NL | User Manual - Page 196
with zoom or any other settings. For more precise measurements, you can also use the Projection Distance Calculator on the Epson website. PowerLite Pro Z8150NL/Z8250NL/Z8255NL (4:3 image) Lens Screen or image size Throw Ratio Zoom Ratio Focal Length F-number Standard zoom lens (ELPLS04) 60 - Epson PowerLite Pro Z8150NL | User Manual - Page 197
Middle throw zoom lens (ELPLM07) 60 to 500 inches Long throw zoom lens (ELPLL07) 60 to 500 inches Throw Ratio 3.85 - 5.88 5.76 - 8.09 PowerLite Pro Z8450WUNL/Z8455WUNL (16:10 image) Lens Screen or image size Throw Ratio Standard zoom lens (ELPLS04) 60 to 500 inches 1.74 - 2.82 Wide zoom - Epson PowerLite Pro Z8150NL | User Manual - Page 198
functions may be supported. Component Video Signal SDTV(480i) SDTV(576i) SDTV(480p) SDTV(576p) HDTV(720p) HDTV(1080i) HDTV(1080p)* Refresh Rate (Hz) 60 50 60 50 50/60 50/60 50/60 Resolution (dots) 720x480 720x576 720x480 720x576 1280x720 1920x1080 1920x1080 * PowerLite Pro Z8450WUNL/Z8455WUNL - Epson PowerLite Pro Z8150NL | User Manual - Page 199
Supported Monitor Displays 199 Input signals from HDMI1/2 input port Signal VGA compatible when VESA CVT-RB (Reduced Blanking) signal is input. Input signals from SDI input port (PowerLite Pro Z8450WUNL/Z8455WUNL only) Signal SDTV(480i) SDTV(576i) HDTV(720p) HDTV(1080i) HDTV(1080p) Refresh - Epson PowerLite Pro Z8150NL | User Manual - Page 200
/SHA-384/SHA-512 512/1024/2048/4096 bit Required (up to 32 alphanumeric characters) Server Certificate (PEAP/PEAP-TLS/EAP-TLS/EAP-Fast) Item Supported format Extension Encryption Hashes Key length Encode Explanation X509v3 DER/CER/PEM RSA MD5/SHA-1/SHA-256/SHA-384/SHA-512 512/1024/2048/4096 - Epson PowerLite Pro Z8150NL | User Manual - Page 201
) Focus adjustment Zoom adjustment*1 Lens shift*1 Lamp Lamp life*2 Noise level Power supply PowerLite Pro Z8450WUNL/ Z8455WUNL PowerLite Pro Z8350WNL PowerLite Pro Z8250NL/Z8255NL PowerLite Pro Z8150NL 21.0 inches (534 mm) (W) ^ 6.6 inches (167 mm) (H) ^ 28.9 inches (734 mm) (D) (not including - Epson PowerLite Pro Z8150NL | User Manual - Page 202
(Communication Off) Standby: 5.1 W (Communication On), 0.5 W (Communication Off) 0 to 10000 ft (0 to 3048 m) (Set High Altitude Mode to On when using the projector above 4921 ft (1500 m).) 32 to 122*F (0 to 50°C (No condensation) 14 to 140*F (-10 to 60°C) (No condensation) Approx. 48.4 lb (22 kg - Epson PowerLite Pro Z8150NL | User Manual - Page 203
's Guide supplied with the optional lenses. *2 Turn off this product when not in use to prolong the life of the projector. Lamp port 1 Remote port 1 PowerLite Pro Z8450WUNL/ Z8455WUNL 1BNC (female) 203 PowerLite Pro Z8350WNL PowerLite Pro PowerLite Pro Z8150NL Z8250NL/Z8255NL Mini D-Sub15- - Epson PowerLite Pro Z8150NL | User Manual - Page 204
Specifications 204 * USB 2.0 is supported. However, the operation of all USB compatible devices is not guaranteed. Angle of tilt Using the projector at angles not shown in the illustrations above may damage it or cause an accident. - Epson PowerLite Pro Z8150NL | User Manual - Page 205
Appearance Appearance 10.5 (267) 16.0 (167) 3.4 (86.6) A Center of lens B Distance from center of lens to suspension bracket point 4.8 (121.4) 8.9 (225) 21.0 (534) 18.0 (456) 1.5 (39) 205 9.3 (236) 21.4 (544.6) 28.9 (734) Units: inches (mm) - Epson PowerLite Pro Z8150NL | User Manual - Page 206
Glossary 206 Glossary This section explains easily terms that are used with the projector and difficult terms that are not explained in the text of this guide. For details, refer to other commercially available publications. AMX Device Discovery DHCP DICOM HDCP HDTV IP Address S-Video SDI SDTV - Epson PowerLite Pro Z8150NL | User Manual - Page 207
the network address on a divided network (subnet) from the IP Addressg. Sync. The signals output from computers have a specific frequency. If the projector frequency does not match this frequency, the resulting images are not of a good quality. The process of matching the phases of these signals - Epson PowerLite Pro Z8150NL | User Manual - Page 208
Glossary Tracking Trap IP Address Progressive Refresh Rate 208 The signals output from computers have a specific frequency. If the projector frequency does not match this frequency, the resulting images are not of a good quality. The process of matching the frequency of these signals (the number - Epson PowerLite Pro Z8150NL | User Manual - Page 209
OS X 10.7.x In this guide, the operating systems above are referred Epson offers a recycling program for end of life products. Please go to www.epson.com/recycle for information on how to return your products for proper disposal. Important Safety Instructions • Do not look into the lens when the projector - Epson PowerLite Pro Z8150NL | User Manual - Page 210
new batteries, and do not use any batteries other than those specified in this User's Guide. Replace the batteries as soon as they run out and remove the batteries if you will not be using the projector for a long period of time. Do not expose batteries to heat or flame and do - Epson PowerLite Pro Z8150NL | User Manual - Page 211
where the plug can be easily unplugged. • Unplug the projector from the wall outlet and refer servicing to qualified service personnel under the following conditions: If it does not operate normally when you follow the operating instructions, or exhibits a distinct change in performance; If smoke - Epson PowerLite Pro Z8150NL | User Manual - Page 212
hands. • Always attach the lens cover to the lens when not using the projector, to prevent the lens from becoming dirty or damaged. • Never try to with your eyes or mouth, seek medical advice immediately. • If the projector is mounted overhead and the lamp breaks, be careful to prevent pieces of - Epson PowerLite Pro Z8150NL | User Manual - Page 213
installation. This equipment generates, uses and can radiate radio frequency energy and, if not installed and used in accordance with the instructions, may cause harmful interference to radio communications. However, there is no guarantee that interference will not occur in a particular installation - Epson PowerLite Pro Z8150NL | User Manual - Page 214
of the GPL Programs until five (5) years after the discontinuation of same model of this projector product. If you desire to receive the source code of the GPL Programs, contact Epson as described in the User's Guide. These GPL Programs are WITHOUT ANY WARRANTY; without even the implied warranty of - Epson PowerLite Pro Z8150NL | User Manual - Page 215
• wireless_tools 29 • EPSON original drivers The GNU we are referring to freedom, not price. Our General Public Licenses are designed to make free software (and charge for this service if you wish), that you receive problems introduced by others will not reflect on the original authors' reputations. - Epson PowerLite Pro Z8150NL | User Manual - Page 216
General Notes 216 Finally, any free program is threatened constantly by software patents. We wish to avoid the danger that redistributors of a free program will individually obtain patent licenses, in effect making the program proprietary. To prevent this, we have made it clear that any patent - Epson PowerLite Pro Z8150NL | User Manual - Page 217
General Notes 217 Thus, it is not the intent of this section to claim rights or contest your rights to work written entirely by you; rather, the intent is to exercise the right to control the distribution of derivative or collective works based on the Program. In addition, mere aggregation of - Epson PowerLite Pro Z8150NL | User Manual - Page 218
spirit to the present version, but may differ in detail to address new problems or concerns. Each version is given a distinguishing version number. If the Foundation; we sometimes make exceptions for this. Our decision will be guided by the two goals of preserving the free status of all derivatives - Epson PowerLite Pro Z8150NL | User Manual - Page 219
RISK AS TO THE QUALITY AND PERFORMANCE OF THE PROGRAM IS WITH YOU. SHOULD THE PROGRAM PROVE DEFECTIVE, YOU ASSUME THE COST OF ALL NECESSARY SERVICING, REPAIR OR CORRECTION. 12. IN NO EVENT UNLESS REQUIRED BY APPLICABLE LAW OR AGREED TO IN WRITING WILL ANY COPYRIGHT HOLDER, OR ANY OTHER PARTY - Epson PowerLite Pro Z8150NL | User Manual - Page 220
the LGPL Programs until five (5) years after the discontinuation of same model of this projector product. If you desire to receive the source code of the LGPL Programs, contact Epson as described in the User's Guide. These LGPL Programs are WITHOUT ANY WARRANTY; without even the implied warranty of - Epson PowerLite Pro Z8150NL | User Manual - Page 221
we are referring to freedom of use, not price. Our General Public Licenses are designed to make of free software (and charge for this service if you wish); that you receive source the original author's reputation will not be affected by problems that might be introduced by others. Finally, software - Epson PowerLite Pro Z8150NL | User Manual - Page 222
General Notes 222 We call this license the "Lesser" General Public License because it does Less to protect the user's freedom than the ordinary General Public License. It also provides other free software developers Less of an advantage over competing non-free programs. These disadvantages are the - Epson PowerLite Pro Z8150NL | User Manual - Page 223
General Notes 223 You may charge a fee for the physical act of transferring a copy, and you may at your option offer warranty protection in exchange for a fee. 2. You may modify your copy or copies of the Library or any portion of it, thus forming a work based on the Library, and copy and - Epson PowerLite Pro Z8150NL | User Manual - Page 224
General Notes 224 If distribution of object code is made by offering access to copy from a designated place, then offering equivalent access to copy the source code from the same place satisfies the requirement to distribute the source code, even though third parties are not compelled to copy the - Epson PowerLite Pro Z8150NL | User Manual - Page 225
General Notes 225 You must give prominent notice with each copy of the work that the Library is used in it and that the Library and its use are covered by this License. You must supply a copy of this License. If the work during execution displays copyright notices, you must include the copyright - Epson PowerLite Pro Z8150NL | User Manual - Page 226
License from time to time. Such new versions will be similar in spirit to the present version, but may differ in detail to address new problems or concerns. Each version is given a distinguishing version number. If the Library specifies a version number of this License which applies to it and "any - Epson PowerLite Pro Z8150NL | User Manual - Page 227
Foundation; we sometimes make exceptions for this. Our decision will be guided by the two goals of preserving the free status of all derivatives SHOULD THE LIBRARY PROVE DEFECTIVE, YOU ASSUME THE COST OF ALL NECESSARY SERVICING, REPAIR OR CORRECTION. 16. IN NO EVENT UNLESS REQUIRED BY APPLICABLE LAW - Epson PowerLite Pro Z8150NL | User Manual - Page 228
1 April 1990 Ty Coon, President of Vice That's all there is to it! BSD License (Berkeley Software Distribution License) This projector product includes the open source software program "University of California, Berkeley License (Berkeley Software Distribution License)" which applies the terms and - Epson PowerLite Pro Z8150NL | User Manual - Page 229
(INCLUDING, BUT NOT LIMITED TO, PROCUREMENT OF SUBSTITUTE GOODS OR SERVICES; LOSS OF USE, DATA, OR PROFITS; OR BUSINESS INTERRUPTION) , EVEN IF ADVISED OF THE POSSIBILITY OF SUCH DAMAGE. libjpeg This projector product includes the open source software program "libjpeg" which applies the terms - Epson PowerLite Pro Z8150NL | User Manual - Page 230
" was produced with GNU Autoconf. It is copyright by the Free Software Foundation but is freely distributable. The same holds for its supporting scripts (config.guess, config.sub, ltconfig, ltmain.sh). Another support script, install-sh, is copyright by M.I.T. but is also freely distributable. - Epson PowerLite Pro Z8150NL | User Manual - Page 231
the unpatented Huffman mode, it is unlikely that very many implementations will support it.) So far as we are aware, there are no patent restrictions Incorporated. GIF(sm) is a Service Mark property of CompuServe Incorporated." libpng This projector product includes the open source software - Epson PowerLite Pro Z8150NL | User Manual - Page 232
General Notes 232 libpng versions 1.0.7, July 1, 2000, through 1.2.5 - October 3, 2002, are Copyright (c) 2000-2002 Glenn Randers-Pehrson, and are distributed according to the same disclaimer and license as libpng-1.0.6 with the following individuals added to the list of Contributing Authors Simon - Epson PowerLite Pro Z8150NL | User Manual - Page 233
, and encourage the use of this source code as a component to supporting the PNG file format in commercial products. If you use this source code Randers-Pehrson [email protected] September 12, 2004 zlib This projector product includes the open source software program "zlib" which applies - Epson PowerLite Pro Z8150NL | User Manual - Page 234
modified sources, we would appreciate that you include in the file ChangeLog history information documenting your changes. mDNSResponder This projector product includes the open source software program "mDNSResponder" which applies the following license terms "Apache License Version 2.0, January - Epson PowerLite Pro Z8150NL | User Manual - Page 235
General Notes 235 License terms "Apache License Version 2.0, January 2004" are as follows. Apache License Version 2.0, January 2004 http://www.apache.org/licenses/ TERMS AND CONDITIONS FOR USE, REPRODUCTION, AND DISTRIBUTION 1. Definitions. "License" shall mean the terms and conditions for use, - Epson PowerLite Pro Z8150NL | User Manual - Page 236
General Notes 236 2. Grant of Copyright License. Subject to the terms and conditions of this License, each Contributor hereby grants to You a perpetual, worldwide, non-exclusive, no-charge, royalty-free, irrevocable copyright license to reproduce, prepare Derivative Works of, publicly display, - Epson PowerLite Pro Z8150NL | User Manual - Page 237
License does not grant permission to use the trade names, trademarks, service marks, or product names of the Licensor, except as required for , You may choose to offer, and charge a fee for, acceptance of support, warranty, indemnity, or other liability obligations and/or rights consistent with this - Epson PowerLite Pro Z8150NL | User Manual - Page 238
General Notes 238 newlib This projector product includes the open source software program "newlib" which applies the terms and conditions provided by owner of the copyright to the "newlib". The "newlib" - Epson PowerLite Pro Z8150NL | User Manual - Page 239
DAMAGES (INCLUDING, BUT NOT LIMITED TO, PROCUREMENT OF SUBSTITUTE GOODS OR SERVICES; LOSS OF USE, DATA, OR PROFITS; OR BUSINESS INTERRUPTION) HOWEVER the copyright notice and this permission notice and warranty disclaimer appear in supporting documentation, and that the name of Lucent or any of its - Epson PowerLite Pro Z8150NL | User Manual - Page 240
benefit from your experience, please report any problems or suggestions about this software to the 29K Technical Support Center at 800-29-29-AMD (800- The direct dial number is 512-462-4118. Advanced Micro Devices, Inc. 29K Support Products Mail Stop 573 5900 E. Ben White Blvd. Austin, TX 78741 800- - Epson PowerLite Pro Z8150NL | User Manual - Page 241
LIABLE FOR ANY DIRECT, INDIRECT, INCIDENTAL, SPECIAL, EXEMPLARY, OR CONSEQUENTIAL DAMAGES (INCLUDING, BUT NOT LIMITED TO, PROCUREMENT OF SUBSTITUTE GOODS OR SERVICES; LOSS OF USE, DATA, OR PROFITS; OR BUSINESS INTERRUPTION) HOWEVER CAUSED AND ON ANY THEORY OF LIABILITY, WHETHER IN CONTRACT, STRICT - Epson PowerLite Pro Z8150NL | User Manual - Page 242
benefit from your experience, please report any problems or suggestions about this software to the SuperH Support Center via e-mail at [email protected] (INCLUDING, BUT NOT LIMITED TO, PROCUREMENT OF SUBSTITUTE GOODS OR SERVICES; LOSS OF USE, DATA, OR PROFITS; OR BUSINESS INTERRUPTION) - Epson PowerLite Pro Z8150NL | User Manual - Page 243
LIABLE FOR ANY DIRECT, INDIRECT, INCIDENTAL, SPECIAL, EXEMPLARY, OR CONSEQUENTIAL DAMAGES (INCLUDING, BUT NOT LIMITED TO, PROCUREMENT OF SUBSTITUTE GOODS OR SERVICES; LOSS OF USE, DATA, OR PROFITS; OR BUSINESS INTERRUPTION) HOWEVER CAUSED AND ON ANY THEORY OF LIABILITY, WHETHER IN CONTRACT, STRICT - Epson PowerLite Pro Z8150NL | User Manual - Page 244
(INCLUDING, BUT NOT LIMITED TO, PROCUREMENT OF SUBSTITUTE GOODS OR SERVICES; LOSS OF USE, DATA, OR PROFITS; OR BUSINESS INTERRUPTION) HOWEVER a copy or modification of this software and in all copies of the supporting documentation for such software. THIS SOFTWARE IS BEING PROVIDED "AS IS", WITHOUT - Epson PowerLite Pro Z8150NL | User Manual - Page 245
DAMAGES (INCLUDING, BUT NOT LIMITED TO, PROCUREMENT OF SUBSTITUTE GOODS OR SERVICES; LOSS OF USE, DATA, OR PROFITS; OR BUSINESS INTERRUPTION) HOWEVER that both the copyright notice and this permission notice appear in supporting documentation. In addition, Intel grants this permission provided that - Epson PowerLite Pro Z8150NL | User Manual - Page 246
LIABLE FOR ANY DIRECT, INDIRECT, INCIDENTAL, SPECIAL, EXEMPLARY, OR CONSEQUENTIAL DAMAGES (INCLUDING, BUT NOT LIMITED TO, PROCUREMENT OF SUBSTITUTE GOODS OR SERVICES; LOSS OF USE, DATA, OR PROFITS; OR BUSINESS INTERRUPTION) HOWEVER CAUSED AND ON ANY THEORY OF LIABILITY, WHETHER IN CONTRACT, STRICT - Epson PowerLite Pro Z8150NL | User Manual - Page 247
LIABLE FOR ANY DIRECT, INDIRECT, INCIDENTAL, SPECIAL, EXEMPLARY, OR CONSEQUENTIAL DAMAGES (INCLUDING, BUT NOT LIMITED TO, PROCUREMENT OF SUBSTITUTE GOODS OR SERVICES; LOSS OF USE, DATA, OR PROFITS; OR BUSINESS INTERRUPTION) HOWEVER CAUSED AND ON ANY THEORY OF LIABILITY, WHETHER IN CONTRACT, STRICT - Epson PowerLite Pro Z8150NL | User Manual - Page 248
LIABLE FOR ANY DIRECT, INDIRECT, INCIDENTAL, SPECIAL, EXEMPLARY, OR CONSEQUENTIAL DAMAGES (INCLUDING, BUT NOT LIMITED TO, PROCUREMENT OF SUBSTITUTE GOODS OR SERVICES; LOSS OF USE, DATA, OR PROFITS; OR BUSINESS INTERRUPTION) HOWEVER CAUSED AND ON ANY THEORY OF LIABILITY, WHETHER IN CONTRACT, STRICT - Epson PowerLite Pro Z8150NL | User Manual - Page 249
LIABLE FOR ANY DIRECT, INDIRECT, INCIDENTAL, SPECIAL, EXEMPLARY, OR CONSEQUENTIAL DAMAGES (INCLUDING, BUT NOT LIMITED TO, PROCUREMENT OF SUBSTITUTE GOODS OR SERVICES; LOSS OF USE, DATA, OR PROFITS; OR BUSINESS INTERRUPTION) HOWEVER CAUSED AND ON ANY THEORY OF LIABILITY, WHETHER IN CONTRACT, STRICT - Epson PowerLite Pro Z8150NL | User Manual - Page 250
LIABLE FOR ANY DIRECT, INDIRECT, INCIDENTAL, SPECIAL, EXEMPLARY, OR CONSEQUENTIAL DAMAGES (INCLUDING, BUT NOT LIMITED TO, PROCUREMENT OF SUBSTITUTE GOODS OR SERVICES; LOSS OF USE, DATA, OR PROFITS; OR BUSINESS INTERRUPTION) HOWEVER CAUSED AND ON ANY THEORY OF LIABILITY, WHETHER IN CONTRACT, STRICT - Epson PowerLite Pro Z8150NL | User Manual - Page 251
DAMAGES (INCLUDING, BUT NOT LIMITED TO, PROCUREMENT OF SUBSTITUTE GOODS OR SERVICES; LOSS OF USE, DATA, OR PROFITS; OR BUSINESS INTERRUPTION) HOWEVER and conditions (hereinafter referred to as "WPA Supplicant License"). The projector uses this product in compliance with the BSD License, as part of - Epson PowerLite Pro Z8150NL | User Manual - Page 252
LIABLE FOR ANY DIRECT, INDIRECT, INCIDENTAL, SPECIAL, EXEMPLARY, OR CONSEQUENTIAL DAMAGES (INCLUDING, BUT NOT LIMITED TO, PROCUREMENT OF SUBSTITUTE GOODS OR SERVICES; LOSS OF USE, DATA, OR PROFITS; OR BUSINESS INTERRUPTION) HOWEVER CAUSED AND ON ANY THEORY OF LIABILITY, WHETHER IN CONTRACT, STRICT - Epson PowerLite Pro Z8150NL | User Manual - Page 253
.MPEGLA.COM Trademarks EPSON®, Instant Off®, PowerLite®, and Quick Corner® are registered trademarks, and EPSON Exceed Your Vision is a registered logomark of Seiko Epson Corporation. PrivateLine® is a registered trademark, and EPSON StoreSM and Extra CareSM are service marks of Epson America, Inc - Epson PowerLite Pro Z8150NL | User Manual - Page 254
or alterations to this product, or (excluding the U.S.) failure to strictly comply with Seiko Epson Corporation's operating and maintenance instructions. Seiko Epson Corporation shall not be liable for any damages or problems arising from the use of any options or any consumable products other than
-
 1
1 -
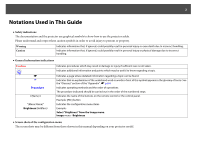 2
2 -
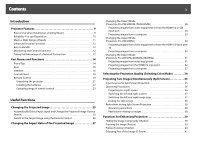 3
3 -
 4
4 -
 5
5 -
 6
6 -
 7
7 -
8
-
9
-
10
-
11
-
12
-
13
-
14
-
15
-
16
-
17
-
18
-
19
-
20
-
21
-
22
-
23
-
24
-
25
-
26
-
27
-
28
-
29
-
30
-
31
-
32
-
33
-
34
-
35
-
36
-
37
-
38
-
39
-
40
-
41
-
42
-
43
-
44
-
45
-
46
-
47
-
48
-
49
-
50
-
51
-
52
-
53
-
54
-
55
-
56
-
57
-
58
-
59
-
60
-
61
-
62
-
63
-
64
-
65
-
66
-
67
-
68
-
69
-
70
-
71
-
72
-
73
-
74
-
75
-
76
-
77
-
78
-
79
-
80
-
81
-
82
-
83
-
84
-
85
-
86
-
87
-
88
-
89
-
90
-
91
-
92
-
93
-
94
-
95
-
96
-
97
-
98
-
99
-
100
-
101
-
102
-
103
-
104
-
105
-
106
-
107
-
108
-
109
-
110
-
111
-
112
-
113
-
114
-
115
-
116
-
117
-
118
-
119
-
120
-
121
-
122
-
123
-
124
-
125
-
126
-
127
-
128
-
129
-
130
-
131
-
132
-
133
-
134
-
135
-
136
-
137
-
138
-
139
-
140
-
141
-
142
-
143
-
144
-
145
-
146
-
147
-
148
-
149
-
150
-
151
-
152
-
153
-
154
-
155
-
156
-
157
-
158
-
159
-
160
-
161
-
162
-
163
-
164
-
165
-
166
-
167
-
168
-
169
-
170
-
171
-
172
-
173
-
174
-
175
-
176
-
177
-
178
-
179
-
180
-
181
-
182
-
183
-
184
-
185
-
186
-
187
-
188
-
189
-
190
-
191
-
192
-
193
-
194
-
195
-
196
-
197
-
198
-
199
-
200
-
201
-
202
-
203
-
204
-
205
-
206
-
207
-
208
-
209
-
210
-
211
-
212
-
213
-
214
-
215
-
216
-
217
-
218
-
219
-
220
-
221
-
222
-
223
-
224
-
225
-
226
-
227
-
228
-
229
-
230
-
231
-
232
-
233
-
234
-
235
-
236
-
237
-
238
-
239
-
240
-
241
-
242
-
243
-
244
-
245
-
246
-
247
-
248
-
249
-
250
-
251
-
252
-
253
-
254
 |
 |

PowerLite® Pro
Z8150NL/Z8250NL/Z8255NL/
Z8350WNL/Z8450WUNL/Z8455WUNL
User’s Guide