HP CC567A User Guide - Page 106
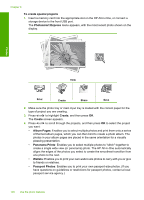
Create special projects from your photos, screen appears
 |
View all HP CC567A manuals
Add to My Manuals
Save this manual to your list of manuals |
Page 106 highlights
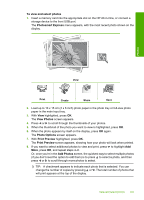
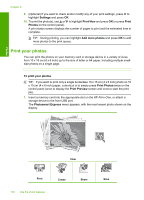
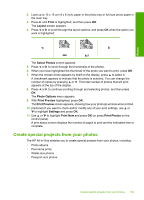
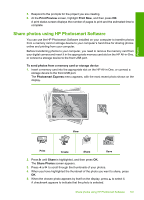
Photos 2. Load up to 10 x 15 cm (4 x 6 inch) paper in the photo tray or full-size photo paper in the main tray. 3. Press until Print is highlighted, and then press OK. The Layout screen appears. 4. Press or to scroll through the layout options, and press OK when the option you want is highlighted: 4x6 5x7 The Select Photos screen appears. 5. Press or to scroll through the thumbnails of the photos. 6. When you have highlighted the thumbnail of the photo you want to print, press OK. 7. When the chosen photo appears by itself on the display, press to select it. A checkmark appears to indicate that the photo is selected. You can change the number of copies by pressing or . The total number of photos that will print appears at the top of the display. 8. Press or to continue scrolling through and selecting photos, and then press OK. The Photo Options menu appears. 9. With Print Preview highlighted, press OK. The Print Preview screen appears, showing how your photo(s) will look when printed. 10. (Optional) If you want to check and/or modify any of your print settings, use or to highlight Settings and press OK. 11. Use or to highlight Print Now and press OK (or press Print Photos on the control panel). A print status screen displays the number of pages to print and the estimated time to complete. Create special projects from your photos The HP All-in-One enables you to create special projects from your photos, including: • Photo albums • Panorama prints • Wallet-size photos • Passport-size photos Create special projects from your photos 105
-
 1
1 -
2
-
3
-
4
-
5
-
6
-
7
-
8
-
9
-
10
-
11
-
12
-
13
-
14
-
15
-
16
-
17
-
18
-
19
-
20
-
21
-
22
-
23
-
24
-
25
-
26
-
27
-
28
-
29
-
30
-
31
-
32
-
33
-
34
-
35
-
36
-
37
-
38
-
39
-
40
-
41
-
42
-
43
-
44
-
45
-
46
-
47
-
48
-
49
-
50
-
51
-
52
-
53
-
54
-
55
-
56
-
57
-
58
-
59
-
60
-
61
-
62
-
63
-
64
-
65
-
66
-
67
-
68
-
69
-
70
-
71
-
72
-
73
-
74
-
75
-
76
-
77
-
78
-
79
-
80
-
81
-
82
-
83
-
84
-
85
-
86
-
87
-
88
-
89
-
90
-
91
-
92
-
93
-
94
-
95
-
96
-
97
-
98
-
99
-
100
-
 101
101 -
 102
102 -
 103
103 -
 104
104 -
 105
105 -
 106
106 -
 107
107 -
 108
108 -
 109
109 -
 110
110 -
 111
111 -
112
-
113
-
114
-
115
-
116
-
117
-
118
-
119
-
120
-
121
-
122
-
123
-
124
-
125
-
126
-
127
-
128
-
129
-
130
-
131
-
132
-
133
-
134
-
135
-
136
-
137
-
138
-
139
-
140
-
141
-
142
-
143
-
144
-
145
-
146
-
147
-
148
-
149
-
150
-
151
-
152
-
153
-
154
-
155
-
156
-
157
-
158
-
159
-
160
-
161
-
162
-
163
-
164
-
165
-
166
-
167
-
168
-
169
-
170
-
171
-
172
-
173
-
174
-
175
-
176
-
177
-
178
-
179
-
180
-
181
-
182
-
183
-
184
-
185
-
186
-
187
-
188
-
189
-
190
-
191
-
192
-
193
-
194
-
195
-
196
-
197
-
198
-
199
-
200
-
201
-
202
-
203
-
204
-
205
-
206
-
207
-
208
-
209
-
210
-
211
-
212
-
213
-
214
-
215
-
216
-
217
-
218
-
219
-
220
-
221
-
222
-
223
-
224
-
225
-
226
-
227
-
228
-
229
-
230
-
231
-
232
-
233
-
234
-
235
-
236
-
237
-
238
-
239
-
240
-
241
-
242
-
243
-
244
-
245
-
246
-
247
-
248
-
249
-
250
-
251
-
252
-
253
-
254
-
255
-
256
-
257
-
258
-
259
-
260
-
261
-
262
-
263
-
264
-
265
-
266
-
267
-
268
-
269
-
270
-
271
-
272
-
273
-
274
-
275
-
276
-
277
-
278
-
279
-
280
-
281
-
282
-
283
-
284
-
285
-
286
-
287
-
288
-
289
-
290
-
291
-
292
-
293
-
294
-
295
-
296
-
297
-
298
-
299
-
300
-
301
-
302
-
303
-
304
-
305
-
306
-
307
-
308
-
309
 |
 |