HP CC567A User Guide - Page 68
Delete speed dial entries, Print the speed dial list, Delete Speed Dial
 |
View all HP CC567A manuals
Add to My Manuals
Save this manual to your list of manuals |
Page 68 highlights
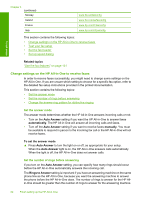
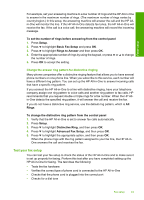
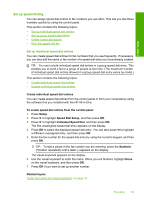
Finish setup 5. Press or to scroll through the individual speed dial entries you set up, and then press OK to select the appropriate entry. Repeat this step for each number you want to add to the group speed dial. 6. When you are done, press to highlight Done Selecting, and then press OK. The visual keyboard appears on the display. 7. Use the visual keyboard to enter a name for the group speed dial. When you are finished, highlight Done on the visual keyboard, and then press OK. 8. Press OK to add another group. Related topics • "Enter text using the visual keyboard" on page 19 • "Broadcast a fax to multiple recipients" on page 136 Delete speed dial entries You can delete an individual or group speed dial entry. When deleting speed dial entries, consider the following: • Deleting an individual speed dial entry also deletes that entry from any groups to which you have assigned it. • Deleting a group speed dial entry does not delete the individual speed dial entries associated with it. You can still use the individual speed dial entries to send faxes. To delete speed dial entries from the control panel 1. Press Setup. 2. Press to highlight Speed Dial Setup, and then press OK. 3. Press to highlight Delete Speed Dial, and then press OK. 4. Press to highlight the speed dial entry that you want to delete, and then press OK. Print the speed dial list You can print a list of all the speed dial entries that you programmed on the HP All-inOne. To print the speed dial list 1. Press Setup. 2. Press to highlight Speed Dial Setup, and then press OK. 3. Press to highlight Print Speed Dial List, and then press OK. TIP: You can also print this list by selecting Speed Dial List from the Print Report menu. Fax setup 67
-
 1
1 -
2
-
3
-
4
-
5
-
6
-
7
-
8
-
9
-
10
-
11
-
12
-
13
-
14
-
15
-
16
-
17
-
18
-
19
-
20
-
21
-
22
-
23
-
24
-
25
-
26
-
27
-
28
-
29
-
30
-
31
-
32
-
33
-
34
-
35
-
36
-
37
-
38
-
39
-
40
-
41
-
42
-
43
-
44
-
45
-
46
-
47
-
48
-
49
-
50
-
51
-
52
-
53
-
54
-
55
-
56
-
57
-
58
-
59
-
60
-
61
-
62
-
 63
63 -
 64
64 -
 65
65 -
 66
66 -
 67
67 -
 68
68 -
 69
69 -
 70
70 -
 71
71 -
 72
72 -
 73
73 -
74
-
75
-
76
-
77
-
78
-
79
-
80
-
81
-
82
-
83
-
84
-
85
-
86
-
87
-
88
-
89
-
90
-
91
-
92
-
93
-
94
-
95
-
96
-
97
-
98
-
99
-
100
-
101
-
102
-
103
-
104
-
105
-
106
-
107
-
108
-
109
-
110
-
111
-
112
-
113
-
114
-
115
-
116
-
117
-
118
-
119
-
120
-
121
-
122
-
123
-
124
-
125
-
126
-
127
-
128
-
129
-
130
-
131
-
132
-
133
-
134
-
135
-
136
-
137
-
138
-
139
-
140
-
141
-
142
-
143
-
144
-
145
-
146
-
147
-
148
-
149
-
150
-
151
-
152
-
153
-
154
-
155
-
156
-
157
-
158
-
159
-
160
-
161
-
162
-
163
-
164
-
165
-
166
-
167
-
168
-
169
-
170
-
171
-
172
-
173
-
174
-
175
-
176
-
177
-
178
-
179
-
180
-
181
-
182
-
183
-
184
-
185
-
186
-
187
-
188
-
189
-
190
-
191
-
192
-
193
-
194
-
195
-
196
-
197
-
198
-
199
-
200
-
201
-
202
-
203
-
204
-
205
-
206
-
207
-
208
-
209
-
210
-
211
-
212
-
213
-
214
-
215
-
216
-
217
-
218
-
219
-
220
-
221
-
222
-
223
-
224
-
225
-
226
-
227
-
228
-
229
-
230
-
231
-
232
-
233
-
234
-
235
-
236
-
237
-
238
-
239
-
240
-
241
-
242
-
243
-
244
-
245
-
246
-
247
-
248
-
249
-
250
-
251
-
252
-
253
-
254
-
255
-
256
-
257
-
258
-
259
-
260
-
261
-
262
-
263
-
264
-
265
-
266
-
267
-
268
-
269
-
270
-
271
-
272
-
273
-
274
-
275
-
276
-
277
-
278
-
279
-
280
-
281
-
282
-
283
-
284
-
285
-
286
-
287
-
288
-
289
-
290
-
291
-
292
-
293
-
294
-
295
-
296
-
297
-
298
-
299
-
300
-
301
-
302
-
303
-
304
-
305
-
306
-
307
-
308
-
309
 |
 |