HP LaserJet P4014 HP LaserJet P4010 and P4510 Series - User Guide - Page 174
Clear jams, Clear jams from the top-cover and print-cartridge areas
 |
View all HP LaserJet P4014 manuals
Add to My Manuals
Save this manual to your list of manuals |
Page 174 highlights
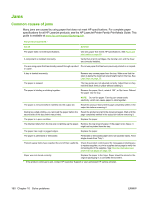
Clear jams Clear jams from the top-cover and print-cartridge areas 1. Open the top cover and remove the print cartridge. CAUTION: To prevent damage to the print cartridge, do not expose it to light for more than a few minutes. Cover the print cartridge with a sheet of paper while it is outside of the product. 2. Use the green handle to lift the paper-access plate. Slowly pull the jammed paper out of the product. Do not tear the paper. If paper is difficult to remove, try clearing it from the tray area. See Clear jams from the trays on page 166. 3. Open Tray 1 and remove the envelope accessory cover. If paper is present, remove it. 162 Chapter 10 Solve problems ENWW
-
 1
1 -
2
-
3
-
4
-
5
-
6
-
7
-
8
-
9
-
10
-
11
-
12
-
13
-
14
-
15
-
16
-
17
-
18
-
19
-
20
-
21
-
22
-
23
-
24
-
25
-
26
-
27
-
28
-
29
-
30
-
31
-
32
-
33
-
34
-
35
-
36
-
37
-
38
-
39
-
40
-
41
-
42
-
43
-
44
-
45
-
46
-
47
-
48
-
49
-
50
-
51
-
52
-
53
-
54
-
55
-
56
-
57
-
58
-
59
-
60
-
61
-
62
-
63
-
64
-
65
-
66
-
67
-
68
-
69
-
70
-
71
-
72
-
73
-
74
-
75
-
76
-
77
-
78
-
79
-
80
-
81
-
82
-
83
-
84
-
85
-
86
-
87
-
88
-
89
-
90
-
91
-
92
-
93
-
94
-
95
-
96
-
97
-
98
-
99
-
100
-
101
-
102
-
103
-
104
-
105
-
106
-
107
-
108
-
109
-
110
-
111
-
112
-
113
-
114
-
115
-
116
-
117
-
118
-
119
-
120
-
121
-
122
-
123
-
124
-
125
-
126
-
127
-
128
-
129
-
130
-
131
-
132
-
133
-
134
-
135
-
136
-
137
-
138
-
139
-
140
-
141
-
142
-
143
-
144
-
145
-
146
-
147
-
148
-
149
-
150
-
151
-
152
-
153
-
154
-
155
-
156
-
157
-
158
-
159
-
160
-
161
-
162
-
163
-
164
-
165
-
166
-
167
-
168
-
 169
169 -
 170
170 -
 171
171 -
 172
172 -
 173
173 -
 174
174 -
 175
175 -
 176
176 -
 177
177 -
 178
178 -
 179
179 -
180
-
181
-
182
-
183
-
184
-
185
-
186
-
187
-
188
-
189
-
190
-
191
-
192
-
193
-
194
-
195
-
196
-
197
-
198
-
199
-
200
-
201
-
202
-
203
-
204
-
205
-
206
-
207
-
208
-
209
-
210
-
211
-
212
-
213
-
214
-
215
-
216
-
217
-
218
-
219
-
220
-
221
-
222
-
223
-
224
-
225
-
226
-
227
-
228
-
229
-
230
-
231
-
232
-
233
-
234
-
235
-
236
-
237
-
238
-
239
-
240
-
241
-
242
-
243
-
244
-
245
-
246
 |
 |

Clear jams
Clear jams from the top-cover and print-cartridge areas
1.
Open the top cover and remove the print cartridge.
CAUTION:
To prevent damage to the print cartridge, do not expose it to light for more than a few
minutes. Cover the print cartridge with a sheet of paper while it is outside of the product.
2.
Use the green handle to lift the paper-access plate. Slowly pull the jammed paper out of the product.
Do not tear the paper. If paper is difficult to remove, try clearing it from the tray area. See
Clear
jams from the trays
on page
166
.
3.
Open Tray 1 and remove the envelope accessory cover. If paper is present, remove it.
162
Chapter 10
Solve problems
ENWW