HP LaserJet P4014 HP LaserJet P4010 and P4510 Series - User Guide - Page 197
Con Device, Print Quality, Fuser, Modes, Toner Density, Optimize, Line Detail=on
 |
View all HP LaserJet P4014 manuals
Add to My Manuals
Save this manual to your list of manuals |
Page 197 highlights
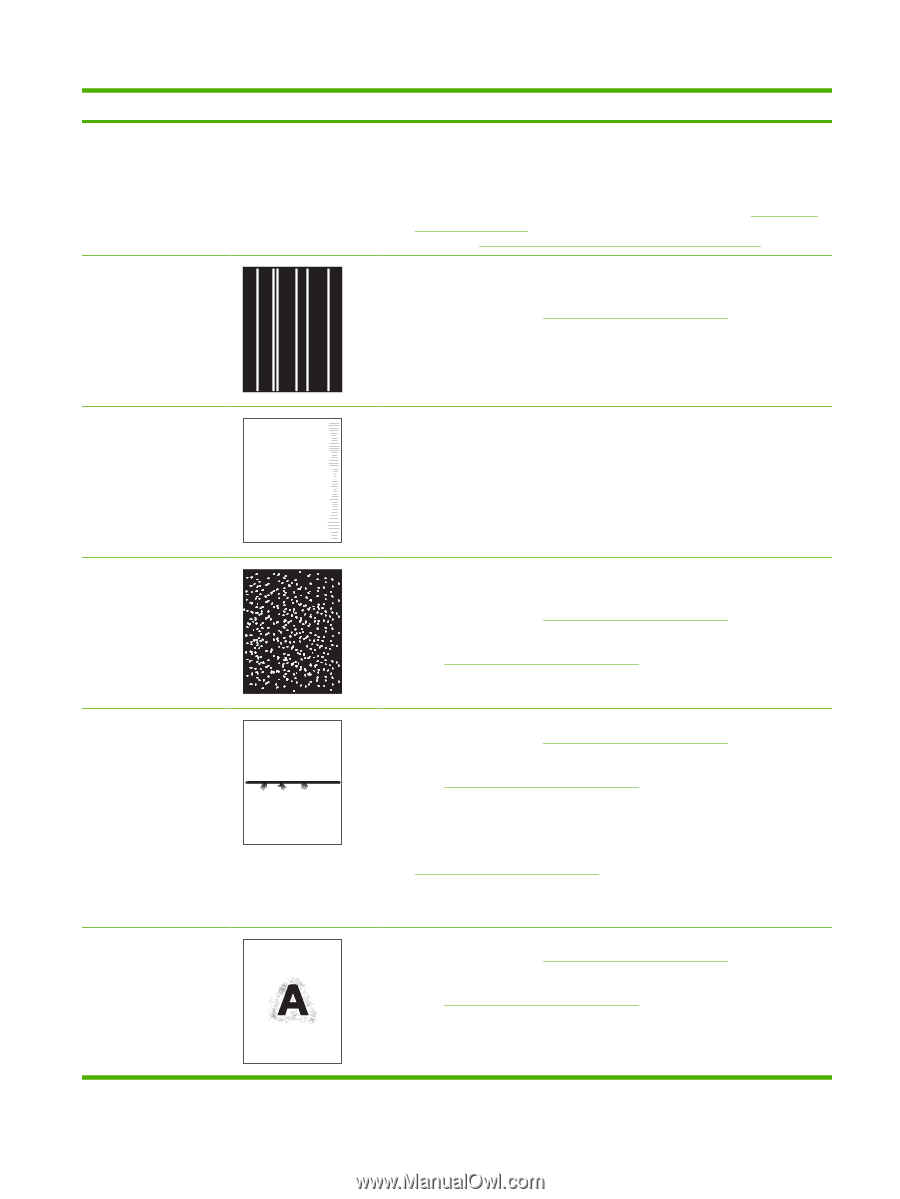
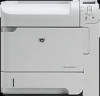
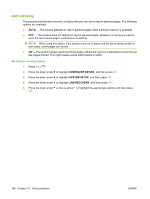
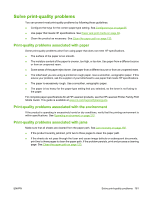
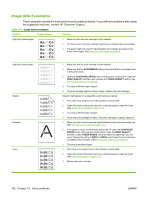
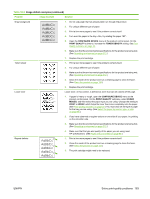
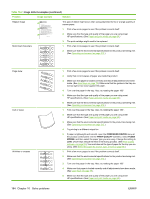
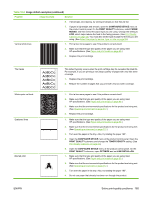
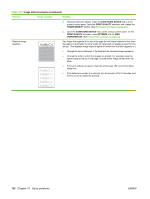
Table 10-2 Image defect examples (continued) Problem Image example Solution 6. If envelopes are creasing, try storing envelopes so that they lie flat. 7. If paper is lightweight and smooth, open the CONFIGURE DEVICE menu at the product control panel. On the PRINT QUALITY submenu, select FUSER MODES, and then select the paper type you are using. Change the setting to LOW, which helps reduce the heat in the fusing process. (See Print Quality submenu on page 22.) You must also set the type of paper for the tray you are using. (See Select the paper by source, type, or size on page 86.) Vertical white lines 1. Print a few more pages to see if the problem corrects itself. 2. Make sure that the type and quality of the paper you are using meet HP specifications. (See Paper and print media on page 69.) 3. Replace the print cartridge. Tire tracks White spots on black Scattered lines Blurred print AaBbCc AaBbCc AaBbCc AaBbCc AaBbCc This defect typically occurs when the print cartridge has far exceeded its rated life. For example, if you are printing a very large quantity of pages with very little toner coverage. 1. Replace the print cartridge. 2. Reduce the number of pages that you print with very low toner coverage. 1. Print a few more pages to see if the problem corrects itself. 2. Make sure that the type and quality of the paper you are using meet HP specifications. (See Paper and print media on page 69.) 3. Make sure that the environmental specifications for the product are being met. (See Operating environment on page 212.) 4. Replace the print cartridge. 1. Make sure that the type and quality of the paper you are using meet HP specifications. (See Paper and print media on page 69.) 2. Make sure that the environmental specifications for the product are being met. (See Operating environment on page 212.) 3. Turn over the paper in the tray. Also, try rotating the paper 180°. 4. Open the CONFIGURE DEVICE menu at the product control panel. Open the PRINT QUALITY submenu and change the TONER DENSITY setting. (See Print Quality submenu on page 22.) 5. Open the CONFIGURE DEVICE menu at the product control panel. On the PRINT QUALITY submenu, open OPTIMIZE and set LINE DETAIL=ON. 1. Make sure that the type and quality of the paper you are using meet HP specifications. (See Paper and print media on page 69.) 2. Make sure that the environmental specifications for the product are being met. (See Operating environment on page 212.) 3. Turn over the paper in the tray. Also, try rotating the paper 180°. 4. Do not use paper that already has been run through the product. ENWW Solve print-quality problems 185
-
 1
1 -
2
-
3
-
4
-
5
-
6
-
7
-
8
-
9
-
10
-
11
-
12
-
13
-
14
-
15
-
16
-
17
-
18
-
19
-
20
-
21
-
22
-
23
-
24
-
25
-
26
-
27
-
28
-
29
-
30
-
31
-
32
-
33
-
34
-
35
-
36
-
37
-
38
-
39
-
40
-
41
-
42
-
43
-
44
-
45
-
46
-
47
-
48
-
49
-
50
-
51
-
52
-
53
-
54
-
55
-
56
-
57
-
58
-
59
-
60
-
61
-
62
-
63
-
64
-
65
-
66
-
67
-
68
-
69
-
70
-
71
-
72
-
73
-
74
-
75
-
76
-
77
-
78
-
79
-
80
-
81
-
82
-
83
-
84
-
85
-
86
-
87
-
88
-
89
-
90
-
91
-
92
-
93
-
94
-
95
-
96
-
97
-
98
-
99
-
100
-
101
-
102
-
103
-
104
-
105
-
106
-
107
-
108
-
109
-
110
-
111
-
112
-
113
-
114
-
115
-
116
-
117
-
118
-
119
-
120
-
121
-
122
-
123
-
124
-
125
-
126
-
127
-
128
-
129
-
130
-
131
-
132
-
133
-
134
-
135
-
136
-
137
-
138
-
139
-
140
-
141
-
142
-
143
-
144
-
145
-
146
-
147
-
148
-
149
-
150
-
151
-
152
-
153
-
154
-
155
-
156
-
157
-
158
-
159
-
160
-
161
-
162
-
163
-
164
-
165
-
166
-
167
-
168
-
169
-
170
-
171
-
172
-
173
-
174
-
175
-
176
-
177
-
178
-
179
-
180
-
181
-
182
-
183
-
184
-
185
-
186
-
187
-
188
-
189
-
190
-
191
-
 192
192 -
 193
193 -
 194
194 -
 195
195 -
 196
196 -
 197
197 -
 198
198 -
 199
199 -
 200
200 -
 201
201 -
 202
202 -
203
-
204
-
205
-
206
-
207
-
208
-
209
-
210
-
211
-
212
-
213
-
214
-
215
-
216
-
217
-
218
-
219
-
220
-
221
-
222
-
223
-
224
-
225
-
226
-
227
-
228
-
229
-
230
-
231
-
232
-
233
-
234
-
235
-
236
-
237
-
238
-
239
-
240
-
241
-
242
-
243
-
244
-
245
-
246
 |
 |