HP Photosmart 618 HP Photosmart 618 digital camera - (English) User Guide
HP Photosmart 618 Manual
 |
View all HP Photosmart 618 manuals
Add to My Manuals
Save this manual to your list of manuals |
HP Photosmart 618 manual content summary:
- HP Photosmart 618 | HP Photosmart 618 digital camera - (English) User Guide - Page 1
HP 618 Digital Camera HP Imaging Technology User's Guide - HP Photosmart 618 | HP Photosmart 618 digital camera - (English) User Guide - Page 2
are registered trademarks of Adobe Systems Incorporated. Microsoft and Windows are registered trademarks of Microsoft Corporation. Apple, Macintosh, and Mac are trademarks of Apple Computer, Inc., registered in the U.S. and other countries. HP 618 Digital Camera User's Guide 2 Legal Notices - HP Photosmart 618 | HP Photosmart 618 digital camera - (English) User Guide - Page 3
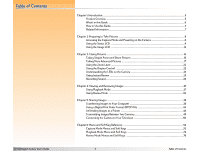
Table of Contents HP 618 Digital Camera User's Guide Chapter 1: Introduction ...5 Product Overview ...5 What's in this Guide ...6 How to Use this Guide ...7 Related Information ...7 Chapter 2: Preparing to Take Pictures ...8 Accessing the Capture Mode and Powering on the Camera 8 Using the Status - HP Photosmart 618 | HP Photosmart 618 digital camera - (English) User Guide - Page 4
Memory Cards ...109 Appendix C: Product Warranties ...110 Limited Product Warranty ...110 Hewlett-Packard Year 2000 Warranty ...112 Appendix D: Product Safety and Regulatory Information 113 Safety Information ...113 Regulatory Notices ...114 Glossary ...115 Index ...125 HP 618 Digital Camera User - HP Photosmart 618 | HP Photosmart 618 digital camera - (English) User Guide - Page 5
103. Note: Capture, Playback, and Review modes have menus and related soft keys you can use to change your camera's settings and to edit and organize images. (PC Connect mode does not have menus or soft keys.) Welcome to the HP 618 Digital Camera User's Guide. This guide will help you take high - HP Photosmart 618 | HP Photosmart 618 digital camera - (English) User Guide - Page 6
them to other cameras and printers, and viewing them on a television. "Chapter 6: Menu and Soft Key Reference" What each of your camera's menus and related soft keys do. "Chapter 7: Troubleshooting" How to fix common problems when using the camera, and how to contact HP Customer Care for - HP Photosmart 618 | HP Photosmart 618 digital camera - (English) User Guide - Page 7
in black and white, instead. Note: It is assumed that you have already used the HP 618 Digital Camera Quick Start Guide to install the batteries and the memory card in your camera. How to Use this Guide You can use this guide online, or you can print it out. The main advantage of using it online is - HP Photosmart 618 | HP Photosmart 618 digital camera - (English) User Guide - Page 8
covers the following topics: Š "Accessing the Capture Mode and Powering on the Camera" on page 8 Š "Using the Status LCD" on page 9 Š "Setting on page 13 Š "Understanding the Text Message Area" on page 12 Š "Viewing the Camera Status" on page 14 Š "Using the Overlay Soft Key" on page 14 Š "Using - HP Photosmart 618 | HP Photosmart 618 digital camera - (English) User Guide - Page 9
flash mode, timer mode, and auto focus range on the camera. Flash mode Timer mode Auto focus range Note: If you see 000 flashing in the status LCD, this means that either there is no memory card in the camera, or the memory card is full. Chapter 2: Preparing to Take Pictures 9 Using the Status - HP Photosmart 618 | HP Photosmart 618 digital camera - (English) User Guide - Page 10
pictures with the Macro auto focus range setting. Setting the Flash Mode Your camera has seven flash modes. The default flash mode is Auto (no icons displayed To use a slow sync mode of the flash in which the camera collects the image background with the available light and flashes to illuminate - HP Photosmart 618 | HP Photosmart 618 digital camera - (English) User Guide - Page 11
cycle the power on the camera (power it off and then on again). If you change the focus mode from Auto to Manual Focus in the Photo Assist release button. To use the remote infrared trigger on the HP Remote Control (included with the camera), which has a 3-second delay. Setting the Auto Focus - HP Photosmart 618 | HP Photosmart 618 digital camera - (English) User Guide - Page 12
you are running your camera on batteries rather than with the HP-approved AC power camera settings in the Capture, Playback, and Review modes, and to play back and review captured images in the Playback and Review Manual Focus Distance When you set the Focus Mode in the Photo Assist menu to Manual - HP Photosmart 618 | HP Photosmart 618 digital camera - (English) User Guide - Page 13
is set to Infinity, INF is displayed. Digital Zoom Indicator When the camera is in digital zoom, the digital zoom icon is displayed on the right side of the memory card is full. When capturing a slow process with a series of images. Press and release the shutter release button, and the camera - HP Photosmart 618 | HP Photosmart 618 digital camera - (English) User Guide - Page 14
appear on the Status screen, including: Š means that a memory card is inserted in the camera. Š means that the current auto focus range setting is Metering Auto Exposure Metering setting Version The version number of your camera's firmware To exit the Status screen and return to the live view - HP Photosmart 618 | HP Photosmart 618 digital camera - (English) User Guide - Page 15
camera has camera's general settings. To access the Capture mode menus: 1 Set the camera mode dial to Capture mode . 2 Power on the camera if you haven't already. 3 Press the MENU button on the back of the camera back of your camera (see Figure - HP Photosmart 618 | HP Photosmart 618 digital camera - (English) User Guide - Page 16
the Diopter Control" on page 22 Š "Understanding the LEDs on the Camera" on page 23 Š "Using Instant Review" on page 25 Š "Recording Sound" on page 26 Note: These instructions for taking simple point-and-shoot pictures assume that your camera is set to the default image type (One Shot), and that - HP Photosmart 618 | HP Photosmart 618 digital camera - (English) User Guide - Page 17
Wait for the shutter sound, indicating the camera has captured the image. Then release the button. The captured image appears for a 3-second Instant Review period on the image LCD. If you are happy with it, do nothing, and the image will be saved on the memory card. If not, you can delete the image - HP Photosmart 618 | HP Photosmart 618 digital camera - (English) User Guide - Page 18
Note: The image LCD uses a lot of battery power. If you are running your camera on batteries rather than with the HP-approved AC power adapter, you may want to limit your use of the image LCD and use the viewfinder instead. To turn the image LCD - HP Photosmart 618 | HP Photosmart 618 digital camera - (English) User Guide - Page 19
26. Š Delete the image by pressing the middle (Delete) soft key. Š Save the image to the memory card and return to the Capture mode immediately by pressing the right (Exit) soft key. Š Do nothing and, when Instant Review times out (the default time-out is 3 seconds), the image is then saved to the - HP Photosmart 618 | HP Photosmart 618 digital camera - (English) User Guide - Page 20
each image in a Continuous sequence except for the final one is automatically saved to the memory card before the camera captures the next image in the sequence. If Instant Review is off, each image is automatically saved before the next one is captured, and then the final one is saved automatically - HP Photosmart 618 | HP Photosmart 618 digital camera - (English) User Guide - Page 21
. Š Do nothing and, when Instant Review times out (the default time-out is 3 seconds), all of the images in the sequence are then saved to the memory card automatically. What's Next? The following sections provide more information about various features of your camera that you can use when taking - HP Photosmart 618 | HP Photosmart 618 digital camera - (English) User Guide - Page 22
the live view of Capture mode (for example, you press the MENU button on the camera to display the Capture mode menus, or you turn the camera mode dial to set the camera to another mode). To exit the digital zoom, you can also press, release, and then re-press the zoom lever in - HP Photosmart 618 | HP Photosmart 618 digital camera - (English) User Guide - Page 23
side of the viewfinder (see Figure 10) display either a green light, red light, or both, indicating either the focus status, flash status, a memory card problem, or that the camera is processing an image and is not ready to take a picture. Table 6: Viewfinder LEDs LED Green (Top) Red (Bottom) Both - HP Photosmart 618 | HP Photosmart 618 digital camera - (English) User Guide - Page 24
on the back of the camera (see Figure 12) blinks whenever the camera is reading from or writing to the memory card. Caution: Make sure the camera is powered off any time you remove the memory card from the camera. Removing the memory card when the memory card access LED is blinking could corrupt - HP Photosmart 618 | HP Photosmart 618 digital camera - (English) User Guide - Page 25
Note: When Instant Review is set to Off, the camera immediately returns to Capture mode, and the captured image or sequence of images is automatically saved to the memory card. Note: If you are unhappy with any other images within a Continuous sequence (rather than just the final image, which you - HP Photosmart 618 | HP Photosmart 618 digital camera - (English) User Guide - Page 26
the image: 1 Press the sound record button on the back of the camera to activate the recording. A microphone icon flashes and the length of the save the image(s) and the attached sound to the memory card. Š Do nothing and allow the Instant Review to time out. In this case, the image(s) and the - HP Photosmart 618 | HP Photosmart 618 digital camera - (English) User Guide - Page 27
Images" on page 32.) Accessing the Playback Mode To access the Playback mode: 1 Set the camera mode dial to Playback mode . 2 Power on the camera if you haven't already. The Playback mode screen is displayed on the image LCD. Chapter 4: Viewing and Reviewing Images 27 Using Playback Mode - HP Photosmart 618 | HP Photosmart 618 digital camera - (English) User Guide - Page 28
Viewing and Reviewing Images Viewing Images Full Screen When you first enter Playback mode, the image LCD displays the last image saved on the memory card. The image time the image was captured, as well as some of the key camera settings that were used to capture the image, such as the image type - HP Photosmart 618 | HP Photosmart 618 digital camera - (English) User Guide - Page 29
screen. Your slideshow can include all of the images on the memory card, or you can choose a single category of images to use. slideshow: 1 Press the MENU button on the back of the camera. The Slideshow option of the Play Settings menu is highlighted. Reviewing Images 29 Using Playback Mode - HP Photosmart 618 | HP Photosmart 618 digital camera - (English) User Guide - Page 30
Mode Accessing the Review Mode To access the Review mode: 1 Set the camera mode dial to Review mode . 2 Power on the camera if you haven't already. The Review mode screen is displayed on the image LCD (see Figure 14). The image LCD displays the images that are saved on the memory card. The images - HP Photosmart 618 | HP Photosmart 618 digital camera - (English) User Guide - Page 31
Review mode menus, that action will apply to all the marked images. For example, you can mark several images and delete them all at once, instead of having to delete one image at a time. To mark or unmark all of the images on the memory card take Timelapse pictures, the camera takes a sequence of - HP Photosmart 618 | HP Photosmart 618 digital camera - (English) User Guide - Page 32
group of images from the memory card. To delete images: 1 Select the image or mark the images you want to delete. If you want to delete one or more images (but not all the images) within a Timelapse sequence or a group of images, first follow the instructions in "Expanding and Collapsing Timelapse - HP Photosmart 618 | HP Photosmart 618 digital camera - (English) User Guide - Page 33
Image Groups You can group images to organize them in one folder on the memory card. To group images: 1 Mark the images you wish to group. 2 Press the MENU button on the back of the camera. The Edit menu of Review mode is displayed. 3 Press the down arrow on the 4-way controller to scroll - HP Photosmart 618 | HP Photosmart 618 digital camera - (English) User Guide - Page 34
. (When an image is protected, it cannot be deleted from the memory card.) To protect images: 1 Select an image or mark the images you want to protect. 2 Press the MENU button on the back of the camera. The Edit menu of Review mode is displayed. 3 Press the down arrow on the 4-way controller - HP Photosmart 618 | HP Photosmart 618 digital camera - (English) User Guide - Page 35
To deselect an image's category: 1 Select the image whose category you want to deselect. 2 Press the MENU button on the back of the camera. The Edit menu of Review mode is displayed. 3 Press the down arrow on the 4-way controller to scroll to the Categorize menu option. 4 Press the left (Edit) soft - HP Photosmart 618 | HP Photosmart 618 digital camera - (English) User Guide - Page 36
memory card, or press the left (Find) soft key to select a new range of dates. Searching for Images by Date and by Category You can use the Find menu in Review by date: 1 Press the MENU button on the back of the camera. The Edit menu of Review mode is displayed. 2 Press the right arrow on the 4-way - HP Photosmart 618 | HP Photosmart 618 digital camera - (English) User Guide - Page 37
for images by category: 1 Press the MENU button on the back of the camera. The Edit menu of Review mode is displayed. 2 Press the right arrow on the 4-way controller to scroll ) soft key to resume viewing all the images stored on the memory card. Chapter 4: Viewing and Reviewing Images 37 Using - HP Photosmart 618 | HP Photosmart 618 digital camera - (English) User Guide - Page 38
camera may not be supported and may be lost if you use image editing software other than the HP Photo Imaging Software with Digital Print Order Format (DPOF) File" on page 44 Š "JetSending Images to a Printer" on page 46 Š "Transmitting Images Between Two Cameras" on page 48 Š "Connecting the Camera - HP Photosmart 618 | HP Photosmart 618 digital camera - (English) User Guide - Page 39
followed the HP 618 Digital Camera Quick Start Guide to install the HP Photo Imaging Software on your computer. Figure 22: Connectors on the USB Cable To Computer Chapter 5: Sharing Images To Camera The one exception is Windows NT 4.0, because it does not support the USB interface. A Windows NT - HP Photosmart 618 | HP Photosmart 618 digital camera - (English) User Guide - Page 40
end of the USB cable to the bottom (USB) connector (see Figure 23). 5 Set the camera to PC Connect mode . 6 Power on the camera. Within a few seconds, your computer detects the camera on the USB port. What happens next depends on what version of Windows your computer is running: Windows Me Your - HP Photosmart 618 | HP Photosmart 618 digital camera - (English) User Guide - Page 41
If you have a Macintosh computer and have already followed the instructions in the HP 618 Digital Camera Quick Start Guide to set the USB Disk Drive mode on your camera, skip these instructions and go on to "Using Your Camera as a USB Mass Storage Device to Transfer Images" on page 42. Transferring - HP Photosmart 618 | HP Photosmart 618 digital camera - (English) User Guide - Page 42
98 or 2000 computer and have installed the HP Photo Imaging Software on your computer (by following the instructions in the HP 618 Digital Camera Quick Start Guide), then the main window of the HP Photo Imaging Software also opens. You can either follow step 6 below to copy the image files from - HP Photosmart 618 | HP Photosmart 618 digital camera - (English) User Guide - Page 43
followed the HP 618 Digital Camera Quick Start Guide to install the HP Photo Imaging Software on your computer. Transferring Images from a Memory Card to a Windows NT 4.0 Computer To transfer images to your Windows NT 4.0 computer, you must have either an HP printer (such as the HP P1000/1100 - HP Photosmart 618 | HP Photosmart 618 digital camera - (English) User Guide - Page 44
each of them. The file is used by selected HP printers and other printing devices that can read a DPOF file directly from the memory card. Creating a DPOF File To create a DPOF file: 1 Set the camera mode dial to Review mode . 2 Power on the camera if you haven't already. 3 Either select one image - HP Photosmart 618 | HP Photosmart 618 digital camera - (English) User Guide - Page 45
Print Order Form. 3 Press the middle (Erase) soft key to erase all of the entries from the Print Order Form. Chapter 5: Sharing Images 45 Using a Digital Print Order Format (DPOF) File - HP Photosmart 618 | HP Photosmart 618 digital camera - (English) User Guide - Page 46
Infrared Window on the Camera Chapter 5: Sharing Images JetSending Images to a Printer HP JetSend allows for easy, wireless printing. If your printer supports the HP JetSend infrared technology, you can transfer your images directly from the camera to the printer without connecting any cables. See - HP Photosmart 618 | HP Photosmart 618 digital camera - (English) User Guide - Page 47
on the back of the camera. The Review mode menus are displayed. Camera-Printer menu option. 7 Set your printer to receive images to print. See your printer's documentation for details. 8 Aim the camera's infrared window (see Figure 26 on page 46) at the printer's infrared sensor, and place the camera - HP Photosmart 618 | HP Photosmart 618 digital camera - (English) User Guide - Page 48
option is highlighted. 6 Press the left (Send) soft key on your camera. Your camera's image LCD reads: "Receiving Camera Ready?" 7 Set the other camera to receive images. See the other camera's documentation for details. 8 Aim your camera's infrared window (see Figure 26 on page 46) at the other - HP Photosmart 618 | HP Photosmart 618 digital camera - (English) User Guide - Page 49
two times to move to the Transmit menu. The Camera-Camera menu option is highlighted. 5 Press the middle (Receive) soft key on your camera. 6 Set the other camera to send images. See the other camera's documentation for details. 7 Aim your camera's infrared window (see Figure 26 on page 46) at the - HP Photosmart 618 | HP Photosmart 618 digital camera - (English) User Guide - Page 50
comes with a 6 ft. audio/ video cable, which you can use to connect the camera to a television. Note: Refer to your television's or VCR's documentation for more information about the video input format. Note: See your television's documentation for specific instructions on how to locate the video - HP Photosmart 618 | HP Photosmart 618 digital camera - (English) User Guide - Page 51
HP-approved AC power adapter to power the camera while you have it connected to a television. Figure 27: Connecting the Video Cable to the Camera Note: When the camera for specific instructions on how to select the video input. 2 Set the camera mode dial to either Playback mode or Review mode . - HP Photosmart 618 | HP Photosmart 618 digital camera - (English) User Guide - Page 52
your camera's firmware are posted from time-to-time on the HP website at: www.hp.com/photosmart. You can install these updates on your camera so that camera modes that have menus and soft keys: Š "Capture Mode Menus and Soft Keys" on page 52 Š "Playback Mode Menu and Soft Keys" on page 74 Š "Review - HP Photosmart 618 | HP Photosmart 618 digital camera - (English) User Guide - Page 53
; they also remain set when you cycle the power on the camera. Figure 29: File Settings Submenu - JPEG Figure 30: File Settings up to 5" x 7". Best - Produces the highest-quality images and uses the most memory (uses the lowest compression rate). Use this setting for images you plan to enlarge and - HP Photosmart 618 | HP Photosmart 618 digital camera - (English) User Guide - Page 54
page 109 lists the number of images an 8 MB, 16 MB, and 32 MB memory card can store, depending on the JPEG quality level or TIFF setting at which the camera is set. Note: All options you set are active from shotto-shot; they also remain set when you cycle the power on - HP Photosmart 618 | HP Photosmart 618 digital camera - (English) User Guide - Page 55
Figure 32: Photo Assist Menu Photo Assist Menu Use the Photo Assist menu to manipulate these more advanced camera operations: Š Exposure Š EV Compensation Š White Balance Š Focus Š AE Metering Š ISO Speed Table 12: Photo Assist Soft Keys Soft Key Function Edit Opens submenu associated with - HP Photosmart 618 | HP Photosmart 618 digital camera - (English) User Guide - Page 56
Exposure Mode Submenu Use the Exposure Mode submenu to select how the camera calculates exposure. You can select from these setting options: Š Auto Tv mode) by pressing the up and down arrows (see below). If the camera cannot properly expose because the picture subject is out of range, as in very - HP Photosmart 618 | HP Photosmart 618 digital camera - (English) User Guide - Page 57
it resets to its default setting when you cycle the power on the camera. Figure 34: EV Compensation Submenu Table 13: Exposure Mode Soft Keys Soft EV Compensation Submenu Use the EV (Exposure Value) Compensation submenu to manually adjust the exposure in 0.5 EV increments (- values for darker - HP Photosmart 618 | HP Photosmart 618 digital camera - (English) User Guide - Page 58
Note: The option you set is active from shot-toshot; it resets to its default setting when you cycle the power on the camera. Figure 35: White Balance Submenu White Balance Submenu Use the White Balance submenu to correct the color applied to a captured image under different lighting conditions - HP Photosmart 618 | HP Photosmart 618 digital camera - (English) User Guide - Page 59
option you set is active from shot-toshot; it resets to its default setting when you cycle the power on the camera. Figure 36: Focus Mode Submenu Note: Setting the camera to Manual focus mode cancels any selected auto focus range (Macro or Infinity) and turns off the corresponding icon on the status - HP Photosmart 618 | HP Photosmart 618 digital camera - (English) User Guide - Page 60
. Figure 37: AE Metering Submenu AE Metering Submenu Use the AE (Automatic Exposure) Metering submenu to select the area of the scene that the camera will use to set the exposure when you take a picture. Table 17: AE Metering Submenu Setting Average (default) Center-weighted Spot Function The - HP Photosmart 618 | HP Photosmart 618 digital camera - (English) User Guide - Page 61
; it resets to its default setting when you cycle the power on the camera. Figure 38: ISO Speed Submenu ISO Speed Submenu Use the ISO Speed submenu . You can select from these setting options: Š Auto (Default) − The camera automatically determines the best ISO speed for the scene. Š 100 Š 200 The - HP Photosmart 618 | HP Photosmart 618 digital camera - (English) User Guide - Page 62
Note: An image stamp becomes permanently embedded in the image and overwrites data in the image. You cannot remove it later. Figure 39: Image Stamp Menu Figure 40: Date/Time Stamp Submenu Image Stamp Menu Use the Image Stamp menu to place watermarks on your images as you capture them. The Image - HP Photosmart 618 | HP Photosmart 618 digital camera - (English) User Guide - Page 63
Note: If you have set the Color in the File Settings submenu to either B&W (black and white) or Sepia, the Image Stamp will also be B&W or Sepia, regardless of the color you set for the Text and Background Colors in the Image Stamp menu. Table 21: Settings for Date/Time, Text, and Logo Stamp - HP Photosmart 618 | HP Photosmart 618 digital camera - (English) User Guide - Page 64
Figure 41: Text Stamp Submenu Note: Text strings can be a maximum of 31 characters. Text Stamp Submenu Use the Text Stamp submenu to stamp an image with text that you enter using the text entry dialog. Text Stamp is either On or Off, and the default is Off. When it is On, you can set the following - HP Photosmart 618 | HP Photosmart 618 digital camera - (English) User Guide - Page 65
Figure 42: Logo Stamp Submenu Note: By default, no logo files are included with your camera. To learn how to get logo files, see the HP website at: www.hp.com/photosmart. Chapter 6: Menu and Soft Key Reference Logo Stamp Submenu Logo Stamp is either On or Off, and the default is Off. When it - HP Photosmart 618 | HP Photosmart 618 digital camera - (English) User Guide - Page 66
. Preferences Menu Use the Preferences menu to change a variety of your camera's general settings. You can select from these options: Š Display Š Sound Š Format Card Š PC Connect Mode Š Date & Time Š Image Counter Š Camera Name Š Language Š Reset Settings Table 26: Preferences Soft Keys Soft Key - HP Photosmart 618 | HP Photosmart 618 digital camera - (English) User Guide - Page 67
Menu and Soft Key Reference Display Submenu Use the Display submenu to control the display on the camera's image LCD. Table 27: Display Submenu Setting Brightness Level Instant Review (see Note) Live View (see Note) Sleep Timeout (see Note) Default 4 3 sec Off Options 1 (dimmest) - 7 (brightest - HP Photosmart 618 | HP Photosmart 618 digital camera - (English) User Guide - Page 68
you will hear the camera's system sounds, such as shutter clicks, beeps, and so forth. Figure 46: Format Card Confirmation Screen Chapter 6: to format the memory card (see Figure 46). Table 31: Format Card Soft Keys Soft Key Format Cancel Function Reformats the memory card. Exits the confirmation - HP Photosmart 618 | HP Photosmart 618 digital camera - (English) User Guide - Page 69
to the computer as you would from another disk drive. Use this setting to connect the camera to a Mac OS 8.6 or better computer, or to a Windows Me, 98, or 2000 computer. You can use software included with your computer or camera to transfer images to the computer. Use this setting to connect the - HP Photosmart 618 | HP Photosmart 618 digital camera - (English) User Guide - Page 70
Figure 48: Set Date & Time Submenu Figure 49: Format Dialog Set Date & Time Submenu Use the Set Date & Time submenu to set the camera's date and time. Press the up and down arrows on the 4-way controller to scroll through the list of numbers. Press the left and right - HP Photosmart 618 | HP Photosmart 618 digital camera - (English) User Guide - Page 71
restarts the first image captured at number 1. The images are counted according to the history of the camera's use. For example: image #400 is the 400th image to be captured with this camera. Table 37: Image Counter Soft Keys Soft Key Select Exit Function Places a checkmark next to the selected - HP Photosmart 618 | HP Photosmart 618 digital camera - (English) User Guide - Page 72
the 4-way controller to back up and delete a character. Š Middle (Space) soft key to create a space between words in the camera name. Table 38: Camera Name Soft Keys Soft Key Function Character Set Icon Toggles through four character sets: capital letters, lowercase letters, numbers, and symbols - HP Photosmart 618 | HP Photosmart 618 digital camera - (English) User Guide - Page 73
is now used. Returns to the Preferences menu without changing the setting. Reset Settings Option Use the Reset Settings option to reset all of the camera settings (except for the Language, Format for the Set Date & Time, PC Connect Mode, and Video Preferences settings) to their defaults in one step - HP Photosmart 618 | HP Photosmart 618 digital camera - (English) User Guide - Page 74
Playback Mode Menu and Soft Keys To access the Playback mode menu and related soft keys, turn the camera mode dial to Playback mode and press the MENU button on the back of the camera. Once you have captured images, you can choose options and settings for the images within the one - HP Photosmart 618 | HP Photosmart 618 digital camera - (English) User Guide - Page 75
Figure 55: Slideshow Submenu Slideshow Submenu Use the Slideshow submenu to select the criteria for a slideshow to be viewed "on the fly." Table 42: Slideshow Submenu Setting Content Duration Sound Loop Default All 2 sec On On Options All, Category 1-10 sec On, Off On, Off Table 43: Slideshow - HP Photosmart 618 | HP Photosmart 618 digital camera - (English) User Guide - Page 76
Figure 56: Playback Rate Submenu Playback Rate Submenu Use the Playback Rate submenu to establish a default playback rate for each image type. Table 44: Playback Rate Submenu Setting Timelapse Group Default 3 sec 3 sec Options 1-10 sec rate 1-10 sec rate Table 45: Playback Rate Soft Keys Soft - HP Photosmart 618 | HP Photosmart 618 digital camera - (English) User Guide - Page 77
Figure 57: Video Preferences Submenu Video Preferences Submenu Use the Video Preferences submenu to specify the video format: NTSC or PAL. The format that you choose (NTSC or PAL) depends on your television's video input format: Š NTSC is the video connection standard used in the United States and - HP Photosmart 618 | HP Photosmart 618 digital camera - (English) User Guide - Page 78
Review mode menus and related soft keys, turn the camera mode dial to Review mode and press the MENU button on the camera. Once you have captured images, you can change specifications for the images within the four Review of the marked images from the memory card. Note that protected images within a - HP Photosmart 618 | HP Photosmart 618 digital camera - (English) User Guide - Page 79
Note: A group becomes a folder on the memory card, in which all the images in that group are stored. Figure 60: Group Name Submenu Figure 61: the image file into and out of groups. Š The image file will be marked "Read Only" in Windows when transferred to a PC. 79 Review Mode Menus and Soft Keys - HP Photosmart 618 | HP Photosmart 618 digital camera - (English) User Guide - Page 80
soft key. Allows you to unprotect images. Cancels the protect operation and returns to the Review mode screen. Categories Submenu Use the Categories submenu to assign images to a category. The camera has predefined categories, such as vacation, work, pets, family, and friends Choose the category - HP Photosmart 618 | HP Photosmart 618 digital camera - (English) User Guide - Page 81
page 44 for more information. Print Order Form Menu Use the Print Order Form menu to create a Digital Print Order Format (DPOF) file. Table 52: Print Order Form Menu Option Add Images View Order the DPOF file. Exits and returns to the Review mode screen. Chapter 6: Menu and Soft Key Reference 81 - HP Photosmart 618 | HP Photosmart 618 digital camera - (English) User Guide - Page 82
specify the exact size you want your Standard prints to be at the printer. For example, you can specify that all Standard images be printed at the order. If no images are marked, the image currently selected in the Review mode is added to the order. Table 54: Add to Order Submenu Setting Copies - HP Photosmart 618 | HP Photosmart 618 digital camera - (English) User Guide - Page 83
the contents of the DPOF file. Returns to the Print Order Form menu without clearing the DPOF file. Chapter 6: Menu and Soft Key Reference 83 Review Mode Menus and Soft Keys - HP Photosmart 618 | HP Photosmart 618 digital camera - (English) User Guide - Page 84
Use the Transmit menu to transfer images in one of two ways: Š Camera-Camera Š Camera-Printer Note: For more information, see "Transmitting Images Between Two Cameras" on page 48. Camera-Camera Option Use the Camera-Camera option to send current or marked images to, or receive images from, another - HP Photosmart 618 | HP Photosmart 618 digital camera - (English) User Guide - Page 85
to send current or marked images to a printer via the HP JetSend infrared technology. Table 59: Camera-Printer Soft Keys Soft Key Send Exit Function Sets the camera to sender mode. Displays a screen to confirm sending images and then returns to the Review mode screen. Exits this screen and returns - HP Photosmart 618 | HP Photosmart 618 digital camera - (English) User Guide - Page 86
by date (but not both at the same time). When you return to the Review mode to view the results of the find operation, the Find icon will appear Selects the category to find. Exits the Find screen and returns to the Review mode screen. After the Find operation, marks a selected image. After the Find - HP Photosmart 618 | HP Photosmart 618 digital camera - (English) User Guide - Page 87
dates using the 4-way controller. Table 61: Find By Date Soft Keys Soft Key Find Exit Function Executes the Find criteria and returns to the Review mode screen to display results. Exits this screen and returns to the Find menu without executing the Find command. Find By Category Submenu Use the - HP Photosmart 618 | HP Photosmart 618 digital camera - (English) User Guide - Page 88
HP for help. See "Contacting HP Customer Care" on page 93. Troubleshooting Common Problems Problem Solution The camera will not power on Š If you are using batteries: Š Check the type of batteries that you have installed in the camera. They may not be the appropriate type for a digital camera - HP Photosmart 618 | HP Photosmart 618 digital camera - (English) User Guide - Page 89
Chapter 7: Troubleshooting Problem Solution The camera is powered on, but when I press a button, the camera does not respond Š Try powering the camera off and then on again. Š Remove the batteries or unplug the HP AC power adapter. Then reinstall the batteries or plug in the AC power adapter, - HP Photosmart 618 | HP Photosmart 618 digital camera - (English) User Guide - Page 90
Chapter 7: Troubleshooting Problem Solution The camera is displaying an error message There are 3 different types of error messages you may see on the camera: Š Memory card is not formatted - "Err" is displayed on the status LCD and the message "Card requires formatting" is displayed on the - HP Photosmart 618 | HP Photosmart 618 digital camera - (English) User Guide - Page 91
appear as a disk drive in Windows Explorer? Note: Computers running Windows NT 4.0 cannot connect to the camera via the USB cable, because Windows NT 4.0 does not support the USB interface. You must use either an HP P1000/1100 or similar printer, or a memory card reader to transfer the images to - HP Photosmart 618 | HP Photosmart 618 digital camera - (English) User Guide - Page 92
a scanner, check the manual for the software program to see if you can use TWAIN to scan images, instead. Š For more detailed information about this problem, consult the Technical Support section for this camera that is located on the HP website at: www.hp.com/photosmart. Š Try using a different - HP Photosmart 618 | HP Photosmart 618 digital camera - (English) User Guide - Page 93
helpful tips and tricks, downloadable drivers, and the latest product and software updates − 24 hours a day, 7 days a week. HP Customer Care by Phone If you encounter a problem with your camera that is not covered in this chapter, contact HP for help. HP has Customer Support Centers worldwide, some - HP Photosmart 618 | HP Photosmart 618 digital camera - (English) User Guide - Page 94
appendix covers the following topics: Š "Accessing the Preferences Menu" on page 94 Š "Setting the Display" on page 95 Š "Controlling Camera Sounds" on page 97 Š "Formatting the Memory Card" on page 98 Š "Selecting the PC Connect Mode" on page 98 Š "Setting the Date and Time" on page 99 Š "Setting - HP Photosmart 618 | HP Photosmart 618 digital camera - (English) User Guide - Page 95
you want. 3 Press the right (Exit) soft key to save the setting, exit the Display submenu, and return to the Preferences menu. Instant Review The camera's Instant Review feature allows you to see displayed on the image LCD either the One Shot image, the final image of a Continuous image sequence, or - HP Photosmart 618 | HP Photosmart 618 digital camera - (English) User Guide - Page 96
Note: The image LCD uses a lot of battery power. If you are running your camera on batteries rather than with the HP-approved AC power adapter, you may want to limit your use of the image LCD. In turn, you may want to leave the Live View - HP Photosmart 618 | HP Photosmart 618 digital camera - (English) User Guide - Page 97
setting, exit the Sound submenu, and return to the Preferences menu. System Sounds The Systems Sounds setting determines whether or not you will hear the camera's system sounds, such as shutter clicks, beeps, and so forth. The default value is On (that you will hear system sounds). To change the - HP Photosmart 618 | HP Photosmart 618 digital camera - (English) User Guide - Page 98
key to exit the confirmation screen without reformatting the memory card and return to the Preferences menu. Selecting the PC Connect Mode Use the PC Connect Mode submenu to specify how the camera will appear to your computer when connected via the USB interface in PC Connect mode. You can then - HP Photosmart 618 | HP Photosmart 618 digital camera - (English) User Guide - Page 99
between the date/time fields in the center of the screen. Setting the Date and Time Use the Set Date & Time submenu to set the camera's date and time. If you wish to change the format that is used for the date and time, see the next subsection, "Format Dialog." Press - HP Photosmart 618 | HP Photosmart 618 digital camera - (English) User Guide - Page 100
the time is in the 12-hour clock format. For example, to set your camera to the MM/DD/YY 24 hour format (so that the date will be in date and time format, and you return to the Set Date & Time submenu. The camera is now set to the date and time format you just selected. Setting the Image Counter - HP Photosmart 618 | HP Photosmart 618 digital camera - (English) User Guide - Page 101
information.) The default camera name is Digita Camera. For example, if you transmit images from camera B to camera A, camera B's name appears in the image information area of the Review mode screen on camera A when any images from camera B are viewed on camera A. The camera name does not appear - HP Photosmart 618 | HP Photosmart 618 digital camera - (English) User Guide - Page 102
Language English is set as the default language that is used on the camera. Use the Language submenu to select a language from the list of Reset) soft key, you will see a confirmation of your choice to reset the camera settings (see Figure 81). You can either press the middle (Reset) soft key - HP Photosmart 618 | HP Photosmart 618 digital camera - (English) User Guide - Page 103
Power Adapter" on page 108 Š "Using the HP NiMH Batteries and Recharger" on page 108 Š "Storage Capacities of Memory Cards" on page 109 Camera Specifications The following table lists the specifications for the HP 618 digital camera. Camera Dimensions 127.5mm (L) x 56.5mm (W) x 71.5mm (H) (5.0 in - HP Photosmart 618 | HP Photosmart 618 digital camera - (English) User Guide - Page 104
Appendix B: Camera and Accessories Information HP Imaging Technology Š Custom ASIC for higher-performance 0.5m (1.64 ft.) to infinity Š Macro: 0.1m (0.33 ft.) to 0.6m (1.97 ft.) Š Infinity Š Manual focus: 0.1m (0.33 ft.) to infinity Š Built-in flash Š Flash modes: Auto, Auto with Red-Eye Reduction - HP Photosmart 618 | HP Photosmart 618 digital camera - (English) User Guide - Page 105
Memory Card Timer CompactFlashTM card (Type I or Type II, Power level 0) shipped with camera Š 10-second delay Š 3-second delay with HP Remote Š Create slideshows of images Š Send images via HP JetSend infrared technology to JetSend-capable printers Š Delete, protect, group, and categorize images - HP Photosmart 618 | HP Photosmart 618 digital camera - (English) User Guide - Page 106
HP 618 digital camera. Do not mix batteries of different types. Replace all 4 batteries at the same time; do not replace the batteries individually. Always follow all of the manufacturer's instructions the camera in the idle state (image LCD off) Š Using the camera in Review mode Š Using the camera - HP Photosmart 618 | HP Photosmart 618 digital camera - (English) User Guide - Page 107
as other camera accessories, from the HP Shopping Village website at: www.hpshopping.com. (Click the Digital Photography link on the main web page. Then click the Digital Photography Accessories link on the second web page.) This table of power accessories was current at the time this manual was - HP Photosmart 618 | HP Photosmart 618 digital camera - (English) User Guide - Page 108
camera when you are looking at the front of the camera. 3 Connect the round end of the AC power adapter's cable to the middle (power adapter) connector in the camera (see Figure 82). Using the HP HP 618 camera, you must charge all 4 NiMH batteries in the HP NiMH Battery Recharger per the instructions - HP Photosmart 618 | HP Photosmart 618 digital camera - (English) User Guide - Page 109
most memory available on a memory card, reformat the card either on the camera (using the Format Card option in the Preferences menu − see page 68), or through the computer (using USB Disk Drive mode, reformat the card as you would a disk drive − see page 69). Storage Capacities of Memory Cards The - HP Photosmart 618 | HP Photosmart 618 digital camera - (English) User Guide - Page 110
Warranties Limited Product Warranty HP Product HP 618 digital camera CompactFlash memory card HP Photo Imaging Software Duration of Limited Warranty 1 year 1 year 90 Days A. Extent of Limited Warranty 1 Hewlett-Packard (HP) warrants to the end-user customer that the HP products specified above - HP Photosmart 618 | HP Photosmart 618 digital camera - (English) User Guide - Page 111
is valid in any country where the covered HP product is distributed by HP. Contracts for additional warranty services, such as on-site service, are available from any authorized HP service facility in countries where the product is distributed by HP or by an authorized importer. B. Limitations of - HP Photosmart 618 | HP Photosmart 618 digital camera - (English) User Guide - Page 112
any instructions for installing patches or upgrades), provided that all other products (e.g. hardware, software, firmware) used in combination with such HP Products(s) properly exchange date data with it. The duration of the Year 2000 warranty extends through January 31, 2001. 112 Hewlett-Packard - HP Photosmart 618 | HP Photosmart 618 digital camera - (English) User Guide - Page 113
Safety Information Using Batteries The HP 618 digital camera comes with four non-rechargeable batteries. Do not attempt to recharge these batteries. Do not mix old and new batteries or batteries of different types. Follow the battery manufacturer's safety instructions. Disposing or Recycling of - HP Photosmart 618 | HP Photosmart 618 digital camera - (English) User Guide - Page 114
apparatus does not exceed the Class B limits for radio noise emissions from digital apparatus as set out in the interference-causing equipment standard entitled Digital Apparatus, ICES-003 of the Department of Communications. Cet appareil numérique respecte les limites de bruits radioélectriques - HP Photosmart 618 | HP Photosmart 618 digital camera - (English) User Guide - Page 115
automatic shutoff Av battery status HP 618 Digital Camera User's Guide A button on the back of the camera that has four directional arrows camera that automatically focuses the camera lens on a picture subject. You can change the focus mode to Manual Focus in the Photo Assist menu. See also "Manual - HP Photosmart 618 | HP Photosmart 618 digital camera - (English) User Guide - Page 116
memory card. Refers to digital cropping of the image, giving the appearance of greater zoom. After the optical zoom is at its maximum setting, you can digitally Playback mode. This button is inactive in Review and PC Connect modes. See also " camera. HP 618 Digital Camera User's Guide 116 Glossary - HP Photosmart 618 | HP Photosmart 618 digital camera - (English) User Guide - Page 117
type firmware firmware update flash flash mode flash mode button flash mode icon(s) f-number focal length focus focus mode focus range four-way controller f-stop grouped images HP 618 Digital Camera User's Guide The number of bytes in a file. The file size for images saved on a digital camera is - HP Photosmart 618 | HP Photosmart 618 digital camera - (English) User Guide - Page 118
image size image type image type icon image type soft key infrared infrared window interval ISO number JetSend JPEG HP 618 Digital Camera User's Guide State-of-the-art image processing technology developed by HP that captures sharp, colorful images with exceptional levels of detail, individually - HP Photosmart 618 | HP Photosmart 618 digital camera - (English) User Guide - Page 119
Landscape Program exposure mode LCD LED lens live view Manual Focus mode marking memory card memory card access LED memory card door MENU button menus microphone mode dial modes NTSC connection One Shot image type HP 618 Digital Camera User's Guide The exposure mode setting in the Photo Assist menu - HP Photosmart 618 | HP Photosmart 618 digital camera - (English) User Guide - Page 120
mode Portrait Program exposure mode HP 618 Digital Camera User's Guide The true resolution of an imaging digital cameras, this is usually an adapter into which you can plug the memory card from the camera for transferring images to your computer. The slot in a computer that holds a PCMCIA card - HP Photosmart 618 | HP Photosmart 618 digital camera - (English) User Guide - Page 121
Assist menu that lets you select a shutter speed, and the camera automatically selects the aperture setting. See also "aperture" on page 115, "Aperture Priority (Av) exposure mode" on page 115, "shutter" on page 121, and "shutter speed" on page 122. HP 618 Digital Camera User's Guide 121 Glossary - HP Photosmart 618 | HP Photosmart 618 digital camera - (English) User Guide - Page 122
's memory card. Tagged Image File Format. A bitmapped file format for images. TIFF does not compress the image. TIFF files are supported by many programs and can also be used on many types of computers. See also "file type" on page 117 and "JPEG" on page 118. HP 618 Digital Camera User's Guide 122 - HP Photosmart 618 | HP Photosmart 618 digital camera - (English) User Guide - Page 123
connector on a television into which you plug the video cable. The window on the back of the camera through which you look to frame the subject that will be recorded when you capture an image. The process of bringing the camera out of sleep mode. HP 618 Digital Camera User's Guide 123 Glossary - HP Photosmart 618 | HP Photosmart 618 digital camera - (English) User Guide - Page 124
the camera that moves the lens continuously between telephoto and wide angle focal lengths. The zoom lever also controls the digital zoom. See also "digital zoom" on page 116, "focal length" on page 117, "telephoto" on page 122, and "wide angle" on page 124. HP 618 Digital Camera User's Guide 124 - HP Photosmart 618 | HP Photosmart 618 digital camera - (English) User Guide - Page 125
HP 618 Digital Camera User's Guide Numerics 4-way controller, using 15 A AC power adapter purchasing from HP 107 safety information 113 using 108 Accessories for powering the camera 38 using Focus Lock 18 Camera Name submenu 72, 101 Camera-Camera menu option 84 Camera-Printer menu option 85 Capture - HP Photosmart 618 | HP Photosmart 618 digital camera - (English) User Guide - Page 126
HP 618 Digital Camera User's Guide E Timelapse images 21 Edit menu 78 viewing Timelapse in Playback mode 28 Erase Order menu option 83 EV Compensation submenu 57 Expanding Timelapse or grouped - HP Photosmart 618 | HP Photosmart 618 digital camera - (English) User Guide - Page 127
HP 618 Digital Camera User's Guide Limited product warranty 110 Logo Files dialog 65 Logo Stamp submenu 65 M Macro auto focus range indicator 13 Manual focus 12 Marking images 31 Memory card access LED 24 Memory card, Format Card 81 Printer, JetSending images to 46 Problems, troubleshooting 88 - HP Photosmart 618 | HP Photosmart 618 digital camera - (English) User Guide - Page 128
HP 618 Digital Camera User's Guide Removing grouping on images 33 Reset Settings menu option 73, 102 Review mode accessing 27, 30 Category submenu 87 Find By Date submenu 87 Find menu 86 Focus submenu 59 Format Card option 68 Format List dialog 70 Group Name submenu 79 Image Counter submenu 71 - HP Photosmart 618 | HP Photosmart 618 digital camera - (English) User Guide - Page 129
HP 618 Digital Camera User's Guide Video Preferences submenu 77 View Order option 83 White Balance submenu 58 Sound submenu 68, 97 Sound, recording 26 Specifications, camera 84 Troubleshooting common problems 88 U Unmarking images 31 Unprotecting images 34 Updates to firmware 7 User's Guide how to
-
 1
1 -
 2
2 -
 3
3 -
 4
4 -
 5
5 -
 6
6 -
 7
7 -
8
-
9
-
10
-
11
-
12
-
13
-
14
-
15
-
16
-
17
-
18
-
19
-
20
-
21
-
22
-
23
-
24
-
25
-
26
-
27
-
28
-
29
-
30
-
31
-
32
-
33
-
34
-
35
-
36
-
37
-
38
-
39
-
40
-
41
-
42
-
43
-
44
-
45
-
46
-
47
-
48
-
49
-
50
-
51
-
52
-
53
-
54
-
55
-
56
-
57
-
58
-
59
-
60
-
61
-
62
-
63
-
64
-
65
-
66
-
67
-
68
-
69
-
70
-
71
-
72
-
73
-
74
-
75
-
76
-
77
-
78
-
79
-
80
-
81
-
82
-
83
-
84
-
85
-
86
-
87
-
88
-
89
-
90
-
91
-
92
-
93
-
94
-
95
-
96
-
97
-
98
-
99
-
100
-
101
-
102
-
103
-
104
-
105
-
106
-
107
-
108
-
109
-
110
-
111
-
112
-
113
-
114
-
115
-
116
-
117
-
118
-
119
-
120
-
121
-
122
-
123
-
124
-
125
-
126
-
127
-
128
-
129
 |
 |
HP 618 Digital Camera
User’s Guide
HP Imaging Technology