HP Photosmart 618 HP Photosmart 618 digital camera - (English) User Guide - Page 33
Grouping Images and Dissolving Image Groups, Two Images in a Group
 |
View all HP Photosmart 618 manuals
Add to My Manuals
Save this manual to your list of manuals |
Page 33 highlights
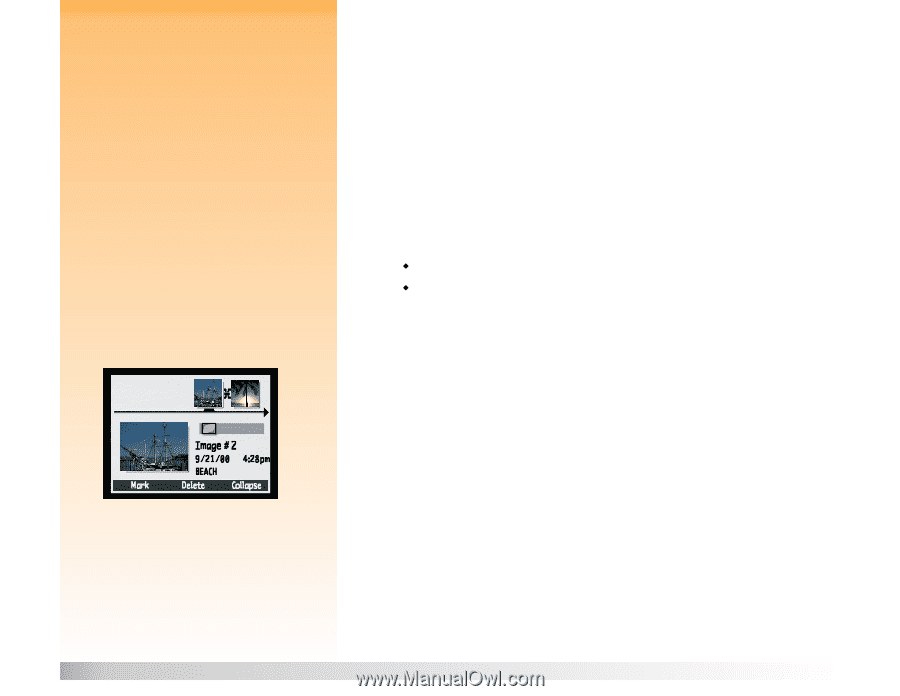
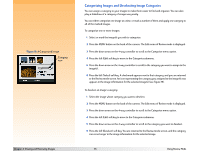
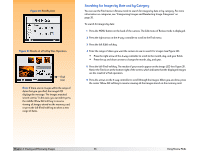
Note: A group becomes a folder on the memory card, in which all the images in that group are stored. Note: Group names must be eight characters or less, and cannot contain spaces. Also, the camera does not accept group names that begin with BR or TL (regardless of language) because these letters are reserved. Figure 17: Two Images in a Group Note: Dissolving a group does not delete the images in the group, only the group name. Grouping Images and Dissolving Image Groups You can group images to organize them in one folder on the memory card. To group images: 1 Mark the images you wish to group. 2 Press the MENU button on the back of the camera. The Edit menu of Review mode is displayed. 3 Press the down arrow on the 4-way controller to scroll to the Group menu option. 4 Move to the Group Name menu by pressing either the left (Create) soft key if there are no existing groups, or the left (Add) soft key and then the middle (Create New) soft key if there are existing groups. 5 Name the new group by doing the following. (See the Note on the left for restrictions on group names.) Š Press the up or down arrow on the 4-way controller to scroll to the letter you want to use. Š Press the right arrow on the 4-way controller to add a letter to the name, or the left arrow to delete a letter. For example, if you select the letter "L" and then press the right arrow on the 4-way controller, the letter appears in the center of the screen. 6 Press the right (Exit) soft key to exit the Group Name menu, and then press Exit again to exit the Review mode menus. You are returned to the Review mode screen. The name of the group now appears in the image information for all the images in the group when each image is selected, and the images in the group have a link icon between them (see the example in Figure 17). To dissolve (remove) the grouping on images: 1 Select any image included in the group you want to dissolve. 2 Press the MENU button on the back of the camera. The Edit menu of Review mode is displayed. 3 Press the down arrow on the 4-way controller to scroll to the Group menu option. 4 Press the center (Dissolve) soft key to dissolve (remove) the grouping. 5 Press the right (Exit) soft key. You are returned to the Review mode screen, and the images are no longer grouped. Chapter 4: Viewing and Reviewing Images 33 Using Review Mode
-
 1
1 -
2
-
3
-
4
-
5
-
6
-
7
-
8
-
9
-
10
-
11
-
12
-
13
-
14
-
15
-
16
-
17
-
18
-
19
-
20
-
21
-
22
-
23
-
24
-
25
-
26
-
27
-
 28
28 -
 29
29 -
 30
30 -
 31
31 -
 32
32 -
 33
33 -
 34
34 -
 35
35 -
 36
36 -
 37
37 -
 38
38 -
39
-
40
-
41
-
42
-
43
-
44
-
45
-
46
-
47
-
48
-
49
-
50
-
51
-
52
-
53
-
54
-
55
-
56
-
57
-
58
-
59
-
60
-
61
-
62
-
63
-
64
-
65
-
66
-
67
-
68
-
69
-
70
-
71
-
72
-
73
-
74
-
75
-
76
-
77
-
78
-
79
-
80
-
81
-
82
-
83
-
84
-
85
-
86
-
87
-
88
-
89
-
90
-
91
-
92
-
93
-
94
-
95
-
96
-
97
-
98
-
99
-
100
-
101
-
102
-
103
-
104
-
105
-
106
-
107
-
108
-
109
-
110
-
111
-
112
-
113
-
114
-
115
-
116
-
117
-
118
-
119
-
120
-
121
-
122
-
123
-
124
-
125
-
126
-
127
-
128
-
129
 |
 |