HP Photosmart 618 HP Photosmart 618 digital camera - (English) User Guide - Page 35
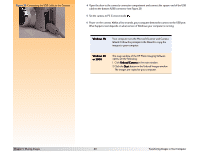
Categorizing Images and Deselecting Image Categories, A Categorized Image
 |
View all HP Photosmart 618 manuals
Add to My Manuals
Save this manual to your list of manuals |
Page 35 highlights
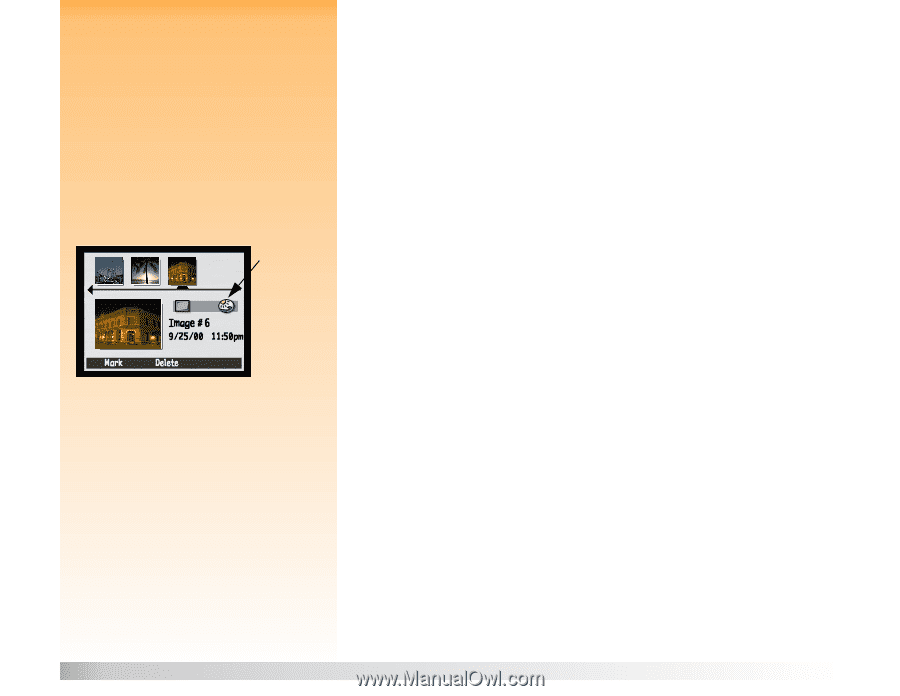
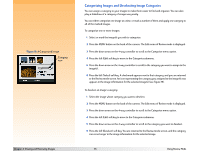
Figure 19: A Categorized Image Category icon Chapter 4: Viewing and Reviewing Images Categorizing Images and Deselecting Image Categories You can assign a category to your images to make them easier to find and organize. You can also play a slideshow of a category of images very easily. You can either categorize one image at a time, or mark a number of them and apply one category to all of the marked images. To categorize one or more images: 1 Select or mark the image(s) you wish to categorize. 2 Press the MENU button on the back of the camera. The Edit menu of Review mode is displayed. 3 Press the down arrow on the 4-way controller to scroll to the Categorize menu option. 4 Press the left (Edit) soft key to move to the Categories submenu. 5 Press the down arrow on the 4-way controller to scroll to the category you want to assign to the image(s). 6 Press the left (Select) soft key. A checkmark appears next to that category, and you are returned to the Review mode screen. An icon representing the category you assigned to the image(s) now appears in the image information for the selected image(s) (see Figure 19). To deselect an image's category: 1 Select the image whose category you want to deselect. 2 Press the MENU button on the back of the camera. The Edit menu of Review mode is displayed. 3 Press the down arrow on the 4-way controller to scroll to the Categorize menu option. 4 Press the left (Edit) soft key to move to the Categories submenu. 5 Press the down arrow on the 4-way controller to scroll to the category you want to deselect. 6 Press the left (Deselect) soft key. You are returned to the Review mode screen, and the category icon is no longer in the image information for the selected image. 35 Using Review Mode
-
 1
1 -
2
-
3
-
4
-
5
-
6
-
7
-
8
-
9
-
10
-
11
-
12
-
13
-
14
-
15
-
16
-
17
-
18
-
19
-
20
-
21
-
22
-
23
-
24
-
25
-
26
-
27
-
28
-
29
-
 30
30 -
 31
31 -
 32
32 -
 33
33 -
 34
34 -
 35
35 -
 36
36 -
 37
37 -
 38
38 -
 39
39 -
 40
40 -
41
-
42
-
43
-
44
-
45
-
46
-
47
-
48
-
49
-
50
-
51
-
52
-
53
-
54
-
55
-
56
-
57
-
58
-
59
-
60
-
61
-
62
-
63
-
64
-
65
-
66
-
67
-
68
-
69
-
70
-
71
-
72
-
73
-
74
-
75
-
76
-
77
-
78
-
79
-
80
-
81
-
82
-
83
-
84
-
85
-
86
-
87
-
88
-
89
-
90
-
91
-
92
-
93
-
94
-
95
-
96
-
97
-
98
-
99
-
100
-
101
-
102
-
103
-
104
-
105
-
106
-
107
-
108
-
109
-
110
-
111
-
112
-
113
-
114
-
115
-
116
-
117
-
118
-
119
-
120
-
121
-
122
-
123
-
124
-
125
-
126
-
127
-
128
-
129
 |
 |