HP Photosmart 618 HP Photosmart 618 digital camera - (English) User Guide - Page 18
Using Focus Lock, What’s Next?, Taking Pictures, Taking More Advanced Pictures
 |
View all HP Photosmart 618 manuals
Add to My Manuals
Save this manual to your list of manuals |
Page 18 highlights
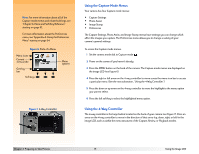
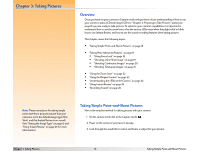
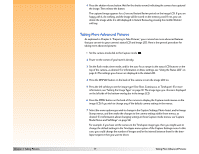
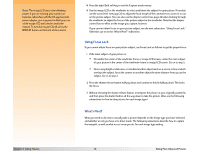
Note: The image LCD uses a lot of battery power. If you are running your camera on batteries rather than with the HP-approved AC power adapter, you may want to limit your use of the image LCD and use the viewfinder instead. To turn the image LCD off, press the DISPLAY button on the back of the camera. 8 Press the right (Exit) soft key to exit the Capture mode menus. 9 Use the image LCD or the viewfinder to select and frame the subject for your picture. If needed, use the zoom lever (see page 22) to adjust the focal length of the camera lens to zoom in or out on the picture subject. You can also use the diopter control (see page 22) when looking through the viewfinder to adjust the focus of the picture subject in the viewfinder. Note that the diopter control has no effect on the image you capture, however. If you cannot obtain focus on your picture subject, see the next subsection, "Using Focus Lock." Otherwise, go on to the "What's Next?" subsection. Using Focus Lock If you cannot obtain focus on your picture subject, use Focus Lock as follows to get the proper focus: 1 If the main subject of your picture is: Š Not within the center of the viewfinder frame or image LCD screen, center the main subject of your picture in the center of the viewfinder frame or image LCD screen. Go on to step 2. Š Near a very bright or dark area, or is behind another object (such as a screen or fence) which overlaps the subject, focus the camera on another object the same distance from you as the subject. Go on to step 2. 2 Press the shutter release button halfway down and continue to hold it halfway down. This locks the focus. 3 Without releasing the shutter release button, recompose the picture as you originally wanted it, and then press the shutter button all the way down to take the picture. (Also see the following subsections for how to take pictures for each image type.) What's Next? What you need to do next to actually take a picture depends on the image type you have selected, and whether or not you have set a timer mode. The following subsections describe how to capture the image(s), as well as what occurs once you do, for each image type setting. Chapter 3: Taking Pictures 18 Taking More Advanced Pictures
-
 1
1 -
2
-
3
-
4
-
5
-
6
-
7
-
8
-
9
-
10
-
11
-
12
-
 13
13 -
 14
14 -
 15
15 -
 16
16 -
 17
17 -
 18
18 -
 19
19 -
 20
20 -
 21
21 -
 22
22 -
 23
23 -
24
-
25
-
26
-
27
-
28
-
29
-
30
-
31
-
32
-
33
-
34
-
35
-
36
-
37
-
38
-
39
-
40
-
41
-
42
-
43
-
44
-
45
-
46
-
47
-
48
-
49
-
50
-
51
-
52
-
53
-
54
-
55
-
56
-
57
-
58
-
59
-
60
-
61
-
62
-
63
-
64
-
65
-
66
-
67
-
68
-
69
-
70
-
71
-
72
-
73
-
74
-
75
-
76
-
77
-
78
-
79
-
80
-
81
-
82
-
83
-
84
-
85
-
86
-
87
-
88
-
89
-
90
-
91
-
92
-
93
-
94
-
95
-
96
-
97
-
98
-
99
-
100
-
101
-
102
-
103
-
104
-
105
-
106
-
107
-
108
-
109
-
110
-
111
-
112
-
113
-
114
-
115
-
116
-
117
-
118
-
119
-
120
-
121
-
122
-
123
-
124
-
125
-
126
-
127
-
128
-
129
 |
 |