HP Photosmart Premium TouchSmart Web All-in-One Printer - C309 User Guide - Page 117
Align the Printer, Device Services
 |
View all HP Photosmart Premium TouchSmart Web All-in-One Printer - C309 manuals
Add to My Manuals
Save this manual to your list of manuals |
Page 117 highlights
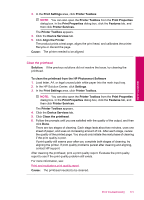
Solve a problem 3. In the Print Settings area, click Printer Toolbox. NOTE: You can also open the Printer Toolbox from the Print Properties dialog box. In the Print Properties dialog box, click the Features tab, and then click Printer Services. The Printer Toolbox appears. 4. Click the Device Services tab. 5. Click Align the Printer. The product prints a test page, aligns the print head, and calibrates the printer. Recycle or discard the page. Cause: The printer needed to be aligned. Clean the printhead Solution: If the previous solutions did not resolve the issue, try cleaning the printhead. To clean the printhead from the HP Photosmart Software 1. Load letter, A4, or legal unused plain white paper into the main input tray. 2. In the HP Solution Center, click Settings. 3. In the Print Settings area, click Printer Toolbox. NOTE: You can also open the Printer Toolbox from the Print Properties dialog box. In the Print Properties dialog box, click the Features tab, and then click Printer Services. The Printer Toolbox appears. 4. Click the Device Services tab. 5. Click Clean the printhead. 6. Follow the prompts until you are satisfied with the quality of the output, and then click Done. There are two stages of cleaning. Each stage lasts about two minutes, uses one sheet of paper, and uses an increasing amount of ink. After each stage, review the quality of the printed page. You should only initiate the next phase of cleaning if the print quality is poor. If print quality still seems poor after you complete both stages of cleaning, try aligning the printer. If print quality problems persist after cleaning and aligning, contact HP support. After cleaning the printhead, print a print quality report. Evaluate the print quality report to see if the print quality problem still exists. For more information, see: Print and evaluate a print quality report Cause: The printhead needed to be cleaned. Print troubleshooting 115
-
 1
1 -
2
-
3
-
4
-
5
-
6
-
7
-
8
-
9
-
10
-
11
-
12
-
13
-
14
-
15
-
16
-
17
-
18
-
19
-
20
-
21
-
22
-
23
-
24
-
25
-
26
-
27
-
28
-
29
-
30
-
31
-
32
-
33
-
34
-
35
-
36
-
37
-
38
-
39
-
40
-
41
-
42
-
43
-
44
-
45
-
46
-
47
-
48
-
49
-
50
-
51
-
52
-
53
-
54
-
55
-
56
-
57
-
58
-
59
-
60
-
61
-
62
-
63
-
64
-
65
-
66
-
67
-
68
-
69
-
70
-
71
-
72
-
73
-
74
-
75
-
76
-
77
-
78
-
79
-
80
-
81
-
82
-
83
-
84
-
85
-
86
-
87
-
88
-
89
-
90
-
91
-
92
-
93
-
94
-
95
-
96
-
97
-
98
-
99
-
100
-
101
-
102
-
103
-
104
-
105
-
106
-
107
-
108
-
109
-
110
-
111
-
 112
112 -
 113
113 -
 114
114 -
 115
115 -
 116
116 -
 117
117 -
 118
118 -
 119
119 -
 120
120 -
 121
121 -
 122
122 -
123
-
124
-
125
-
126
-
127
-
128
-
129
-
130
-
131
-
132
-
133
-
134
-
135
-
136
-
137
-
138
-
139
-
140
-
141
-
142
-
143
-
144
-
145
-
146
-
147
-
148
-
149
-
150
-
151
-
152
-
153
-
154
-
155
-
156
-
157
-
158
-
159
-
160
-
161
-
162
-
163
-
164
-
165
-
166
-
167
-
168
-
169
-
170
-
171
-
172
-
173
-
174
-
175
-
176
-
177
-
178
-
179
-
180
-
181
-
182
-
183
-
184
-
185
-
186
-
187
-
188
-
189
-
190
-
191
-
192
-
193
-
194
-
195
-
196
-
197
-
198
-
199
-
200
-
201
-
202
-
203
-
204
-
205
-
206
-
207
-
208
-
209
-
210
-
211
-
212
 |
 |
