HP StorageWorks 1606 Brocade Fabric OS Administrator's Guide v6.3.0 (53-100133 - Page 381
Creating an Admin Domain, Admin Domains and Virtual Fabrics cannot co-exist.
 |
View all HP StorageWorks 1606 manuals
Add to My Manuals
Save this manual to your list of manuals |
Page 381 highlights
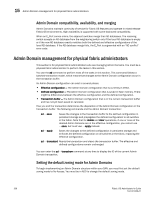
Admin Domain management for physical fabric administrators 15 1. Log in to the switch with the appropriate RBAC role. 2. Ensure you are in the AD0 context by entering the ad --show command to determine the current Admin Domain. If necessary, switch to the AD0 context by entering the ad --select 0 command. 3. Set the default zoning mode to No Access, as described in "Setting the default zoning mode" on page 237. Creating an Admin Domain To create an Admin Domain, you must specify an Admin Domain name, number, or both: • If you create an Admin Domain using only a number, the Admin Domain name is automatically assigned to be "ADn", where n is the number you specified. For example, if you specify AD number = 4, then AD name is set to "AD4". • If you create an Admin Domain using only a name, the Admin Domain number is automatically assigned and is the lowest available AD number, except if you specify a name in the format "ADn", in which case the Admin Domain number is assigned to be n. For example, if you specify AD name = "blueAD" and the lowest available AD number is 5, then AD name is "blueAD" and AD number is 5. If you specify AD name = "AD15" and the lowest available AD number is 6, then AD name is "AD15" and AD number is 15. Because the specified name is in the format "ADn", the AD number is assigned to be n and not the lowest available AD number. The Admin Domain name cannot exceed 63 characters and can contain alphabetic and numeric characters. The only special character allowed is an underscore ( _ ). When you create an Admin Domain, you must specify at least one member (switch, switch port, or device). You cannot create an empty Admin Domain. For more information about these member types, see "Admin Domain member types" on page 335. A newly created Admin Domain has no zoning defined and the default access mode is No Access. This means the devices in the Admin Domain cannot communicate with each other. You must set up zones in the newly created Admin Domain to allow devices to access each other, even if the devices were already zoned together prior to your moving them to the Admin Domain. See "Admin Domains, zones, and zone databases" on page 354 for additional information about how zones work with Admin Domains. You create Admin Domains in the transaction buffer. You can either save the newly created Admin Domain to a defined configuration or make it the effective Admin Domain configuration directly. The following procedure describes the steps for creating Admin Domains. 1. Log in to the switch as the physical fabric administrator. 2. Disable Virtual Fabrics, if necessary, as described in "Disabling Virtual Fabrics" on page 210. Admin Domains and Virtual Fabrics cannot co-exist. 3. Set the default zone mode to No Access, if you have not already done so. See "Setting the default zoning mode" on page 237 for instructions. 4. Switch to the AD255 context, if you are not already in that context: ad --select 255 Fabric OS Administrator's Guide 339 53-1001336-01
-
 1
1 -
2
-
3
-
4
-
5
-
6
-
7
-
8
-
9
-
10
-
11
-
12
-
13
-
14
-
15
-
16
-
17
-
18
-
19
-
20
-
21
-
22
-
23
-
24
-
25
-
26
-
27
-
28
-
29
-
30
-
31
-
32
-
33
-
34
-
35
-
36
-
37
-
38
-
39
-
40
-
41
-
42
-
43
-
44
-
45
-
46
-
47
-
48
-
49
-
50
-
51
-
52
-
53
-
54
-
55
-
56
-
57
-
58
-
59
-
60
-
61
-
62
-
63
-
64
-
65
-
66
-
67
-
68
-
69
-
70
-
71
-
72
-
73
-
74
-
75
-
76
-
77
-
78
-
79
-
80
-
81
-
82
-
83
-
84
-
85
-
86
-
87
-
88
-
89
-
90
-
91
-
92
-
93
-
94
-
95
-
96
-
97
-
98
-
99
-
100
-
101
-
102
-
103
-
104
-
105
-
106
-
107
-
108
-
109
-
110
-
111
-
112
-
113
-
114
-
115
-
116
-
117
-
118
-
119
-
120
-
121
-
122
-
123
-
124
-
125
-
126
-
127
-
128
-
129
-
130
-
131
-
132
-
133
-
134
-
135
-
136
-
137
-
138
-
139
-
140
-
141
-
142
-
143
-
144
-
145
-
146
-
147
-
148
-
149
-
150
-
151
-
152
-
153
-
154
-
155
-
156
-
157
-
158
-
159
-
160
-
161
-
162
-
163
-
164
-
165
-
166
-
167
-
168
-
169
-
170
-
171
-
172
-
173
-
174
-
175
-
176
-
177
-
178
-
179
-
180
-
181
-
182
-
183
-
184
-
185
-
186
-
187
-
188
-
189
-
190
-
191
-
192
-
193
-
194
-
195
-
196
-
197
-
198
-
199
-
200
-
201
-
202
-
203
-
204
-
205
-
206
-
207
-
208
-
209
-
210
-
211
-
212
-
213
-
214
-
215
-
216
-
217
-
218
-
219
-
220
-
221
-
222
-
223
-
224
-
225
-
226
-
227
-
228
-
229
-
230
-
231
-
232
-
233
-
234
-
235
-
236
-
237
-
238
-
239
-
240
-
241
-
242
-
243
-
244
-
245
-
246
-
247
-
248
-
249
-
250
-
251
-
252
-
253
-
254
-
255
-
256
-
257
-
258
-
259
-
260
-
261
-
262
-
263
-
264
-
265
-
266
-
267
-
268
-
269
-
270
-
271
-
272
-
273
-
274
-
275
-
276
-
277
-
278
-
279
-
280
-
281
-
282
-
283
-
284
-
285
-
286
-
287
-
288
-
289
-
290
-
291
-
292
-
293
-
294
-
295
-
296
-
297
-
298
-
299
-
300
-
301
-
302
-
303
-
304
-
305
-
306
-
307
-
308
-
309
-
310
-
311
-
312
-
313
-
314
-
315
-
316
-
317
-
318
-
319
-
320
-
321
-
322
-
323
-
324
-
325
-
326
-
327
-
328
-
329
-
330
-
331
-
332
-
333
-
334
-
335
-
336
-
337
-
338
-
339
-
340
-
341
-
342
-
343
-
344
-
345
-
346
-
347
-
348
-
349
-
350
-
351
-
352
-
353
-
354
-
355
-
356
-
357
-
358
-
359
-
360
-
361
-
362
-
363
-
364
-
365
-
366
-
367
-
368
-
369
-
370
-
371
-
372
-
373
-
374
-
375
-
 376
376 -
 377
377 -
 378
378 -
 379
379 -
 380
380 -
 381
381 -
 382
382 -
 383
383 -
 384
384 -
 385
385 -
 386
386 -
387
-
388
-
389
-
390
-
391
-
392
-
393
-
394
-
395
-
396
-
397
-
398
-
399
-
400
-
401
-
402
-
403
-
404
-
405
-
406
-
407
-
408
-
409
-
410
-
411
-
412
-
413
-
414
-
415
-
416
-
417
-
418
-
419
-
420
-
421
-
422
-
423
-
424
-
425
-
426
-
427
-
428
-
429
-
430
-
431
-
432
-
433
-
434
-
435
-
436
-
437
-
438
-
439
-
440
-
441
-
442
-
443
-
444
-
445
-
446
-
447
-
448
-
449
-
450
-
451
-
452
-
453
-
454
-
455
-
456
-
457
-
458
-
459
-
460
-
461
-
462
-
463
-
464
-
465
-
466
-
467
-
468
-
469
-
470
-
471
-
472
-
473
-
474
-
475
-
476
-
477
-
478
-
479
-
480
-
481
-
482
-
483
-
484
-
485
-
486
-
487
-
488
-
489
-
490
-
491
-
492
-
493
-
494
-
495
-
496
-
497
-
498
-
499
-
500
-
501
-
502
-
503
-
504
-
505
-
506
-
507
-
508
-
509
-
510
-
511
-
512
-
513
-
514
-
515
-
516
-
517
-
518
-
519
-
520
-
521
-
522
-
523
-
524
-
525
-
526
-
527
-
528
-
529
-
530
-
531
-
532
-
533
-
534
-
535
-
536
-
537
-
538
-
539
-
540
-
541
-
542
-
543
-
544
-
545
-
546
-
547
-
548
-
549
-
550
-
551
-
552
-
553
-
554
-
555
-
556
-
557
-
558
-
559
-
560
-
561
-
562
-
563
-
564
-
565
-
566
-
567
-
568
-
569
-
570
-
571
-
572
-
573
-
574
-
575
-
576
-
577
-
578
-
579
-
580
-
581
-
582
-
583
-
584
-
585
-
586
-
587
-
588
-
589
-
590
-
591
-
592
 |
 |
