Kyocera FS 3830N FS-3820N/3830N Operation Guide Rev-1.1 - Page 179
There are two sockets are provided on the FS-3830N and one socket
 |
View all Kyocera FS 3830N manuals
Add to My Manuals
Save this manual to your list of manuals |
Page 179 highlights
Expanding the Printer Memory 2 Remove the two screws from the printer's rear panel. Screws 3 Pull the main circuit board all the way out of the printer. DIMM Sockets • Before pulling the main circuit board out, clear away the area behind the printer. Foreign objects, accidentally sticking to the back of the Note main circuit board, can cause serious damage to the printer. • There are two sockets are provided on the FS-3830N and one socket on the FS-3820N for expanding the printer's memory. (The extra 32 MB of DIMM memory that come standard with the FS-3830N is installed in one of the expansion sockets.) Install the DIMM as described on the following page. A-5
-
 1
1 -
2
-
3
-
4
-
5
-
6
-
7
-
8
-
9
-
10
-
11
-
12
-
13
-
14
-
15
-
16
-
17
-
18
-
19
-
20
-
21
-
22
-
23
-
24
-
25
-
26
-
27
-
28
-
29
-
30
-
31
-
32
-
33
-
34
-
35
-
36
-
37
-
38
-
39
-
40
-
41
-
42
-
43
-
44
-
45
-
46
-
47
-
48
-
49
-
50
-
51
-
52
-
53
-
54
-
55
-
56
-
57
-
58
-
59
-
60
-
61
-
62
-
63
-
64
-
65
-
66
-
67
-
68
-
69
-
70
-
71
-
72
-
73
-
74
-
75
-
76
-
77
-
78
-
79
-
80
-
81
-
82
-
83
-
84
-
85
-
86
-
87
-
88
-
89
-
90
-
91
-
92
-
93
-
94
-
95
-
96
-
97
-
98
-
99
-
100
-
101
-
102
-
103
-
104
-
105
-
106
-
107
-
108
-
109
-
110
-
111
-
112
-
113
-
114
-
115
-
116
-
117
-
118
-
119
-
120
-
121
-
122
-
123
-
124
-
125
-
126
-
127
-
128
-
129
-
130
-
131
-
132
-
133
-
134
-
135
-
136
-
137
-
138
-
139
-
140
-
141
-
142
-
143
-
144
-
145
-
146
-
147
-
148
-
149
-
150
-
151
-
152
-
153
-
154
-
155
-
156
-
157
-
158
-
159
-
160
-
161
-
162
-
163
-
164
-
165
-
166
-
167
-
168
-
169
-
170
-
171
-
172
-
173
-
 174
174 -
 175
175 -
 176
176 -
 177
177 -
 178
178 -
 179
179 -
 180
180 -
 181
181 -
 182
182 -
 183
183 -
 184
184 -
185
-
186
-
187
-
188
-
189
-
190
-
191
-
192
-
193
-
194
-
195
-
196
-
197
-
198
-
199
-
200
-
201
-
202
-
203
-
204
-
205
-
206
-
207
-
208
-
209
-
210
-
211
-
212
-
213
-
214
-
215
-
216
-
217
-
218
-
219
-
220
-
221
-
222
-
223
-
224
-
225
-
226
-
227
 |
 |
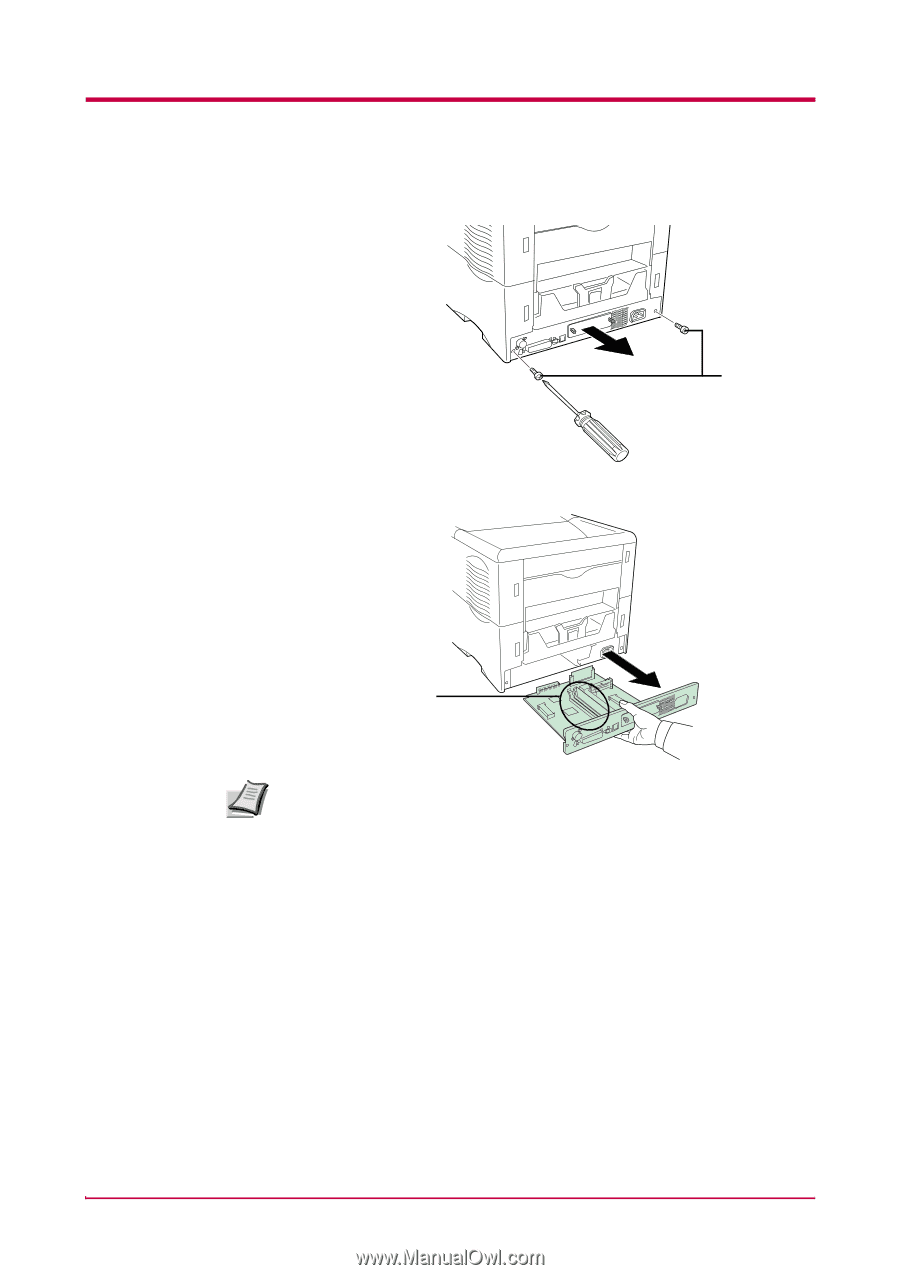
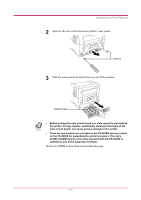
Expanding the Printer Memory
A-5
2
Remove the two screws from the printer’s rear panel.
3
Pull the main circuit board all the way out of the printer.
•
Before pulling the main circuit board out, clear away the area behind
the printer. Foreign objects, accidentally sticking to the back of the
main circuit board, can cause serious damage to the printer.
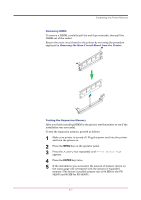
•
There are two sockets are provided on the FS-3830N and one socket
on the FS-3820N for expanding the printer's memory. (The extra
32 MB of DIMM memory that come standard with the FS-3830N is
installed in one of the expansion sockets.)
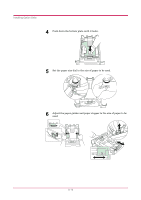
Install the DIMM as described on the following page.
Screws
DIMM Sockets
Note