Kyocera FS 3830N FS-3820N/3830N Operation Guide Rev-1.1 - Page 44
Setting the Paper Size in MP Tray, KX Printer Drivers, Operation Guide,
 |
View all Kyocera FS 3830N manuals
Add to My Manuals
Save this manual to your list of manuals |
Page 44 highlights
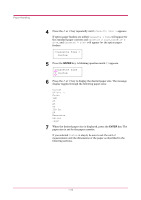
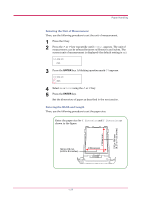
Paper Handling 1 When the unit of measurement is set, press the key. >>X Dimension appears as shown below (the paper width setting). >>X Dimension 216 mm 2 Press the ENTER key. A blinking cursor ( ) appears. >>X Dimension 216 mm 3 Press the or key to increase or decrease the value of the figure where the cursor is blinking and display the desired width. The width can be set between 148 and 216 mm (5.83 to 8.5 inches). You can use the > and < keys to move the cursor right and left. 4 Display the paper width and press the ENTER key. 5 When the width is set, press the key. >>Y Dimension appears (the paper length setting). Set the desired length in the same way as the width. The length can be set between 210 and 356 mm (8.27 to 14.02 inches). 6 Display the paper length, press the ENTER key. 7 Press the MENU key. The message display returns to Ready. To print using the custom size set above, define the same custom size on the printer driver. For details, see KX Printer Drivers Operation Guide. Setting the Paper Size in MP Tray When using the MP tray in the cassette mode, you should set the same paper size to the MP tray as that is used to format the job to print. The factory default setting is A4 or Letter. This menu does not appears when the option envelope feeder is installed on the printer. For more details about the paper sizes that can be fed from the MP tray, see Chapter 2. 1 Press the MENU key. 2 Press the or key repeatedly until Paper Handling > appears. Paper Handling > 1-28
-
 1
1 -
2
-
3
-
4
-
5
-
6
-
7
-
8
-
9
-
10
-
11
-
12
-
13
-
14
-
15
-
16
-
17
-
18
-
19
-
20
-
21
-
22
-
23
-
24
-
25
-
26
-
27
-
28
-
29
-
30
-
31
-
32
-
33
-
34
-
35
-
36
-
37
-
38
-
 39
39 -
 40
40 -
 41
41 -
 42
42 -
 43
43 -
 44
44 -
 45
45 -
 46
46 -
 47
47 -
 48
48 -
 49
49 -
50
-
51
-
52
-
53
-
54
-
55
-
56
-
57
-
58
-
59
-
60
-
61
-
62
-
63
-
64
-
65
-
66
-
67
-
68
-
69
-
70
-
71
-
72
-
73
-
74
-
75
-
76
-
77
-
78
-
79
-
80
-
81
-
82
-
83
-
84
-
85
-
86
-
87
-
88
-
89
-
90
-
91
-
92
-
93
-
94
-
95
-
96
-
97
-
98
-
99
-
100
-
101
-
102
-
103
-
104
-
105
-
106
-
107
-
108
-
109
-
110
-
111
-
112
-
113
-
114
-
115
-
116
-
117
-
118
-
119
-
120
-
121
-
122
-
123
-
124
-
125
-
126
-
127
-
128
-
129
-
130
-
131
-
132
-
133
-
134
-
135
-
136
-
137
-
138
-
139
-
140
-
141
-
142
-
143
-
144
-
145
-
146
-
147
-
148
-
149
-
150
-
151
-
152
-
153
-
154
-
155
-
156
-
157
-
158
-
159
-
160
-
161
-
162
-
163
-
164
-
165
-
166
-
167
-
168
-
169
-
170
-
171
-
172
-
173
-
174
-
175
-
176
-
177
-
178
-
179
-
180
-
181
-
182
-
183
-
184
-
185
-
186
-
187
-
188
-
189
-
190
-
191
-
192
-
193
-
194
-
195
-
196
-
197
-
198
-
199
-
200
-
201
-
202
-
203
-
204
-
205
-
206
-
207
-
208
-
209
-
210
-
211
-
212
-
213
-
214
-
215
-
216
-
217
-
218
-
219
-
220
-
221
-
222
-
223
-
224
-
225
-
226
-
227
 |
 |