Kyocera KM-3035 iTag Specification/Setup/Operation Guide Ver. 8.0 - Page 32
Configuring the Send To Printer Process, Kyocera MFP, Properties, MFP Form, Components - network setup
 |
View all Kyocera KM-3035 manuals
Add to My Manuals
Save this manual to your list of manuals |
Page 32 highlights
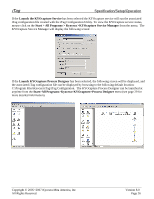
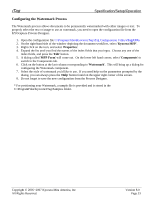
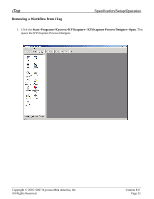
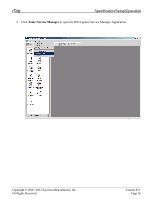
iTag Specification/Setup/Operation Configuring the Send To Printer Process The Send To Printer Process routes images to printers located anywhere on the network. When this process is selected in the iTag configuration utility, the workflow will direct all print jobs into the server's default printer. If this is the desired setting, then no additional configuration is required to use this process. If further configuration is required, see the paragraphs below. Perform additional configuration of this component from the KYOcapture Process Designer to set any of the following for your printouts: • Destination printer • Paper size • Paper source • Number of copies • Pages per sheet • Orientation 1. Open the configuration file C:\Program Files\Kyocera\iTag\iTag Configuration Utility\iTag.CFG . 2. On the right-hand side of the window depicting the document workflow, select 'Kyocera MFP'. 3. Right click on the icon, and select 'Properties'. 4. Expand the list until you find the names of the index fields that you input. Choose any one of the index fields, and press the 'Edit' button. 5. A dialog called 'MFP Form' will come out. On the lower left hand corner, select 'Components' to switch to the Components tab. 6. Click on the button at the last column corresponding to 'Send To Printer'. This will bring up a dialog for configuring the Send To Printer component. 7. Input your desired selection for the settings you'd like to customize. If you need help on the parameters prompted by the dialog, you can always press the 'Help' button. 8. Do not forget to save the new configuration from the Process Designer. Copyright © 2005~2007 Kyocera Mita America, Inc All Rights Reserved. Version 8.0 Page 31
-
 1
1 -
2
-
3
-
4
-
5
-
6
-
7
-
8
-
9
-
10
-
11
-
12
-
13
-
14
-
15
-
16
-
17
-
18
-
19
-
20
-
21
-
22
-
23
-
24
-
25
-
26
-
 27
27 -
 28
28 -
 29
29 -
 30
30 -
 31
31 -
 32
32 -
 33
33 -
 34
34 -
 35
35 -
 36
36 -
 37
37 -
38
-
39
-
40
-
41
-
42
-
43
-
44
-
45
-
46
-
47
-
48
-
49
-
50
-
51
-
52
-
53
-
54
-
55
-
56
-
57
-
58
-
59
-
60
-
61
-
62
-
63
-
64
-
65
-
66
-
67
-
68
-
69
-
70
-
71
-
72
-
73
-
74
-
75
-
76
-
77
-
78
-
79
-
80
-
81
-
82
-
83
-
84
-
85
-
86
-
87
-
88
-
89
-
90
-
91
-
92
-
93
-
94
-
95
-
96
 |
 |