Kyocera KM-3035 iTag Specification/Setup/Operation Guide Ver. 8.0 - Page 33
Configuring the Send To Folder Process, Kyocera MFP, Properties, MFP Form, Components, Send To Folder
 |
View all Kyocera KM-3035 manuals
Add to My Manuals
Save this manual to your list of manuals |
Page 33 highlights
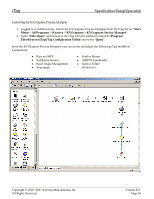
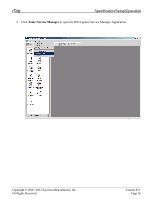
iTag Specification/Setup/Operation Configuring the Send To Folder Process The Send To Folder Process copies files to any local or network directory. When this process is selected in the iTag configuration utility, you are prompted for the folder where documents can be stored. If no other advanced configuration is required, your document workflow should be able to store files in the selected directory without any problems. Perform additional configuration of this component from the KYOcapture Process Designer if you want to do any of the following: • Create dynamic folder names and locations. • Option to rename the file, based on document index information, field values, or field value references. • Option to check user level security against the destination folder location. Only accept users with write permission to store files into destination location. • Enter additional information about the nature of documents stored in the folder such as keywords and comments. 1. Open the configuration file C:\Program Files\Kyocera\iTag\iTag Configuration Utility\iTag.CFG. 2. On the right hand side of the window depicting the document workflow, select 'Kyocera MFP'. 3. Right click on the icon, and select 'Properties'. 4. Expand the list until you find the names of the index fields that you input. Choose any one of the index fields, and press the 'Edit' button. 5. A dialog called 'MFP Form' will come out. Select the 'Components' tab to switch to the available components for the form. 6. Click on the button at the last column corresponding to 'Send To Folder'. This will bring up a dialog for configuring the Send To Folder component. 7. Input your desired selection for the settings you'd like to customize. If you need help on the parameters prompted by the dialog, you can always press the 'Help' button found on the upper right corner of the screen. 8. Do not forget to save the new configuration from the Process Designer. To learn more about how to start the KYOcapture Service manually, go to page 29, Manually Launching the KYOcapture Service Copyright © 2005~2007 Kyocera Mita America, Inc All Rights Reserved. Version 8.0 Page 32
-
 1
1 -
2
-
3
-
4
-
5
-
6
-
7
-
8
-
9
-
10
-
11
-
12
-
13
-
14
-
15
-
16
-
17
-
18
-
19
-
20
-
21
-
22
-
23
-
24
-
25
-
26
-
27
-
 28
28 -
 29
29 -
 30
30 -
 31
31 -
 32
32 -
 33
33 -
 34
34 -
 35
35 -
 36
36 -
 37
37 -
 38
38 -
39
-
40
-
41
-
42
-
43
-
44
-
45
-
46
-
47
-
48
-
49
-
50
-
51
-
52
-
53
-
54
-
55
-
56
-
57
-
58
-
59
-
60
-
61
-
62
-
63
-
64
-
65
-
66
-
67
-
68
-
69
-
70
-
71
-
72
-
73
-
74
-
75
-
76
-
77
-
78
-
79
-
80
-
81
-
82
-
83
-
84
-
85
-
86
-
87
-
88
-
89
-
90
-
91
-
92
-
93
-
94
-
95
-
96
 |
 |
