Kyocera KM-3035 iTag Specification/Setup/Operation Guide Ver. 8.0 - Page 84
Click the KYOcapture Tab along the bottom Right Panel and Enable KYOcapture, Enter the IP
 |
View all Kyocera KM-3035 manuals
Add to My Manuals
Save this manual to your list of manuals |
Page 84 highlights
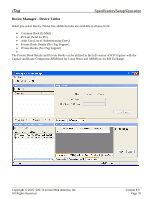
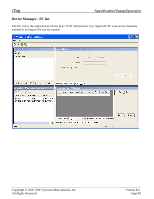
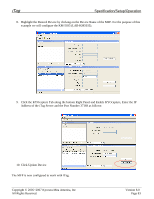
iTag Specification/Setup/Operation 8. Highlight the Desired Device by clicking on the Device Name of the MFP. For the purpose of this example we will configure the KM-5035 (LAB-KM5035). 9. Click the KYOcapture Tab along the bottom Right Panel and Enable KYOcapture, Enter the IP Address of the iTag Server and the Port Number 37169 as follows: 10. Click Update Device The MFP is now configured to work with iTag. Copyright © 2005~2007 Kyocera Mita America, Inc All Rights Reserved. Version 8.0 Page 83
-
 1
1 -
2
-
3
-
4
-
5
-
6
-
7
-
8
-
9
-
10
-
11
-
12
-
13
-
14
-
15
-
16
-
17
-
18
-
19
-
20
-
21
-
22
-
23
-
24
-
25
-
26
-
27
-
28
-
29
-
30
-
31
-
32
-
33
-
34
-
35
-
36
-
37
-
38
-
39
-
40
-
41
-
42
-
43
-
44
-
45
-
46
-
47
-
48
-
49
-
50
-
51
-
52
-
53
-
54
-
55
-
56
-
57
-
58
-
59
-
60
-
61
-
62
-
63
-
64
-
65
-
66
-
67
-
68
-
69
-
70
-
71
-
72
-
73
-
74
-
75
-
76
-
77
-
78
-
 79
79 -
 80
80 -
 81
81 -
 82
82 -
 83
83 -
 84
84 -
 85
85 -
 86
86 -
 87
87 -
 88
88 -
 89
89 -
90
-
91
-
92
-
93
-
94
-
95
-
96
 |
 |
iTag
Specification/Setup/Operation
Copyright © 2005~2007 Kyocera Mita America, Inc
Version 8.0
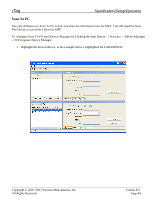
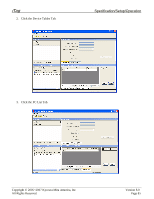
8.
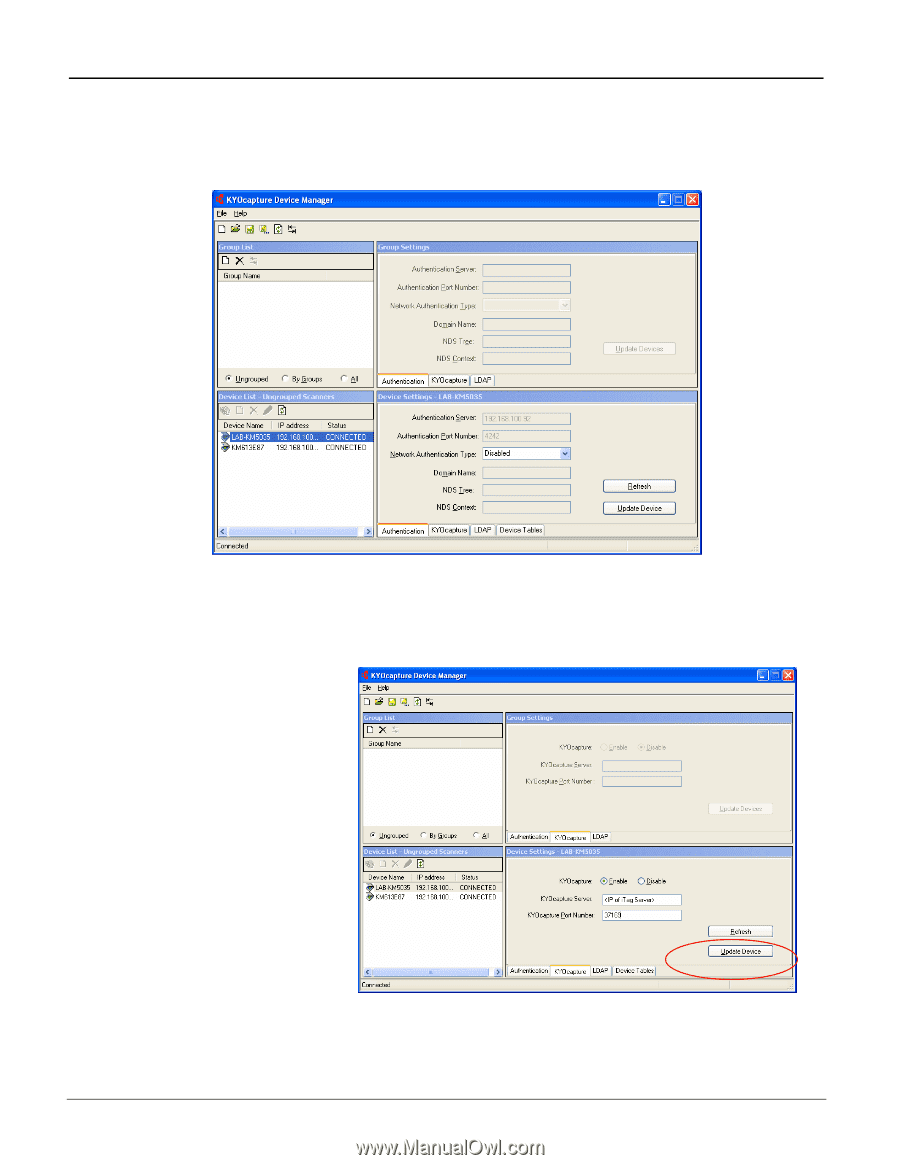
Highlight the Desired Device by clicking on the Device Name of the MFP. For the purpose of this
example we will configure the KM-5035 (LAB-KM5035).
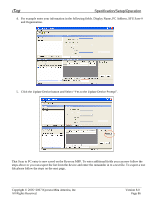
9.
Click the KYOcapture Tab along the bottom Right Panel and Enable KYOcapture, Enter the IP
Address of the iTag Server and the Port Number 37169 as follows:
10.
Click Update Device
The MFP is now configured to work with iTag.
All Rights Reserved
.
Page 83