Nikon VAA109EA User Manual - Page 18
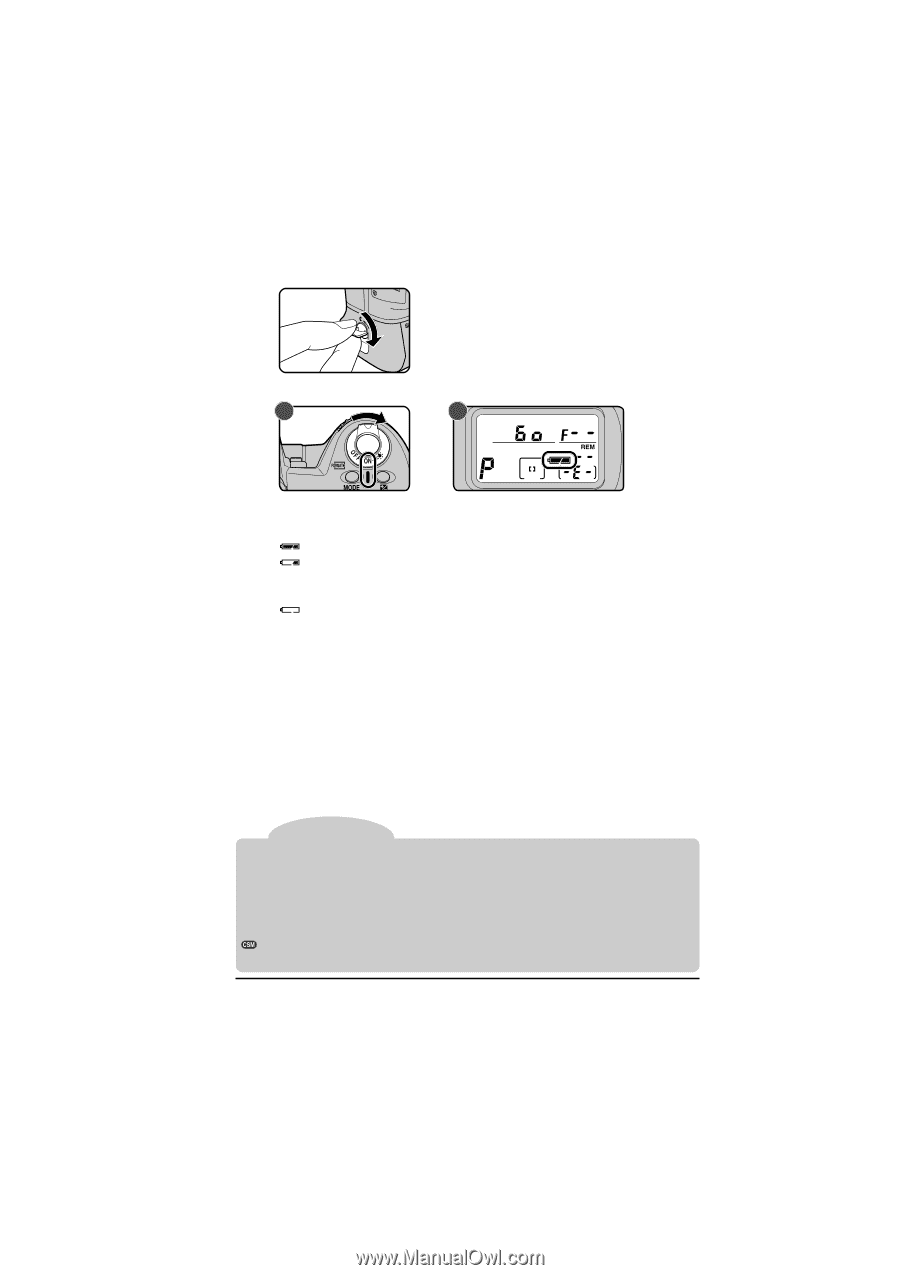
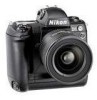
Turn the battery pack latch to the locked position, Check the battery indicator
 |
View all Nikon VAA109EA manuals
Add to My Manuals
Save this manual to your list of manuals |
Page 18 highlights
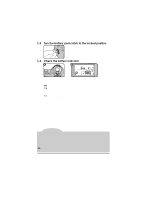
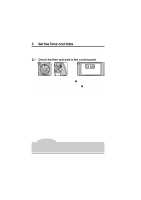
1.3 Turn the battery pack latch to the locked position 1.4 Check the battery indicator A B Turn the camera on (A) and confirm the battery level in the control panel on top of the camera (B). Battery fully charged Low battery Ready a fully-charged spare battery. (The display in the viewfinder turns off to save power when no operations are being performed.) Battery exhausted No photographs can be taken until the battery has been replaced. All indicators in the viewfinder and rear control panel, and all indicators in the top control panel other than the exposure mode, battery indicator, and exposure counter, disappear six seconds after the camera is turned on (automatic meter switch-off). Tip Reactivating the display Lightly press (half-press) the shutter-release button to reactivate the display in the control panel and viewfinder. Indicators will be displayed for six seconds after you remove your finger from the button. Note that when using the shutter-release button for vertical shooting, you will need to set the shutter-release button lock release for vertical shooting to the unlocked position. The length of time before automatic meter switch-off can be changed using custom settings (see "Custom Settings," item 15). First Steps: Insert the Battery 5
-
 1
1 -
2
-
3
-
4
-
5
-
6
-
7
-
8
-
9
-
10
-
11
-
12
-
 13
13 -
 14
14 -
 15
15 -
 16
16 -
 17
17 -
 18
18 -
 19
19 -
 20
20 -
 21
21 -
 22
22 -
 23
23 -
24
-
25
-
26
-
27
-
28
-
29
-
30
-
31
-
32
-
33
-
34
-
35
-
36
-
37
-
38
-
39
-
40
-
41
-
42
-
43
-
44
-
45
-
46
-
47
-
48
-
49
-
50
-
51
-
52
-
53
-
54
-
55
-
56
-
57
-
58
-
59
-
60
-
61
-
62
-
63
-
64
-
65
-
66
-
67
-
68
-
69
-
70
-
71
-
72
-
73
-
74
-
75
-
76
-
77
-
78
-
79
-
80
-
81
-
82
-
83
-
84
-
85
-
86
-
87
-
88
-
89
-
90
-
91
-
92
-
93
-
94
-
95
-
96
-
97
-
98
-
99
-
100
-
101
-
102
-
103
-
104
-
105
-
106
-
107
-
108
-
109
-
110
-
111
-
112
-
113
-
114
-
115
-
116
-
117
-
118
-
119
-
120
-
121
-
122
-
123
-
124
-
125
-
126
-
127
-
128
-
129
-
130
-
131
-
132
-
133
-
134
-
135
-
136
-
137
-
138
-
139
-
140
-
141
-
142
-
143
-
144
 |
 |