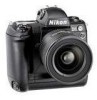
Nikon VAA109EA User Manual - Page 58
Aperture-priority auto
 |
View all Nikon VAA109EA manuals
Add to My Manuals
Save this manual to your list of manuals |
Page 58 highlights
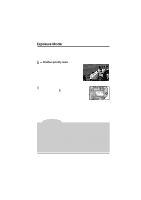
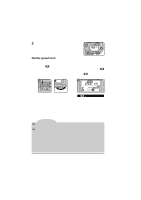
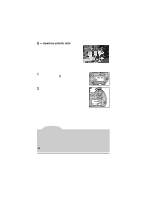
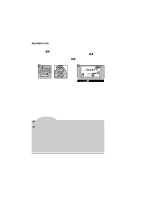
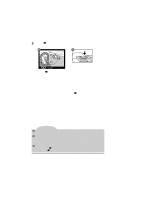
- Aperture-priority auto In aperture-priority auto, you set the aperture and the camera automatically adjusts the shutter speed to produce the best exposure. Small apertures (high f-numbers) can be used to increase the depth of field, bringing background and foreground into focus. Large apertures (low f-numbers) can be used to blur the background. Larger apertures can also be used to increase the range of the flash. To use aperture-priority auto: 1 Holding the MODE button down, rotate the main command dial until appears in the control panel on top of the camera. 2 Rotate the sub-command dial to choose an aperture between the minimum and maximum settings possible for the lens. Note With CPU lenses, the lens aperture ring must be set to its maximum f-number when aperture-priority auto is used. At other settings, the aperture display in the viewfinder and the control panel on top of the camera will show a blinking FEE and the shutter will lock. When a non-CPU lens is used, aperture can be adjusted using the lens aperture ring. The aperture display in the viewfinder and the control panel on top of the camera will show F-- to indicate that aperture must be set manually using the aperture ring. Custom Setting 22 can be used to allow aperture to be set with the aperture ring on CPU lenses. See "Custom Settings," item 22. Camera Settings: Exposure Mode 45
-
 1
1 -
2
-
3
-
4
-
5
-
6
-
7
-
8
-
9
-
10
-
11
-
12
-
13
-
14
-
15
-
16
-
17
-
18
-
19
-
20
-
21
-
22
-
23
-
24
-
25
-
26
-
27
-
28
-
29
-
30
-
31
-
32
-
33
-
34
-
35
-
36
-
37
-
38
-
39
-
40
-
41
-
42
-
43
-
44
-
45
-
46
-
47
-
48
-
49
-
50
-
51
-
52
-
 53
53 -
 54
54 -
 55
55 -
 56
56 -
 57
57 -
 58
58 -
 59
59 -
 60
60 -
 61
61 -
 62
62 -
 63
63 -
64
-
65
-
66
-
67
-
68
-
69
-
70
-
71
-
72
-
73
-
74
-
75
-
76
-
77
-
78
-
79
-
80
-
81
-
82
-
83
-
84
-
85
-
86
-
87
-
88
-
89
-
90
-
91
-
92
-
93
-
94
-
95
-
96
-
97
-
98
-
99
-
100
-
101
-
102
-
103
-
104
-
105
-
106
-
107
-
108
-
109
-
110
-
111
-
112
-
113
-
114
-
115
-
116
-
117
-
118
-
119
-
120
-
121
-
122
-
123
-
124
-
125
-
126
-
127
-
128
-
129
-
130
-
131
-
132
-
133
-
134
-
135
-
136
-
137
-
138
-
139
-
140
-
141
-
142
-
143
-
144
 |
 |
