Nikon VAA109EA User Manual - Page 75
Self Timer Mode
 |
View all Nikon VAA109EA manuals
Add to My Manuals
Save this manual to your list of manuals |
Page 75 highlights
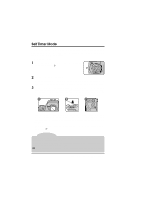
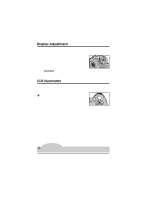
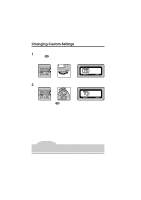
Self Timer Mode The D1's built-in self timer is ideal for photographs in which photographers wish to appear themselves. The camera should be placed on a stable, level surface (a tripod is recommended). To use the self timer: 1 Holding down the mode dial lock release, rotate the mode dial to select . 2 Compose the picture and focus. With single-servo AF, check that the in-focus indicator (q) appears in the viewfinder. Photographs can not be taken when the camera is not focused. 3 In exposure modes other than manual (M), you should close the viewfinder eyepiece shutter (A) to prevent light entering via the eyepiece from affecting the results of the auto-exposure operation. You can then press the shutter-release button all the way down to start the self timer (B). A B C After the shutter-release button is pressed, the self-timer lamp on front of the camera (C) will blink for eight seconds. Two seconds after the lamp stops blinking, the shutter will release automatically and a photograph will be taken. To turn the self timer off before a photo is taken, set the mode dial to a mode other than . Tips Do not stand in front of the lens when adjusting camera settings in single-servo or continuous-servo autofocus modes. If a shutter speed of bulb (long time exposure) is chosen in self-timer mode, shutter speed will be set to approximately 1/10 sec. The timer can be set to delays of 2, 5, or 20 seconds using Custom Setting 16 (see "Custom Settings"). 62 Camera Settings: Self Timer Mode
-
 1
1 -
2
-
3
-
4
-
5
-
6
-
7
-
8
-
9
-
10
-
11
-
12
-
13
-
14
-
15
-
16
-
17
-
18
-
19
-
20
-
21
-
22
-
23
-
24
-
25
-
26
-
27
-
28
-
29
-
30
-
31
-
32
-
33
-
34
-
35
-
36
-
37
-
38
-
39
-
40
-
41
-
42
-
43
-
44
-
45
-
46
-
47
-
48
-
49
-
50
-
51
-
52
-
53
-
54
-
55
-
56
-
57
-
58
-
59
-
60
-
61
-
62
-
63
-
64
-
65
-
66
-
67
-
68
-
69
-
 70
70 -
 71
71 -
 72
72 -
 73
73 -
 74
74 -
 75
75 -
 76
76 -
 77
77 -
 78
78 -
 79
79 -
 80
80 -
81
-
82
-
83
-
84
-
85
-
86
-
87
-
88
-
89
-
90
-
91
-
92
-
93
-
94
-
95
-
96
-
97
-
98
-
99
-
100
-
101
-
102
-
103
-
104
-
105
-
106
-
107
-
108
-
109
-
110
-
111
-
112
-
113
-
114
-
115
-
116
-
117
-
118
-
119
-
120
-
121
-
122
-
123
-
124
-
125
-
126
-
127
-
128
-
129
-
130
-
131
-
132
-
133
-
134
-
135
-
136
-
137
-
138
-
139
-
140
-
141
-
142
-
143
-
144
 |
 |
