Nikon VAA109EA User Manual - Page 19
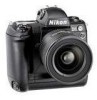
Attach the Lens
 |
View all Nikon VAA109EA manuals
Add to My Manuals
Save this manual to your list of manuals |
Page 19 highlights
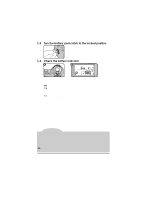
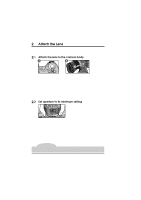
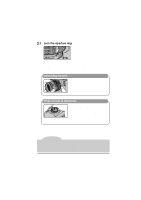
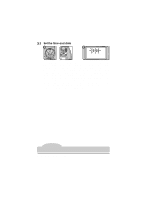
2 Attach the Lens After making sure that the camera is off, mount the lens and set the aperture to its minimum setting (largest f-number). 2.1 Attach the lens to the camera body A B Turn the camera off (A). Align the mounting mark on the lens with the mounting mark on the camera body, then, being careful not to touch the lens-release button, turn the lens counter-clockwise until it locks into place (B). If no lens is attached, or if a non-CPU lens is attached (see "Technical Notes: Compatible Lenses"), F-- will appear in the top control panel and viewfinder when the camera is turned on (if the exposure mode is set to programmed auto or shutter-priority auto, the exposure mode indicator will also blink). 2.2 Set aperture to its minimum setting Set the lens to minimum aperture (maximum f-number). If the lens is not set to the minimum aperture, a blinking FEE indicator will appear in the viewfinder and in the control panel on top of the camera when the camera is turned on. The shutter can not be released while this indicator is displayed. Tip To get the most from your camera, use a D-Type AF Nikkor lens (see "Technical Notes: Compatible Lenses" for more information). 6 First Steps: Attach the Lens
-
 1
1 -
2
-
3
-
4
-
5
-
6
-
7
-
8
-
9
-
10
-
11
-
12
-
13
-
 14
14 -
 15
15 -
 16
16 -
 17
17 -
 18
18 -
 19
19 -
 20
20 -
 21
21 -
 22
22 -
 23
23 -
 24
24 -
25
-
26
-
27
-
28
-
29
-
30
-
31
-
32
-
33
-
34
-
35
-
36
-
37
-
38
-
39
-
40
-
41
-
42
-
43
-
44
-
45
-
46
-
47
-
48
-
49
-
50
-
51
-
52
-
53
-
54
-
55
-
56
-
57
-
58
-
59
-
60
-
61
-
62
-
63
-
64
-
65
-
66
-
67
-
68
-
69
-
70
-
71
-
72
-
73
-
74
-
75
-
76
-
77
-
78
-
79
-
80
-
81
-
82
-
83
-
84
-
85
-
86
-
87
-
88
-
89
-
90
-
91
-
92
-
93
-
94
-
95
-
96
-
97
-
98
-
99
-
100
-
101
-
102
-
103
-
104
-
105
-
106
-
107
-
108
-
109
-
110
-
111
-
112
-
113
-
114
-
115
-
116
-
117
-
118
-
119
-
120
-
121
-
122
-
123
-
124
-
125
-
126
-
127
-
128
-
129
-
130
-
131
-
132
-
133
-
134
-
135
-
136
-
137
-
138
-
139
-
140
-
141
-
142
-
143
-
144
 |
 |
