Nokia IP1220 Installation Guide - Page 103
Before You Begin, To install the encryption accelerator card
 |
View all Nokia IP1220 manuals
Add to My Manuals
Save this manual to your list of manuals |
Page 103 highlights
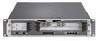
Installing a Nokia Encryption Accelerator Card Before You Begin To replace the encryption accelerator card, you need: „ Physical access to the appliance „ The Nokia encryption accelerator card and installation kit „ Phillips-head screwdriver „ Four screws (included in kit) „ Disposable wrist strap (included in kit) Caution To help guard against electrostatic discharge damage, make sure you are properly grounded by using a grounding wrist strap and following the instructions provided with the wrist strap before you handle the components or open the appliance. The grounding plug on the front of the appliance (shown in Figure 1 on page 20) provides a chassis grounding point. If you do not have a grounding wrist strap, make sure you are properly grounded before you touch any electronic component. Note Because power to an IP1200 Series is automatically disconnected when the chassis tray assembly is opened, you do not need to manually disconnect the power for this procedure. Any servicing of the appliance, however, should be completed with the chassis tray assembly fully removed from the appliance. To install the encryption accelerator card 1. Use Nokia Network Voyager or Lynx to shut down the IP1200 Series. For information about how to access Network Voyager and the related reference materials, see "Using Nokia Network Voyager" on page 44. IP1220 and IP1260 Security Platforms Installation Guide 103
-
 1
1 -
2
-
3
-
4
-
5
-
6
-
7
-
8
-
9
-
10
-
11
-
12
-
13
-
14
-
15
-
16
-
17
-
18
-
19
-
20
-
21
-
22
-
23
-
24
-
25
-
26
-
27
-
28
-
29
-
30
-
31
-
32
-
33
-
34
-
35
-
36
-
37
-
38
-
39
-
40
-
41
-
42
-
43
-
44
-
45
-
46
-
47
-
48
-
49
-
50
-
51
-
52
-
53
-
54
-
55
-
56
-
57
-
58
-
59
-
60
-
61
-
62
-
63
-
64
-
65
-
66
-
67
-
68
-
69
-
70
-
71
-
72
-
73
-
74
-
75
-
76
-
77
-
78
-
79
-
80
-
81
-
82
-
83
-
84
-
85
-
86
-
87
-
88
-
89
-
90
-
91
-
92
-
93
-
94
-
95
-
96
-
97
-
 98
98 -
 99
99 -
 100
100 -
 101
101 -
 102
102 -
 103
103 -
 104
104 -
 105
105 -
 106
106 -
 107
107 -
 108
108 -
109
-
110
-
111
-
112
-
113
-
114
-
115
-
116
-
117
-
118
-
119
-
120
-
121
-
122
-
123
-
124
-
125
-
126
-
127
-
128
 |
 |
