Nokia IP1220 Installation Guide - Page 50
Removing, Installing, and Replacing NICs or the ADP Module, Before You Begin
 |
View all Nokia IP1220 manuals
Add to My Manuals
Save this manual to your list of manuals |
Page 50 highlights
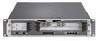
4 Installing and Replacing Network Interface Cards and Accelerated Data Path (ADP) Services Modules Removing, Installing, and Replacing NICs or the ADP Module The IP1200 Series has two slots on the front of the appliance that hold two 6U PMC carriers or a single Accelerated Data Path (ADP) services module. All NICs installed in the IP1200 Series are housed in the 6U PMC carrier. You must first remove the 6U PMC carrier from its slot before you can remove or install a NIC. ADP modules use a carrier similar to the 6U PMC carrier, but the device uses both slots 1 and 2 in your appliance. Note Because the IP1200 Series supports hot swapping of NICs, you do not have to turn off power from the system to remove, install, or replace these devices. ADP modules, however, are not hot-swappable. Before You Begin Before you install a NIC, make sure that the rubber gasket around the front of the NIC is installed properly. To remove, install, or replace a NIC or ADP module you need the following: „ Phillips-head screwdriver „ Suitable, grounded work surface on which to place the PMC carrier or ADP module „ Replacement or new NIC or ADP module To replace a network interface card (NIC) or ADP module Note If you are servicing the slot 1 carrier, Nokia recommends that you disconnect interface cables from the PMC cards after you remove the carrier, as it is more difficult to remove cables from a carrier installed in that location. 1. Identify the location (PMC carrier and slot) of the NIC or ADP module to be replaced. Note For ADP modules, even though the device occupies slots 1 and 2, the location is identified as slot 2 only. 2. Loosen the screws on each side of the PMC carrier or ADP module. The screws are located behind the ejector and locking levers. 50 IP1220 and IP1260 Security Platforms Installation Guide
-
 1
1 -
2
-
3
-
4
-
5
-
6
-
7
-
8
-
9
-
10
-
11
-
12
-
13
-
14
-
15
-
16
-
17
-
18
-
19
-
20
-
21
-
22
-
23
-
24
-
25
-
26
-
27
-
28
-
29
-
30
-
31
-
32
-
33
-
34
-
35
-
36
-
37
-
38
-
39
-
40
-
41
-
42
-
43
-
44
-
 45
45 -
 46
46 -
 47
47 -
 48
48 -
 49
49 -
 50
50 -
 51
51 -
 52
52 -
 53
53 -
 54
54 -
 55
55 -
56
-
57
-
58
-
59
-
60
-
61
-
62
-
63
-
64
-
65
-
66
-
67
-
68
-
69
-
70
-
71
-
72
-
73
-
74
-
75
-
76
-
77
-
78
-
79
-
80
-
81
-
82
-
83
-
84
-
85
-
86
-
87
-
88
-
89
-
90
-
91
-
92
-
93
-
94
-
95
-
96
-
97
-
98
-
99
-
100
-
101
-
102
-
103
-
104
-
105
-
106
-
107
-
108
-
109
-
110
-
111
-
112
-
113
-
114
-
115
-
116
-
117
-
118
-
119
-
120
-
121
-
122
-
123
-
124
-
125
-
126
-
127
-
128
 |
 |
