Nokia IP1220 Installation Guide - Page 97
assembly, and completely remove the chassis to expose the compact flash memory slot
 |
View all Nokia IP1220 manuals
Add to My Manuals
Save this manual to your list of manuals |
Page 97 highlights
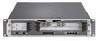
Replacing the Compact Flash Memory Card 5. Loosen the chassis tray assembly retaining screws on the front panel of the appliance. IP1200 00507.2 6. Slide the chassis tray assembly forward, pressing the release tab on the right side of the assembly, and completely remove the chassis to expose the compact flash memory slot on the motherboard. IP1220 and IP1260 Security Platforms Installation Guide 00049 97
-
 1
1 -
2
-
3
-
4
-
5
-
6
-
7
-
8
-
9
-
10
-
11
-
12
-
13
-
14
-
15
-
16
-
17
-
18
-
19
-
20
-
21
-
22
-
23
-
24
-
25
-
26
-
27
-
28
-
29
-
30
-
31
-
32
-
33
-
34
-
35
-
36
-
37
-
38
-
39
-
40
-
41
-
42
-
43
-
44
-
45
-
46
-
47
-
48
-
49
-
50
-
51
-
52
-
53
-
54
-
55
-
56
-
57
-
58
-
59
-
60
-
61
-
62
-
63
-
64
-
65
-
66
-
67
-
68
-
69
-
70
-
71
-
72
-
73
-
74
-
75
-
76
-
77
-
78
-
79
-
80
-
81
-
82
-
83
-
84
-
85
-
86
-
87
-
88
-
89
-
90
-
91
-
 92
92 -
 93
93 -
 94
94 -
 95
95 -
 96
96 -
 97
97 -
 98
98 -
 99
99 -
 100
100 -
 101
101 -
 102
102 -
103
-
104
-
105
-
106
-
107
-
108
-
109
-
110
-
111
-
112
-
113
-
114
-
115
-
116
-
117
-
118
-
119
-
120
-
121
-
122
-
123
-
124
-
125
-
126
-
127
-
128
 |
 |

Replacing the Compact Flash Memory Card
IP1220 and IP1260 Security Platforms Installation Guide
97
5.
Loosen the chassis tray assembly retaining screws on the front panel of the appliance.
6.
Slide the chassis tray assembly forward, pressing the release tab on the right side of the
assembly, and completely remove the chassis to expose the compact flash memory slot on
the motherboard.
00507.2
IP1200
00049