Nokia IP1220 Installation Guide - Page 42
Performing the Initial Configuration - end support
 |
View all Nokia IP1220 manuals
Add to My Manuals
Save this manual to your list of manuals |
Page 42 highlights
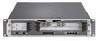
3 Performing the Initial Configuration „ That power is turned on to the power strip or wall receptacle into which you plugged the appliance. If the fans are still not running, or if the power LED does not illuminate, contact your Nokia service provider or Nokia Support as listed in "Nokia Contact Information" on page 3 for technical support. Note On an appliance with two active power supplies installed, connect and turn on both power supplies for load sharing and redundancy. If two power supplies are installed and both power supplies are not turned on, the Fault LED illuminates. Performing the Initial Configuration If you do not use DHCP to perform the initial configuration of your Nokia IP1200 Series appliance, you must use a serial console connection (cable included). After you perform the initial configuration, you no longer need the console connection. To perform the initial configuration 1. Turn on the appliance. At the console a series of startup messages appears, then the following prompt appears: Type any character to enter command mode. The prompt remains on the screen for about five seconds. If you type any character during this time, the system activates the Nokia IPSO boot manager. Note For information about how to use the boot manager, see the Nokia IPSO Boot Manager Reference Guide. After some miscellaneous output appears, the following prompt appears: Hostname? If the Hostname? prompt does not appear on the console, check the console port and console display connections to ensure that the serial cable is completely plugged in at both ends. If you verify the console connections and still do not see either the BOOTMGR> or Hostname? prompts, verify that the terminal or terminal emulator program settings are correct. If the settings are correct, contact your Nokia service provider as listed in "Nokia Contact Information" on page 3. 2. Respond to the Hostname? prompt within 30 seconds to prevent the DHCP client from starting. 42 IP1220 and IP1260 Security Platforms Installation Guide
-
 1
1 -
2
-
3
-
4
-
5
-
6
-
7
-
8
-
9
-
10
-
11
-
12
-
13
-
14
-
15
-
16
-
17
-
18
-
19
-
20
-
21
-
22
-
23
-
24
-
25
-
26
-
27
-
28
-
29
-
30
-
31
-
32
-
33
-
34
-
35
-
36
-
 37
37 -
 38
38 -
 39
39 -
 40
40 -
 41
41 -
 42
42 -
 43
43 -
 44
44 -
 45
45 -
 46
46 -
 47
47 -
48
-
49
-
50
-
51
-
52
-
53
-
54
-
55
-
56
-
57
-
58
-
59
-
60
-
61
-
62
-
63
-
64
-
65
-
66
-
67
-
68
-
69
-
70
-
71
-
72
-
73
-
74
-
75
-
76
-
77
-
78
-
79
-
80
-
81
-
82
-
83
-
84
-
85
-
86
-
87
-
88
-
89
-
90
-
91
-
92
-
93
-
94
-
95
-
96
-
97
-
98
-
99
-
100
-
101
-
102
-
103
-
104
-
105
-
106
-
107
-
108
-
109
-
110
-
111
-
112
-
113
-
114
-
115
-
116
-
117
-
118
-
119
-
120
-
121
-
122
-
123
-
124
-
125
-
126
-
127
-
128
 |
 |
