Pentax OPTIOWP Operation Manual
Pentax OPTIOWP - Optio WP Digital Camera Manual
 |
UPC - 027075110694
View all Pentax OPTIOWP manuals
Add to My Manuals
Save this manual to your list of manuals |
Pentax OPTIOWP manual content summary:
- Pentax OPTIOWP | Operation Manual - Page 1
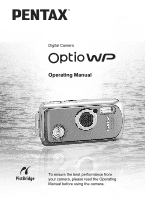
Digital Camera Operating Manual To ensure the best performance from your camera, please read the Operating Manual before using the camera. - Pentax OPTIOWP | Operation Manual - Page 2
Thank you for buying the PENTAX OptioWP Digital Camera. Please read this manual before using the camera in order to get the most out of all the features and functions. Keep this manual safe, as it can be a valuable tool in helping you to understand all the camera's capabilities. Regarding - Pentax OPTIOWP | Operation Manual - Page 3
may cause fire or electric shocks. • If the camera emits smoke or a strange smell, or in the event of any other irregularity, stop using the camera immediately, remove the battery and contact your nearest PENTAX Service Center. Continued use of the camera may result in fire or electric shock. 1 - Pentax OPTIOWP | Operation Manual - Page 4
come in contact with skin or clothes, wash the affected areas thoroughly with water. • Remove the battery from the camera immediately if it becomes product or other abnormality occurs, immediately discontinue using and consult a PENTAX Service Center. Continuing to use the product can cause a fire or - Pentax OPTIOWP | Operation Manual - Page 5
the AC plug cord becomes damaged, consult a PENTAX Service Center. • Do not short or touch the Service Network that is included in the package. This will be useful if you experience problems abroad. • When the camera your camera or recording media (SD Memory Card), etc. • The lens on this camera is - Pentax OPTIOWP | Operation Manual - Page 6
, dust, water, toxic gases, salt, etc. as this may cause damage to the camera. If rain or drops of water get onto the camera, please wipe dry. • Refer to "Precautions When Using an SD Memory Card" (p.30) regarding the SD Memory Card. • Please do not press forcefully on the LCD monitor. This could - Pentax OPTIOWP | Operation Manual - Page 7
. If there is any such damage, contact your nearest PENTAX Service Center. • To maintain the waterproof performance of the camera, you are recommended to change the waterproof packing once a year. Contact your nearest PENTAX Service Center regarding changing the packing. (A charge will be made - Pentax OPTIOWP | Operation Manual - Page 8
USE OF YOUR CAMERA 1 Care to be Taken During Handling 3 Contents 6 Composition of the Operating Manual 11 Camera Features 12 Checking Installing the SD Memory Card 28 Recorded Pixels and Quality Level of Still Pictures 31 Recorded Pixels and Frame Rate of Movies 33 Turning the Camera On - Pentax OPTIOWP | Operation Manual - Page 9
Setting the Playback Mode 60 Taking Pictures 63 Taking Pictures 63 Letting the Camera Choose the Optimal Settings (Program Mode 63 Taking Pictures in the Basic 90 Setting the Sensitivity 92 Setting the Instant Review Time (Instant Review 93 Setting the Image Sharpness (Sharpness 94 Setting - Pentax OPTIOWP | Operation Manual - Page 10
Playing Back Movies 112 Playing Back a Movie 112 Connecting the Camera to AV Equipment 113 Deleting Images 114 Deleting a Single Images/ 122 Trimming Images 124 Copying Images and Sound Files 125 Using the Digital Filters 127 Using the Brightness Filter 128 Red-eye Compensation 129 Adding - Pentax OPTIOWP | Operation Manual - Page 11
a Voice Memo 147 Playing Back a Voice Memo 148 Settings 149 Camera Settings 149 Formatting an SD Memory Card or the Built-in Memory 149 Changing the Date and Default Settings 168 Optional Accessories 171 Messages 172 Troubleshooting 174 Main Specifications 176 WARRANTY POLICY 180 9 - Pentax OPTIOWP | Operation Manual - Page 12
. indicates information that is useful to know. indicates precautions to be taken when operating the camera. A mode This is the mode for capturing still pictures and recording movies and sound files. In this manual, the mode for taking still pictures is referred to as the "Still Picture Capture - Pentax OPTIOWP | Operation Manual - Page 13
pictures and how to edit images with the camera. Refer to the ACDSee for PENTAX User Guide 8 for instructions on how to print or edit images using chapter explains how to set the camera-related functions. 9 Appendix This section deals with troubleshooting and lists the optional accessories. 11 - Pentax OPTIOWP | Operation Manual - Page 14
to make the most of the key features of your camera. Together with the explanations of camera operations, it will enable you to enjoy your camera to the full. Forget Your Worries About Water Getting in the Camera! The OptioWP is the only camera of its class that lets you take pictures continuously - Pentax OPTIOWP | Operation Manual - Page 15
, are saved. (1p.71) For recording yourself saying "Say cheese!" or "Look at the camera". For including the cheers of the crowd at exciting moments of a sporting event. Choose a Frame Before Taking the Picture! The OptioWP lets you choose a frame and display it on the screen before you take the - Pentax OPTIOWP | Operation Manual - Page 16
The user-friendly design of the OptioWP enables easy operation with the minimum number of buttons on the camera body. Simply by choosing the ) Press the Green button while the Mode Palette is displayed to display the guide. (1p.62) Use the Green mode to take pictures easily using standard - Pentax OPTIOWP | Operation Manual - Page 17
Enjoy Playback and Editing Functions Without a Computer! The OptioWP lets you play back and edit images without having to connect the camera to your computer and transfer the images first. The camera is all you need to take and edit still pictures and movies. (1p.122) And no more worries about - Pentax OPTIOWP | Operation Manual - Page 18
Camera OptioWP Strap O-ST20 (∗) Software (CD-ROM) S-SW30 USB cable I-USB7 (∗) AV cable I-AVC7 (∗) Rechargeable lithium-ion battery D-LI8 (∗) Battery charger D-BC8 (∗) AC plug cord (∗) PC Connection Manual Quick Guide Operating Manual (this manual) ACDSee for PENTAX User Guide Items - Pentax OPTIOWP | Operation Manual - Page 19
Names of Parts Front Back Shutter release button Power switch, power indicator (green) Microphone Speaker Self-timer lamp (red) Flash Lens Strap lug LCD monitor Battery/card cover Battery cover lock lever Tripod socket Battery lock lever DC input terminal PC/AV terminal 17 - Pentax OPTIOWP | Operation Manual - Page 20
Names of Operating Parts Power switch Shutter release button Green/i button Zoom/w/x/f/y button Q button Four-way controller 4/W button 3 button Refer to Understanding the Button Functions (p.44 - p.47) for an explanation of the function of each button. Monitor Indications Normal Display in Still - Pentax OPTIOWP | Operation Manual - Page 21
Focus mode (p.81) 5 Camera shake icon (p.79) 6 Digital zoom icon (p.74) 7 Memory status (p.34) + : Built-in memory (without card) a : SD Memory Card r : Card (p.87) 7 White balance (p.88) 8 Sensitivity (p.92) 9 Histogram (p.80) About the Bright and Dark Portions When there is an area in the frame - Pentax OPTIOWP | Operation Manual - Page 22
A7 Memory status (p.34) + : Built-in memory (without card) a : SD Memory Card r : Card is write-protected A8 Key lock icon (p.65) A9 Captured date (p.19) B7 Shutter speed B8 Aperture B9 Histogram (p.80) Guide Indications A guide to available button operations appears on the LCD monitor during - Pentax OPTIOWP | Operation Manual - Page 23
Getting Started Getting Started Attaching the Strap Attach the strap (O-ST20) supplied with the camera. 1 1 2 1 Pass the narrow end of the strap through the strap lug. 2 Pass the other end of the strap through the loop and pull tight. 21 - Pentax OPTIOWP | Operation Manual - Page 24
to charge the battery before using it in the camera for the first time or after a long Place the battery in the charger so that the PENTAX logo is visible. The charging indicator lights red while • The battery has reached the end of its service life when it starts to run down soon after being - Pentax OPTIOWP | Operation Manual - Page 25
Battery cover lock lever Battery lock lever 1 Getting Started 2 1 Installing the Battery Use the battery that is provided with the camera. Charge the battery before using it in the camera for the first time. 1 Open the battery/card cover. Press the battery cover lock lever in the direction of 1, - Pentax OPTIOWP | Operation Manual - Page 26
result. • Do not remove the battery while the camera is turned on. • If you do not intend to use the camera for a long time, remove the battery. • The in accordance with CIPA standards. The playback time is based on PENTAX measuring conditions. Some deviation from the above figures may occur in - Pentax OPTIOWP | Operation Manual - Page 27
with insulating tape and take the battery to a store displaying this symbol. 1 Charging the Battery Abroad The battery charger supplied with the camera is designed to switch automatically to the voltage (100-240V) and frequency (50Hz, 60Hz) of the electricity supply in the country or region - Pentax OPTIOWP | Operation Manual - Page 28
Getting Started Main Socket Types in the Major Countries and Regions of the World 1 North America U.S.A., Canada A B BF C S 9 Europe, Iceland, Ireland, Italy, Ukraine, Austria, Former Soviet Netherlands, Kazakhstan, Greece, Sweden, Union Denmark, Germany, Norway, Hungary, Finland, 9 France - Pentax OPTIOWP | Operation Manual - Page 29
data being recorded on the SD Memory Card or the built-in memory. • Use the AC adapter with due care to avoid fire or electric shock. Be sure to read "FOR SAFE USE OF YOUR CAMERA" (p.1) before using the AC adapter. • Be sure to read the operation manual accompanying the AC adapter before - Pentax OPTIOWP | Operation Manual - Page 30
is unused or has been used on another camera. Refer to "Formatting an SD Memory Card or the Built-in Memory" (p.149) for instructions on formatting. • Allow the camera to dry completely before changing the SD Memory Card. Avoid changing the card where the camera is likely to get wet or dirty, and - Pentax OPTIOWP | Operation Manual - Page 31
the direction of 1, slide the battery/card cover in the direction of 2 and flip the cover open in the direction of 3. 2 Insert the SD Memory Card into the SD Memory Card 1 socket so that the label is facing toward the LCD monitor. Push the card in until it clicks. Images and sound - Pentax OPTIOWP | Operation Manual - Page 32
taken when removing the SD Memory Card immediately after using the camera, as the card may be hot. • Do not remove the SD Memory Card or turn the camera off while data is • For information on compatible SD Memory Cards, visit the PENTAX website or contact your nearest PENTAX Service Center. 30 - Pentax OPTIOWP | Operation Manual - Page 33
for printing, but the resulting increase in data volume reduces the total number of pictures that can be stored in the camera's built-in memory or on the SD Memory Card. The quality of the captured photo or printed picture also depends on the quality level, exposure compensation, resolution of - Pentax OPTIOWP | Operation Manual - Page 34
Built-in Memory 64MB Built-in Memory 64MB f 2560×1920 3 18 6 35 10 60 g 2304×1728 4 24 8 46 11 66 h 2048×1536 5 30 9 55 14 80 i 1600×1200 8 50 15 86 20 117 l 1024× 768 18 107 33 193 42 242 m 640× 480 39 227 61 352 75 430 • The above - Pentax OPTIOWP | Operation Manual - Page 35
. 1 min. 10 min. 52 sec. 45 sec. Sound Built-in Memory 64MB 23 min. 132 min. 2 sec. 13 sec. • The above figures are based on PENTAX standard shooting conditions and may vary depending on the subject, shooting conditions and type of - Pentax OPTIOWP | Operation Manual - Page 36
off. Taking Pictures 1p.63 Checking the Memory Card The memory card is checked automatically when the camera turns on. + appears on the LCD monitor when there is no SD Memory Card inserted in the camera. In this case, images and sound files will be saved in the built-in memory. r appears instead - Pentax OPTIOWP | Operation Manual - Page 37
any more pictures. Pressing the shutter release button does not change the mode to A mode. 1 Press the power switch while holding down the Q button. The camera turns on in Playback Only Mode. To switch from Playback Only mode to A mode, turn the - Pentax OPTIOWP | Operation Manual - Page 38
Getting Started Initial Settings 1 Four-way controller 4 button If the Initial Setting screen or Date Adjust screen appears when you turn the camera on, follow the procedure below to set the display language and/or current date and time. If the Initial Setting screen appears Initial Setting - Pentax OPTIOWP | Operation Manual - Page 39
Getting Started Setting the Display Language You can choose the language in which the menus, error messages, etc. are displayed. 1 1 Press the four-way controller (5). The Language/ screen appears. 2 Use the four-way controller (2345) to choose the display language. English Francais Deutsch - Pentax OPTIOWP | Operation Manual - Page 40
Getting Started Setting the Date and Time Set the current date and time and the display style. 11 2 Press the four-way controller (5). The frame moves to [mm/dd/yy]. Use the four-way controller (23) to choose the date and time display style. Date Adjust Date Style Date Time mm/dd/yy 24h 01/01 - Pentax OPTIOWP | Operation Manual - Page 41
Getting Started 9 Press the 4 button. The camera is ready to take pictures. If you set the date case, the Initial Setting screen will appear next time you turn the camera on. • When you finish the settings and press the 4 button, the camera clock is reset to 00 seconds. To set the exact time, press - Pentax OPTIOWP | Operation Manual - Page 42
right. x : enlarges the subject w : enlarges the area captured by the camera 3 Press the shutter release button halfway. The focus frame turns green if The image appears on the LCD monitor for one second (Instant Review) and is saved to the SD Memory Card or built-in memory. (1p.41) Press the - Pentax OPTIOWP | Operation Manual - Page 43
the subject (by pressing the shutter release button halfway), then aim the camera at your subject and press the shutter release button fully. • Objects that Review The image appears on the LCD monitor for one second (Instant Review) immediately after it is captured. You can change the Instant Review - Pentax OPTIOWP | Operation Manual - Page 44
2 Q button Four-way controller Playing Back Images 1 Press the Q button after taking a picture. The image appears on the LCD monitor. In this manual, this is called Q mode (Playback mode). Displaying one image in full in Q mode (Q mode default setting) is called single-image display. Press the - Pentax OPTIOWP | Operation Manual - Page 45
i button Q button 2 Four-way controller 4 button Quick Start Rotating the Displayed Image 1 Press the Q button after taking a picture. The image appears on the LCD monitor. 2 Press the four-way controller (3). The Playback Mode Palette appears. 3 Use the four-way controller (2345) to - Pentax OPTIOWP | Operation Manual - Page 46
Common Operations Common Operations Understanding the Button Functions 1 2 3 4 3 5 6 7 8 A mode 1 Power switch Turns the camera off. (1p.34) 2 Shutter release button Focuses the camera on the subject when pressed halfway. (Except in s, 3 and \ modes) (1p.40) Takes the still picture when - Pentax OPTIOWP | Operation Manual - Page 47
5 Q button Switches to the Q mode. (1p.104) 6 Four-way controller (2) : Changes the drive mode. (1p.72, p.77, p.78) (3) : Displays the Capture Mode Palette. (1p.53) (4) : Changes the flash mode. (1p.83) (5) : Changes the focus mode. (1p.81) (23) : Adjusts \ in \ mode. (1p.82) 7 4/W button - Pentax OPTIOWP | Operation Manual - Page 48
Turns the camera off. (1p.34) 2 Shutter release button Switches to A mode when pressed down halfway or fully. (1p.104) 3 Green/i button Switches from single-image display to the Delete screen. (1p.114) Switches from nine-image display to the Select & Delete screen. (1p.116) Displays a guide of the - Pentax OPTIOWP | Operation Manual - Page 49
Common Operations 6 Four-way controller (2) : Plays back and pauses a movie or sound file. (1p.112, p.146) (3) : Displays the Playback Mode Palette. (1p.61) Stops a movie or sound file during playback. (1p.112, (45) p.146) : Displays the previous or next image and sound file during single- - Pentax OPTIOWP | Operation Manual - Page 50
Functions To change the camera settings, press the 3 button to display the [A Rec. Mode] menu or [u Setting] menu. Menus for playing back and editing images and sound files are displayed - Pentax OPTIOWP | Operation Manual - Page 51
Common Operations A guide to available button operations appears on the LCD monitor during menu operation. AWB White Balance AF AF Setting items that can be selected with the current ISO AUTO Sensitivity camera settings. MENU Cancel OK OK 5 Use the four-way controller (23) to change the - Pentax OPTIOWP | Operation Manual - Page 52
Playback of Images 6 Press the Q button. The setting is saved and the camera returns to playback status. 3 To Save the Setting and Continue with Menu The 3 button function differs depending on the screen. Refer to the guide indications. MENU Exit : Saves the current setting, exits the menu - Pentax OPTIOWP | Operation Manual - Page 53
Zoom For choosing whether to use the digital zoom function p.75 Instant Review For setting the Instant Review time p.93 Memory For choosing whether to save the set values of the shooting function or return to the defaults when the p.97 camera is turned off Sharpness For choosing sharp - Pentax OPTIOWP | Operation Manual - Page 54
Quick Zoom Auto Power Off Green Button Reset Description For formatting the SD Memory Card or built-in memory For adjusting the playback volume and y on the Zoom/f/y button. For setting the time until the camera turns off automatically For assigning a function to the Green button For returning - Pentax OPTIOWP | Operation Manual - Page 55
1, 2 3 Setting the Shooting Mode 3 The OptioWP has a variety of shooting modes that let you press the Green button to display a guide of the shooting mode. (1p.62) Guide Change OK OK 3 Press the 4 button. 38 The shooting mode is selected and the camera returns to capture status. 03/25 - Pentax OPTIOWP | Operation Manual - Page 56
to record sound files. Be careful not to cover the microphone on the top of the camera with your hand. 5 F Panorama Assist For capturing images to make a panoramic image. Use the supplied software to join images easily. 6 q Landscape Use this mode for taking landscape views. The focus encompasses - Pentax OPTIOWP | Operation Manual - Page 57
C Synchro Sound Record Automatically records the sound 10 sec. before and after the shutter is released. c E Pet Ideal for taking pictures of pets. The camera keeps the moving pet in focus until the shutter release button is pressed. You can select settings according to the color of your pet's coat - Pentax OPTIOWP | Operation Manual - Page 58
Self-portrait Use this mode to take pictures of yourself or include yourself in pictures. The camera adjusts the focus and color. h z Natural Skin Tone Adjusts the color and brightness to reproduce skin tone more beautifully than Portrait mode. i D Food Use this mode for taking pictures of food. The - Pentax OPTIOWP | Operation Manual - Page 59
3 Changing the Shooting Mode Icons In addition to the Green mode, this camera has 20 shooting modes, of which 15 are assigned to the Capture Mode Palette. • Choose a shooting mode and press the Green button to display a guide of the shooting mode. (1p.62) • The shooting modes assigned to the - Pentax OPTIOWP | Operation Manual - Page 60
Pixels 3 Quality Level 4 White Balance Focusing Area Focus Limiter MENU Cancel OK OK Press the shutter release button halfway. The setting is saved and the camera returns to capture status. - Pentax OPTIOWP | Operation Manual - Page 61
recall functions allocated to [3] and [4]. 3 Change the settings and press the Recorded Pixels 4 button. The camera returns to capture status. • If the Green mode has been assigned to the Green button, the camera enters the Green mode one second after the Green button is pressed (1p.64). • If - Pentax OPTIOWP | Operation Manual - Page 62
-way controller (2345) to choose an icon and pressing the 4 button. 100-0038 3 03/25/2005 14:25 Common Operations Slideshow Resize MENU Guide OK OK SHUTTER MENU Guide OK OK OK 38 03/25/2005 14:25 Close the Playback Mode Palette and go to A mode. Recorded Pixels Quality Level MENU - Pentax OPTIOWP | Operation Manual - Page 63
of a picture p.124 For copying images and sound files from the p Image/Sound Copy built-in memory to the SD Memory Card and vice versa p.125 s Image Rotation D Digital Filter q Brightness Filter For rotating still pictures For changing the color of still pictures For changing the brightness of - Pentax OPTIOWP | Operation Manual - Page 64
four-way controller (2345) to choose a shooting Landscape mode. 3 Press the Green button. A guide of the selected shooting mode appears. 4 Press the 4 button. The camera returns to capture status with the selected shooting mode. Guide Change OK OK Landscape For capturing landscape views. The - Pentax OPTIOWP | Operation Manual - Page 65
and aperture for taking still pictures. However, you can select other functions such as the flash mode and recorded pixels. 1 Press the power switch. The camera turns on and is ready to take still pictures. 2 Set the functions you want to use. Refer to "Setting the Shooting Functions" (p.81 - p.96 - Pentax OPTIOWP | Operation Manual - Page 66
enjoy easy picture-taking using standard 4 settings∗, regardless of the settings in the [A Rec. Mode] menu. 1 Press the Green button in A 38 mode. The camera switches to the Green mode. Press the Green button again to return to the status before the Green mode was selected. 2 Press the shutter - Pentax OPTIOWP | Operation Manual - Page 67
display the [A Rec. Mode] menu, - (key lock icon) appears. • When the camera is turned off in the Green mode, it turns on in the Green mode next time the Multiple) O (On) Sensitivity Auto EV Compensation Digital Zoom ±0.0 O (On) Instant Review Sharpness Saturation Contrast 1sec G (Standard) G ( - Pentax OPTIOWP | Operation Manual - Page 68
in focus. 5 Press the shutter release button fully. The picture is taken. • The shutter speed is slower when taking pictures of dark scenes. • To prevent camera shake, use a tripod and the self-timer function. (1p.77) • The number of recorded pixels is set at 1280×960 in x mode. • You can assign - Pentax OPTIOWP | Operation Manual - Page 69
icon does OK OK not affect the resulting picture. Choose whichever you prefer.) 5 Press the 4 button. 38 The Pet mode is selected and the camera returns to capture status. 6 Press the shutter release button halfway. The focus frame turns green if the subject is in focus. 7 Press the shutter - Pentax OPTIOWP | Operation Manual - Page 70
4 You can take a number of images and join them together to form a panorama picture. The panorama software (ACDSee for PENTAX, ACD photostitcher) on the CD-ROM (S-SW30) supplied with the camera and a computer are necessary for joining the images. The Panorama Assist mode enables you to overlap the - Pentax OPTIOWP | Operation Manual - Page 71
and subsequent images. 38 03/25/2005 14:25 37 03/25/2005 14:25 4 The camera cannot join the images. Use the panorama software supplied with the camera (ACDSee for PENTAX, ACD photostitcher). Refer to the ACDSee for PENTAX User Guide for instructions on stitching images. Taking Pictures 69 - Pentax OPTIOWP | Operation Manual - Page 72
Capture Mode Palette appears. 2 Use the four-way controller (2345) to select B (Underwater). 3 Press the 4 button. The Underwater mode is selected and the camera returns to capture status. 4 Press the shutter release button halfway. The focus frame turns green if the subject is in focus. 5 Press the - Pentax OPTIOWP | Operation Manual - Page 73
the 4 button. The Synchro Sound Record mode is selected and the camera returns to capture status. 4 Press the shutter release button halfway. The is taken. A countdown of the recording time appears on the Instant Review screen. • You can play back sound recorded in Synchro Sound Record mode - Pentax OPTIOWP | Operation Manual - Page 74
\ C E x X y > z D J Framing Your Pictures In this mode you can take pictures using the frames stored in the 4 camera. There are three frames already stored in the camera. 1 Press the four-way controller (2) in A mode. The drive mode selection screen appears. 2 Use the four-way controller (45) to - Pentax OPTIOWP | Operation Manual - Page 75
frame selection screen to display the [A Rec. Mode] menu. • The frames used in this function are stored in the camera's built- in memory. They can be replaced with frames from the SD Memory Card by pressing the Green button in the frame selection screen. (1p.131) • The number of recorded pixels - Pentax OPTIOWP | Operation Manual - Page 76
1 Press the Zoom/w/x button in A 38 mode. x Tele : enlarges the subject w Wide : enlarges the area captured by the camera The zoom bar indicates the current level of magnification. When the digital zoom function is set to P (Off), you can take pictures at up to three Zoom bar Press x times - Pentax OPTIOWP | Operation Manual - Page 77
0.0 EV Compensation 4 Press the shutter release button Movie Digital Zoom halfway. QUICK I n s t a n t R e v i e w 4 Memory The digital zoom function setting is saved and the camera returns to capture status. MENU Exit Saving the Digital Zoom Function Setting 1p.97 Taking Pictures 75 - Pentax OPTIOWP | Operation Manual - Page 78
Mode] menu appears. 0.0 EV Compensation 0.0 2 Use the four-way controller (23) Movie Digital Zoom to select [EV Compensation]. QUICK I n s t a n t R e Press the 4 button. The EV compensation value is saved and the camera returns to capture status. • If you use the EV compensation function - Pentax OPTIOWP | Operation Manual - Page 79
4 Press the shutter release button fully. The picture is taken ten seconds or two seconds later. Focusing may be compromised if you move the camera while the self-timer lamp is blinking when taking still pictures. • In C mode, recording will start after ten seconds (or two seconds). • Press the - Pentax OPTIOWP | Operation Manual - Page 80
Shooting) or c (HS Cont. Shooting) and press the HS 4 button. The camera is ready to take a series of pictures. 3 Press the shutter release button halfway y mode. • You can continue shooting until the memory capacity of the SD Memory Card or built-in memory is full. • The interval of continuous - Pentax OPTIOWP | Operation Manual - Page 81
the 4 button: Normal Display, Histogram + Info, No Icons, Backlight Off. For details of each display mode, refer to "Monitor Indications" (p.18). • All the camera buttons function as normal even when the backlight is off. Press the shutter release button to take pictures as normal. • e appears when - Pentax OPTIOWP | Operation Manual - Page 82
is on the left side, and if it is too bright, the peak is on the right side. With the OptioWP, you can check the brightness distribution of the image by displaying it on the LCD monitor as well as by referring portions (where the image 4 is so dark that it is totally black) blink yellow. (1p.19) 80 - Pentax OPTIOWP | Operation Manual - Page 83
you adjust the focus manually. 1 Press the four-way controller (5) in A mode. The focus mode changes each time the button is pressed. You can also change the setting using the four-way controller (23). 2 Press the 4 button. The focus mode setting is saved and the camera returns to capture status - Pentax OPTIOWP | Operation Manual - Page 84
its size when focusing. Press the four-way controller (23). Focus Mode Manual Focus OK OK 38 The MF indicator appears on the LCD monitor to indicator as a guide. 2 : for distant focus 3 : for closer focus 4 Press the 4 button. 2 1m MF indicator The focus is fixed and the camera returns to - Pentax OPTIOWP | Operation Manual - Page 85
Taking Pictures 1 2 A R A F q < I B i \ C E x X > z D J Selecting the Flash Mode Flash Modes , Auto The flash discharges automatically depending on the 4 light conditions. a Flash Off The flash will not discharge, regardless of the brightness. Use this mode to take pictures where flash - Pentax OPTIOWP | Operation Manual - Page 86
flash mode changes each time the button is pressed. You can also change the setting using the four-way controller (23). 2 Press the 4 button. The camera is ready to take pictures in the selected flash mode. Flash Mode Auto OK OK [About the red-eye phenomenon] Taking pictures using the flash - Pentax OPTIOWP | Operation Manual - Page 87
Taking Pictures 5 Rec. Mode 1/3 MENU 2, 3, 4 5M Recorded Pixels Quality Level AWB White Balance AF AF Setting ISO AUTO Sensitivity MENU Exit 1 R A F q < I B i \ C E X y > z D J Selecting the Recorded Pixels You can choose from six recorded pixels settings for still pictures. The larger - Pentax OPTIOWP | Operation Manual - Page 88
AWB White Balance 3M 2M AF AF Setting 1024 ISO AUTO Sensitivity 640 MENU Cancel OK OK The Recorded Pixels setting is saved and the camera returns to capture status. If you use the [Recorded Pixels] function frequently, you can save time by assigning it to the Green button. (1p.58 - Pentax OPTIOWP | Operation Manual - Page 89
AF AF Setting 5 Press the shutter release button ISO AUTO Sensitivity halfway. MENU Cancel OK OK The Quality Level setting is saved and the camera returns to capture status. If you use the [Quality Level] function frequently, you can save time by assigning it to the Green button. (1p - Pentax OPTIOWP | Operation Manual - Page 90
conditions at the time of shooting. White Balance F Auto The camera adjusts the white balance automatically. G Daylight Use this mode this mode when taking pictures under fluorescent light. K Manual Use this mode when adjusting the white balance manually. 1 Press the 3 button in A mode. The - Pentax OPTIOWP | Operation Manual - Page 91
5 Press the shutter release button halfway. The White Balance setting is saved and the camera returns to capture status. Refer to "Manual Setting" below for instructions on adjusting the white balance manually. If you use the [White Balance] function frequently, you can save time by assigning - Pentax OPTIOWP | Operation Manual - Page 92
9 Rec. Mode 1/3 MENU 2, 3, 4, 5, 6, 7, 8 1 5M Recorded Pixels Quality Level AWB White Balance AF AF Setting ISO AUTO Sensitivity MENU Exit R A C F q < I B i \ C E x X y > z D J Setting the Autofocus Conditions You can set various conditions for autofocus. 4 Changing the Focusing Area - Pentax OPTIOWP | Operation Manual - Page 93
[Focus Limiter]. 8 Use the four-way controller (45) to select O or P. 9 Press the shutter release button halfway. The AF setting is saved and the camera returns to capture status. If you use the [Focusing Area] and [Focus Limiter] functions frequently, you can save time by assigning them to the - Pentax OPTIOWP | Operation Manual - Page 94
You can select the sensitivity to suit the brightness of the surroundings. 4 The default setting is Auto. Sensitivity Auto 50 100 200 400 The camera sets the sensitivity automatically. • The lower the sensitivity, the less noise that affects the image. The shutter speed will be slower in low light - Pentax OPTIOWP | Operation Manual - Page 95
controller (23) Movie 3sec Digital Zoom 2sec to change the display time. QUICK I n s t a n t R e v i e w 1 sec 5 Press the shutter release button Memory 0.5sec Off MENU Cancel halfway. The Instant Review setting is saved and the camera returns to capture status. Instant Review 1p.41 93 - Pentax OPTIOWP | Operation Manual - Page 96
contours, choose (-) and to sharpen the contours, choose (+). 4 Press the shutter release button MENU Exit halfway. The Sharpness setting is saved and the camera returns to capture status. If you use the [Sharpness] function frequently, you can save time by assigning it to the Green button. (1p - Pentax OPTIOWP | Operation Manual - Page 97
, choose (-) and to increase the saturation, choose (+). MENU Exit 4 Press the shutter release button halfway. The Saturation setting is saved and the camera returns to capture status. If you use the [Saturation] function frequently, you can save time by assigning it to the Green button. (1p - Pentax OPTIOWP | Operation Manual - Page 98
contrast, choose (-) and to increase the contrast, choose (+). 4 Press the shutter release button MENU Exit halfway. The Contrast setting is saved and the camera returns to capture status. If you use the [Contrast] function frequently, you can save time by assigning it to the Green button. (1p - Pentax OPTIOWP | Operation Manual - Page 99
camera settings when the camera is turned off. For some camera settings, the Memory function is always set to O (On) (the settings are saved when the camera camera camera is turned off.) MF Position The manual focus position set with (1p.76) P Digital Zoom The [Digital Zoom] setting on the - Pentax OPTIOWP | Operation Manual - Page 100
halfway. Memory 1/2 Flash Mode Drive Mode Focus Mode Zoom Position MF Position White Balance MENU Cancel OK OK The Memory setting is saved and the camera returns to capture status. Taking Pictures 98 - Pentax OPTIOWP | Operation Manual - Page 101
Palette appears. 2 Use the four-way controller Movie (2345) to select C (Movie). Taking Pictures MENU Change Guide OK OK 3 Press the 4 button. 1 C mode is selected and the camera returns 23 to capture status. 07:34 The following information appears on the LCD monitor. 1 Movie mode - Pentax OPTIOWP | Operation Manual - Page 102
in C mode. • The only focus modes that can be used in C mode are 3, s and \. • You can use the optical zoom and digital zoom before starting to record, and the digital zoom while recording. • Changing the LCD monitor display mode by pressing the 4 button while recording a movie will not display the - Pentax OPTIOWP | Operation Manual - Page 103
number of recorded Frame Rate 30fps pixels. 7 Press the shutter release button MENU Cancel OK OK halfway. The recorded pixels setting is saved and the camera returns to capture status. Recorded Pixels and Frame Rate of Movies 1p.33 101 - Pentax OPTIOWP | Operation Manual - Page 104
30fps to select [30fps] or [15fps]. 15fps 7 Press the shutter release button MENU Cancel OK OK halfway. The frame rate setting is saved and the camera returns to capture status. Recorded Pixels and Frame Rate of Movies 1p.33 102 - Pentax OPTIOWP | Operation Manual - Page 105
Rate Full Color B & W to choose a color. Sepia 7 Press the shutter release button MENU Cancel OK OK halfway. The color mode setting is saved and the camera returns to capture status. 103 - Pentax OPTIOWP | Operation Manual - Page 106
Images Playing Back Images To Switch Between A Mode and Q Mode In this manual, the capture mode, such as for taking still pictures, is referred to as mode. To Switch From A Mode to Q Mode 1 Press the Q button. The camera switches to Q mode. 5 To Switch From Q Mode to A Mode 1 Press the Q button or - Pentax OPTIOWP | Operation Manual - Page 107
Playing Back and Deleting Images Zoom/f/y button Q button Four-way controller 4 button 3 button Nine-Image Display and Folder Display Nine-Image Display You can display nine thumbnails of captured images at a time. 1 In Q mode, press f on the Zoom/ Frame f/y button. A page consisting of nine - Pentax OPTIOWP | Operation Manual - Page 108
Folder Display If images and sound files are stored in several folders, follow the procedure below to find the folder that you are looking for. 1 In Q mode, press f on the Zoom/f/y button. The screen changes to nine-image display. 2 Press f on the Zoom/f/y button. 100 101 102 3 5 The list - Pentax OPTIOWP | Operation Manual - Page 109
×8). Holding down y on the Zoom/f/y button changes the magnification continuously. You can use the guide at the bottom left of the screen to check which portion of the image is magnified. Guide The following operations can be performed while the magnified image is displayed. Four-way controller - Pentax OPTIOWP | Operation Manual - Page 110
Zoom/f/y button once magnifies the image in stages Quick Zoom Auto Power Off Green Button Reset 3min from ×1.0 to ×8.0 MENU Exit 5 Press the Q button. The camera is ready to play back images. Playing Back and Deleting Images 108 - Pentax OPTIOWP | Operation Manual - Page 111
Displaying Shooting Information in Playback Mode Shooting information can be displayed on the LCD monitor in Q mode. Pressing the 4 button changes the display mode. Refer to p.20 for details of each display mode. Normal Display 100-0026 03/25/2005 14:25 OK Histogram + Info 5 100-0026 5M OK ISO - Pentax OPTIOWP | Operation Manual - Page 112
Slideshow Playing Back and Deleting Images 1, 2, 3 4 MENU Guide OK OK Slideshow You can play back recorded images one after another. 1 Enter the Q mode and use the four-way controller (45) to choose an - Pentax OPTIOWP | Operation Manual - Page 113
controller (5) while playing back a movie displays the next image. • Sound files made in Voice Recording mode are not played back in the slideshow. Connecting the Camera to AV Equipment 1p.113 111 - Pentax OPTIOWP | Operation Manual - Page 114
Playing Back Movies 2 1, 2, 3 Playing Back and Deleting Images Playing Back a Movie You can play back the movies you have taken. Sound is played back at the same time. 5 1 Enter the Q mode and use the four-way controller (45) to 100-0017 00:30 choose the movie you want to play back. 2 - Pentax OPTIOWP | Operation Manual - Page 115
white By using the AV cable, you can capture and play back images on equipment with a video IN jack, such as a TV. Make sure the camera is turned off before connecting it to the TV. 5 1 Open the battery/card cover and connect the AV cable to the PC/AV terminal. 2 Connect - Pentax OPTIOWP | Operation Manual - Page 116
-0017 4 Press the 4 button. The image or sound file is deleted. Deletion Cancel All Images/Sounds OK OK If you press the i button during Instant Review, the screen in Step 2 appears, enabling you to delete the image you have just taken. (1p.43) Recovering Deleted Images 1p.119 114 - Pentax OPTIOWP | Operation Manual - Page 117
Deleting a Sound File If sound has been recorded with an image (1p.147), you can delete the sound without deleting the image. 1 Enter the Q mode and use the four-way controller (45) to choose an image with sound. 2 Press the i button. The confirmation screen appears. 3 Use the four-way controller - Pentax OPTIOWP | Operation Manual - Page 118
2, 4 1 3, 5 3, 6 Playing Back and Deleting Images Deleting Selected Images and Sound Files (from Nine-Image Display) You can delete several images/sound files selected from the nine-image display at once. 5 1 2 3 Protected images and sound files cannot be deleted. In Q mode, press f on the Zoom - Pentax OPTIOWP | Operation Manual - Page 119
4 Press the i button. A confirmation dialog appears. 5 Use the four-way controller (23) Delete all selected images/sounds to select [Select & Delete]. 6 Press the 4 button. The selected images and sound files are deleted. Select & Delete Cancel MENU OK OK 5 Playing Back and Deleting Images - Pentax OPTIOWP | Operation Manual - Page 120
1, 2 3 4 Deleting All Images You can delete all the images and sound files at once. Protected images and sound files cannot be deleted. (1p.120) 51 2 3 4 Press the i button in Q mode. A confirmation dialog appears. Press the i button. A confirmation dialog appears. Use the four-way controller - Pentax OPTIOWP | Operation Manual - Page 121
Playing Back and Deleting Images 1, 2, 4 3, 5 Recovering Deleted Images You can recover images or sound files that were taken with this camera and then deleted. 1 After deleting a file, press the four-way controller (3). The Playback Mode Palette appears. 2 Use the four-way controller (2345) - Pentax OPTIOWP | Operation Manual - Page 122
Slideshow 1, 2, 4, 6, 7 3, 5, 8 MENU Guide OK OK Playing Back and Deleting Images Protecting Images and Sound Files from Deletion (Protect) You can protect stored images and sound files from being - Pentax OPTIOWP | Operation Manual - Page 123
and Deleting Images 1, 2, 4, 6 3, 5, 7 MENU Guide OK OK Protecting All Images and Sound Files 1 Press the Protect Unprotect MENU Cancel OK OK Protected images and sound files will be deleted when the SD Memory Card or built-in memory is formatted. To cancel the Protect setting on all your - Pentax OPTIOWP | Operation Manual - Page 124
Images Slideshow 1, 2, 3, 5, 7 4, 6, 8 MENU Guide OK OK Editing and Printing Images Changing the Image Size and smaller than the original. You can use this function to continue taking pictures when the SD Memory Card or built-in memory is full, by making the images smaller and overwriting - Pentax OPTIOWP | Operation Manual - Page 125
5 Select [Recorded Pixels] and [Quality Level]. Use the four-way controller (45) to choose the size and quality. Use the four-way controller (23) to switch between [Recorded Pixels] and [Quality Level]. 6 Press the 4 button. A confirmation dialog for overwriting the image appears. [Save as] is - Pentax OPTIOWP | Operation Manual - Page 126
5 5 1, 2, 3, 5 4, 6 Slideshow MENU Guide OK OK Trimming Images You can delete the unwanted part of a picture and save the trimmed image as a separate image. 1 2 3 6 4 Enter the Q mode and use - Pentax OPTIOWP | Operation Manual - Page 127
Guide OK OK Editing and Printing Images Copying Images and Sound Files You can copy images and sound files from the built-in memory to the SD Memory Card and vice versa. This function can only be selected when an SD Memory Card has been inserted in the camera. Make sure that the camera is - Pentax OPTIOWP | Operation Manual - Page 128
Card to the Built-in Memory Selected images and sound files from the SD Memory Card are copied to the built-in memory one at a time. 4 copied with the image. • When a file is copied from the SD Memory Card to the built-in memory, it is assigned a new file name. 6 Editing and Printing Images 126 - Pentax OPTIOWP | Operation Manual - Page 129
Slideshow 1, 2, 3, 5, 7 4, 6, 8 MENU Guide OK OK Using the Digital Filters Editing and Printing Images This function lets you edit selected images with digital filters to change the color, etc. You can choose from nine filters: B&W, sepia, red, pink, purple, blue, green, yellow and soft. 1 - Pentax OPTIOWP | Operation Manual - Page 130
image is saved with the same number of recorded pixels and quality level as the original. Movies or images taken with another camera cannot be edited using the digital filters or brightness filter. An error message appears if you choose this function from the Playback Mode Palette and press the - Pentax OPTIOWP | Operation Manual - Page 131
Slideshow 1, 2, 3, 5 4, 6 MENU Guide OK OK Editing and Printing Images Red-eye Compensation You can cannot be used on movies or on images where red eyes cannot be detected on the camera. An error message appears in Step 4. • The red-eye compensation function can only be used with still - Pentax OPTIOWP | Operation Manual - Page 132
Slideshow 1, 2, 3, 5, 7 4, 6, 8 MENU Guide OK OK Editing and Printing Images Adding a Frame (Frame Composite) This function lets you add a decorative frame to still pictures. There are three frames already stored in the camera. 1 Enter the Q mode and use the four-way controller (45) to choose - Pentax OPTIOWP | Operation Manual - Page 133
press the Green button in Step 5. You can register frames which you have downloaded from the internet, etc. When you register a new frame, it replaces one and press the Green button. 6 A message appears and the frames on the SD Memory Card that you can register in the built-in memory appear. 2 - Pentax OPTIOWP | Operation Manual - Page 134
How to display the Movie Edit menu Slideshow Four-way controller 4 button MENU Guide OK OK Editing Movies You can select a frame from a recorded movie to save as a still picture, divide a movie into two or stitch two movies together. 1 - Pentax OPTIOWP | Operation Manual - Page 135
Movie Edit OK Save as Still Image Divide Movies Stitch Movies MENU Guide OK OK MENU OK OK Saving a Frame from a Movie as a Still Picture 5 Use the four-way controller (23) to select [Save as Still Image]. 6 Press - Pentax OPTIOWP | Operation Manual - Page 136
How to display the Movie Edit menu Slideshow Four-way controller 4 button MENU Guide OK OK Dividing a Movie 5 Select [Divide Movies] on the Movie Edit menu. 6 Press the 4 button. The screen for choosing the dividing position appears. 7 Use the - Pentax OPTIOWP | Operation Manual - Page 137
Movie Edit OK Save as Still Image Divide Movies Stitch Movies MENU Guide OK OK MENU OK OK Stitching Movies 5 Select [Stitch Movies] on the Movie Edit menu. 6 Press the 4 button. The movie selection screen appears. 7 Use the - Pentax OPTIOWP | Operation Manual - Page 138
Setting the Printing Service (DPOF) DPOF (Digital Print Order Format) is the format for storing print order data on still pictures captured with a digital camera. Once the print order data has been stored, the pictures can be printed according to the DPOF settings using a DPOF-compatible printer or - Pentax OPTIOWP | Operation Manual - Page 139
6 Press the 4 button. 100-0017 The screen for setting the DPOF print order data for the selected image appears. DPOF setting for this image If DPOF settings have already been made for an image, the previous number of copies Copies Date and date setting (O or P) will be displayed. Date MENU - Pentax OPTIOWP | Operation Manual - Page 140
Slideshow 4 1, 2, 4 1, 3, 5 MENU Guide OK OK Printing All Images When you choose the number of copies and whether or not to insert the date, the settings are applied to all the images stored in the camera. 1 Display the screen for DPOF settings in Q mode. Refer to Steps 2 to 4 on p.136. 2 Use - Pentax OPTIOWP | Operation Manual - Page 141
camera to a printer that supports PictBridge using the USB cable (I-USB7) provided, you can print images directly from the camera without using a PC. Connect the camera . For details, refer to the operating manual for your printer. 6 Connecting the Camera to the Printer 1 Select [PictBridge] - Pentax OPTIOWP | Operation Manual - Page 142
Printing Single Images 1 In the printing mode selection screen, use the four-way controller (23) to select [Select image]. 2 Press the 4 button. The setting screen appears. Select printing mode All Images Select image DPOF setting OK OK 3 4 5 6 6 7 8 Use the four-way controller (45) to choose an - Pentax OPTIOWP | Operation Manual - Page 143
to the settings made on the printer. Paper Type with more E supports higher quality paper. Quality with more E indicates higher print quality. 3 button to cancel printing. • The power indicator lights while the camera is communicating with the printer, and blinks while the card is being accessed - Pentax OPTIOWP | Operation Manual - Page 144
Printing All Images 1 In the printing mode selection screen, use the four-way controller (23) to select [All images]. Select printing mode All Images Select image DPOF setting 2 3 64 OK OK Press the 4 button. The setting screen appears. Choose the number of copies and 100-0017 Print all images - Pentax OPTIOWP | Operation Manual - Page 145
0017 Print with DPOF setting the settings for each image. Refer to p.136 for instructions on how to make the DPOF Copies 01 Date Total 10 settings. 3 Press the the camera and printer when you have 6 finished printing. 1 Turn off the camera. 2 Disconnect the USB cable from the camera and printer - Pentax OPTIOWP | Operation Manual - Page 146
Mode) You can record sound with the camera. The microphone is located on the top of the camera. When recording sound, aim the camera to obtain the best conditions. Speaker Microphone 4, 5 Program Recording and Playing Back Sound 1, 2 3 Guide Change OK OK 1 2 3 7 Press the four-way - Pentax OPTIOWP | Operation Manual - Page 147
• If you press and hold down the shutter release button in Step 4, recording continues until you take your finger off the button. This is useful for making short sound recordings, such as for the user sound in the [Sound] menu. • Sound is saved in WAVE monaural files. • Pressing the 4 button clears - Pentax OPTIOWP | Operation Manual - Page 148
Playing Back Sound You can play back the sound files you made in O mode. 3 1 2, 3, 4 Recording and Playing Back Sound 1 2 3 7 4 146 Press the Q button. Use the four-way controller (45) to choose a sound file to play back. Press the four-way controller (2). The sound file is played back. 1 Total - Pentax OPTIOWP | Operation Manual - Page 149
Palette appears. Voice Memo 3 Use the four-way controller (2345) to select \ (Voice 7 Memo). 4 Press the 4 button. MENU Guide OK OK Recording starts. You can record until the SD Memory Card or built-in memory is full. 5 Press the 4 button. Recording stops. • A voice memo cannot be added to - Pentax OPTIOWP | Operation Manual - Page 150
2 1, 2, 3 Playing Back a Voice Memo 1 Enter the Playback mode and use the four-way controller (45) to choose the still picture with the voice memo that you want to play back. U appears on images with voice memos in single-image display. 2 Press the four-way controller (2). 100-0038 03/25/2005 14: - Pentax OPTIOWP | Operation Manual - Page 151
will delete protected images and any data recorded on the card with a camera other than this camera. • SD Memory Cards formatted on a PC or device other than the camera cannot be used. Be sure to format the card with the camera. 1 Select [Format] on the [u Setting] menu. 8 2 Press the four-way - Pentax OPTIOWP | Operation Manual - Page 152
Date and Time You can change the initial date and time settings. You can also set the style in which the date appears on the camera. Choose [mm/dd/yy], [dd/mm/yy] or [yy/mm/dd]. 1 Select [Date Adjust] on the [u Setting] menu. 2 Press the four-way controller (5). The Date - Pentax OPTIOWP | Operation Manual - Page 153
How to display the [u Setting] menu MENU Four-way controller 4 button 3 button Setting Format Sound Date Adjust Alarm World Time 1/3 03/25/2005 MENU Exit Changing the Sound Settings You can adjust the volume of operation sounds and change the type of sound. 1 Select [Sound] on the [u Setting] - Pentax OPTIOWP | Operation Manual - Page 154
the start-up sound or shutter sound. The sound to be used is recorded with the camera. (1p.144) 1 Select [USER] in Steps 7 and 8 above. 2 Press sound 100-0025 that can be used as the user sound has been saved in the camera. USER appears for the sound set as the user sound. 3 Use the four-way - Pentax OPTIOWP | Operation Manual - Page 155
How to display the [u Setting] menu MENU Four-way controller 4 button 3 button Setting Format Sound Date Adjust Alarm World Time 1/3 03/25/2005 MENU Exit Setting the Alarm You can set the alarm to ring at a specified time. You can choose whether the alarm will ring at the same time every day or - Pentax OPTIOWP | Operation Manual - Page 156
to O (On). 2 Press the four-way controller (5). Alarm The Alarm screen appears. Check the alarm frequency and time. Alarm 3 Press the 3 button twice. Time The camera is ready to take pictures. MENU Cancel 14:25 Once 17:30 OK OK Turning the Alarm Off The Clock mode screen appears and the - Pentax OPTIOWP | Operation Manual - Page 157
How to display the [u Setting] menu MENU Four-way controller 4 button 3 button Setting Format Sound Date Adjust Alarm World Time 1/3 03/25/2005 MENU Exit Setting the World Time The date and time selected in "Setting the Date and Time" (p.38) serve as the W (Hometown) date and time. By using the - Pentax OPTIOWP | Operation Manual - Page 158
7 Use the four-way controller (45) to select O (On) or P (Off). Select O (On) if the Destination city uses daylight saving time. 8 Press the 4 button twice. The World Time setting is saved. Select W in Step 3 to set the city and DST setting for the Hometown city. 8 156 Settings - Pentax OPTIOWP | Operation Manual - Page 159
How to display the [u Setting] menu MENU Four-way controller 3 button Setting Format Sound Date Adjust Alarm World Time 1/3 03/25/2005 MENU Exit Changing the Display Language You can change the language in which the menus, error messages, etc. are displayed. You can choose from English, French, - Pentax OPTIOWP | Operation Manual - Page 160
, pictures are saved in separate folders by the date they were taken. Folder Name Standard XXXPENTX (where XXX is the 3-digit folder number) Date XXX_mmdd (3-digit folder number_month day) Picture taken with standard folder name (Example: March 25) Folder name changed to Next time a picture date - Pentax OPTIOWP | Operation Manual - Page 161
on whether you are going to connect the USB cable to a PC or a PictBridgecompatible printer. Refer to the PC Connection Manual for instructions on connecting the camera to a computer. 1 Select [USB Connection] on the [u Setting] menu. 2 Press the four-way controller (5). A pull-down menu appears - Pentax OPTIOWP | Operation Manual - Page 162
4 button 3 button Setting Format Sound Date Adjust Alarm World Time 1/3 03/25/2005 MENU Exit Changing the Video Output Format When you connect the camera to AV equipment, choose the appropriate video output format (NTSC or PAL) for taking and playing back images. 1 Select [Video Out] on the - Pentax OPTIOWP | Operation Manual - Page 163
How to display the [u Setting] menu MENU Four-way controller 3 button Setting Format Sound Date Adjust Alarm World Time 1/3 03/25/2005 MENU Exit Adjusting the Brightness of the LCD Monitor You can adjust the brightness of the LCD monitor. 1 Use the four-way controller (23) to select [ - Pentax OPTIOWP | Operation Manual - Page 164
4 button. MENU Cancel OK OK The Power Saving setting is saved. 8 Power Saving does not function in the following situations: • in Playback mode • while the camera is connected to a PC or printer • when using the AC adapter • while recording a movie Settings 162 - Pentax OPTIOWP | Operation Manual - Page 165
4 button 3 button Setting Format Sound Date Adjust Alarm World Time 1/3 03/25/2005 MENU Exit Setting Auto Power Off You can set the camera to turn off automatically when no operation is performed for a fixed time. 1 Select [Auto Power Off] on the [u Setting] menu. Setting Power Saving - Pentax OPTIOWP | Operation Manual - Page 166
Guide OK OK Changing the Start-up Screen You can choose an image to be displayed as the start-up screen when the camera is turned on. 1 Press the Q button. The camera if the original image is deleted or the SD Memory Card or built-in memory is formatted. • Select [Off] to hide - Pentax OPTIOWP | Operation Manual - Page 167
3 button Setting Format Sound Date Adjust Alarm World Time 1/3 03/25/2005 MENU Exit Resetting to Default Settings (Reset) You can reset the camera settings to their defaults. Refer to "Default Settings" (p.168) for the reset settings. 1 Select [Reset] on the [u Setting] menu. 2 Press the four - Pentax OPTIOWP | Operation Manual - Page 168
4 button You can use the camera as a clock. With the camera turned off, press and hold down the 4 button to display the clock on the LCD monitor. 1 Press and hold down the 4 button. The camera turns on and the clock appears on the screen. The camera turns off automatically after approximately 10 - Pentax OPTIOWP | Operation Manual - Page 169
Appendix List of World Time Cities Refer to the following list of cities when setting the World Time. Region City Region City North America Honolulu Anchorage Africa/ West Asia Jerusalem Nairobi Vancouver Jeddah San Francisco Tehran Los Angeles Dubai Calgary Karachi Denver Kabul - Pentax OPTIOWP | Operation Manual - Page 170
setting (last memory) is saved when the camera is turned off. No : The setting returns to the default setting when the camera is turned off. ∗ : The setting Compensation 9 Movie Recorded Pixels Color Mode Frame Rate Digital Zoom Instant Review Flash Mode Memory Drive Mode Focus Mode Zoom - Pentax OPTIOWP | Operation Manual - Page 171
Memory MF Position White Balance Sensitivity EV Compensation Digital Zoom DISPLAY File # Sharpness Saturation Contrast [u Setting] Menu Sound Date Adjust Alarm World Time Item Volume Start-up Sound Shutter Sound Operation Sound Self-timer - Pentax OPTIOWP | Operation Manual - Page 172
p.58 Playback Mode Palette Items Item Interval Slideshow Screen Effect Sound Effect Digital Filter Brightness Filter Start-up Screen Default Setting Last Memory Setting 3 sec Yes Wipe Yes On Yes B&W No Standard No Optio Logo screen Yes Reset Setting Yes Yes Yes - - Yes Page - Pentax OPTIOWP | Operation Manual - Page 173
of dedicated accessories are available for this camera. AC adapter D-AC8 Rechargeable lithium-ion battery D-LI8 (∗) Battery charger D-BC8 (∗) AC plug cord (∗) D-CO2A Australia D-CO24E Europe D-CO2H Hong Kong, United Kingdom D-CO24J Japan D-CO2K Korea D-CO24U North America, Canada USB cable I-USB7 - Pentax OPTIOWP | Operation Manual - Page 174
) Memory card error Shooting and playback are impossible due to a problem with the SD Memory Card. You may be able to display or copy the images on an image in a format not supported by this camera. You may be able to play it back on another brand of camera or your computer. The largest file - Pentax OPTIOWP | Operation Manual - Page 175
. It disappears after the image is recorded or the setting is changed. This message appears when the camera takes more than five seconds to display an image due to image processing, or when the SD Memory Card or built-in memory is being formatted. This message appears when the alarm is set - Pentax OPTIOWP | Operation Manual - Page 176
Troubleshooting Problem Cause Remedy Camera will not turn on Battery is not installed Check if battery the flash is charging. Wait until charging is finished. No available space on Insert SD Memory Card with available SD Memory Card or in space or delete unwanted images. (p.28, the built-in - Pentax OPTIOWP | Operation Manual - Page 177
Problem aim at target and press shutter release button fully (p.41), or use Manual Focus mode. (p.82) Subject is not in focusing area Position subject in LCD monitor. If the subject is outside the focusing area, aim the camera at the subject and lock the focus (press shutter release button halfway), - Pentax OPTIOWP | Operation Manual - Page 178
digital still camera with built-in zoom lens 5.0 megapixels 5.19 megapixels " Built-in memory (approx. 10.5MB), SD Memory Card Approximate Image Storage Capacity and Recording Time 2048×1536 5 9 i 1600×1200 8 30 9 55 14 80 50 15 86 20 117 l 1024× 768 18 107 33 193 42 242 - Pentax OPTIOWP | Operation Manual - Page 179
. 45 sec. Sound Built-in Memory 64MB 23 min. 132 min. 2 sec. 13 sec. White Balance Lens Digital Zoom LCD Monitor Playback Functions Focus Modes Autofocus Auto, Daylight, Shade, Tungsten Light, Fluores. Light, Manual Focal Length 6.3 mm - 18.9 mm (equivalent to 38 mm - 114 mm in 35 mm format - Pentax OPTIOWP | Operation Manual - Page 180
(full zoom range) Manual focus : Approx. 0. Natural Skin Tone, Food, Museum Digital Filters B&W, Sepia, Red, Pink, Purple, Blue, Green, Yellow, Soft, Brightness Movie Continuous Approx. 1 second - until built-in memory or SD down 4 button while camera is turned off (approx - Pentax OPTIOWP | Operation Manual - Page 181
When Shooting Accessories Number of Recordable 230 min. accordance with PENTAX conditions (The time shown SD Memory Card) 135 g (including battery and SD Memory Card) Rechargeable lithium-ion battery, battery charger, AC plug cord, USB cable, AV cable, software (CD-ROM), strap, operating manual - Pentax OPTIOWP | Operation Manual - Page 182
chemical corrosion, operation contrary to operating instructions, or modification by an unauthorized repair shop. The manufacturer or its authorized will be made on repairs by non-authorized PENTAX service facilities. Procedure During 12-month Warranty Period Any PENTAX which proves defective during - Pentax OPTIOWP | Operation Manual - Page 183
policy does not affect the customer's statutory rights. • The local warranty policies available from PENTAX distributors in some countries can supersede this warranty policy. Therefore, we recommend that you review the warranty card supplied with your product at the time of purchase, or contact the - Pentax OPTIOWP | Operation Manual - Page 184
and, if not installed and used in accordance with the instructions, may cause harmful interference to radio communications. However, there an experienced radio/TV technician for help. For customers in Canada This Class B digital apparatus meets all requirements of the Canadian 9 Interference - - Pentax OPTIOWP | Operation Manual - Page 185
Memo - Pentax OPTIOWP | Operation Manual - Page 186
Memo - Pentax OPTIOWP | Operation Manual - Page 187
operation. The above named party is responsible for ensuring that the equipment complies with the standards of 47CFR §15.101 to §15.109. Product Name: PENTAX Digital Still Camera Model Number: OptioWP Contact person: Customer Service Manager Date and Place: January, 2005, Colorado - Pentax OPTIOWP | Operation Manual - Page 188
Colorado 80401, U.S.A. (Distribution & Service Center) 16163 West 45th Drive, Unit H Golden, Colorado 80403, U.S.A. (http://www.pentaximaging.com) PENTAX Canada Inc. 1770 Argentia Road Mississauga, Ontario L5N 3S7, CANADA (http://www.pentaxcanada.ca) http://www.digital.pentax.co.jp • Printed
-
 1
1 -
 2
2 -
 3
3 -
 4
4 -
 5
5 -
 6
6 -
 7
7 -
8
-
9
-
10
-
11
-
12
-
13
-
14
-
15
-
16
-
17
-
18
-
19
-
20
-
21
-
22
-
23
-
24
-
25
-
26
-
27
-
28
-
29
-
30
-
31
-
32
-
33
-
34
-
35
-
36
-
37
-
38
-
39
-
40
-
41
-
42
-
43
-
44
-
45
-
46
-
47
-
48
-
49
-
50
-
51
-
52
-
53
-
54
-
55
-
56
-
57
-
58
-
59
-
60
-
61
-
62
-
63
-
64
-
65
-
66
-
67
-
68
-
69
-
70
-
71
-
72
-
73
-
74
-
75
-
76
-
77
-
78
-
79
-
80
-
81
-
82
-
83
-
84
-
85
-
86
-
87
-
88
-
89
-
90
-
91
-
92
-
93
-
94
-
95
-
96
-
97
-
98
-
99
-
100
-
101
-
102
-
103
-
104
-
105
-
106
-
107
-
108
-
109
-
110
-
111
-
112
-
113
-
114
-
115
-
116
-
117
-
118
-
119
-
120
-
121
-
122
-
123
-
124
-
125
-
126
-
127
-
128
-
129
-
130
-
131
-
132
-
133
-
134
-
135
-
136
-
137
-
138
-
139
-
140
-
141
-
142
-
143
-
144
-
145
-
146
-
147
-
148
-
149
-
150
-
151
-
152
-
153
-
154
-
155
-
156
-
157
-
158
-
159
-
160
-
161
-
162
-
163
-
164
-
165
-
166
-
167
-
168
-
169
-
170
-
171
-
172
-
173
-
174
-
175
-
176
-
177
-
178
-
179
-
180
-
181
-
182
-
183
-
184
-
185
-
186
-
187
-
188
 |
 |

Digital Camera
Operating Manual
To ensure the best performance from
your camera, please read the Operating
Manual before using the camera.