Pentax OPTIOWP Operation Manual - Page 126
Trimming Images, to choose the image you want to trim.
 |
UPC - 027075110694
View all Pentax OPTIOWP manuals
Add to My Manuals
Save this manual to your list of manuals |
Page 126 highlights
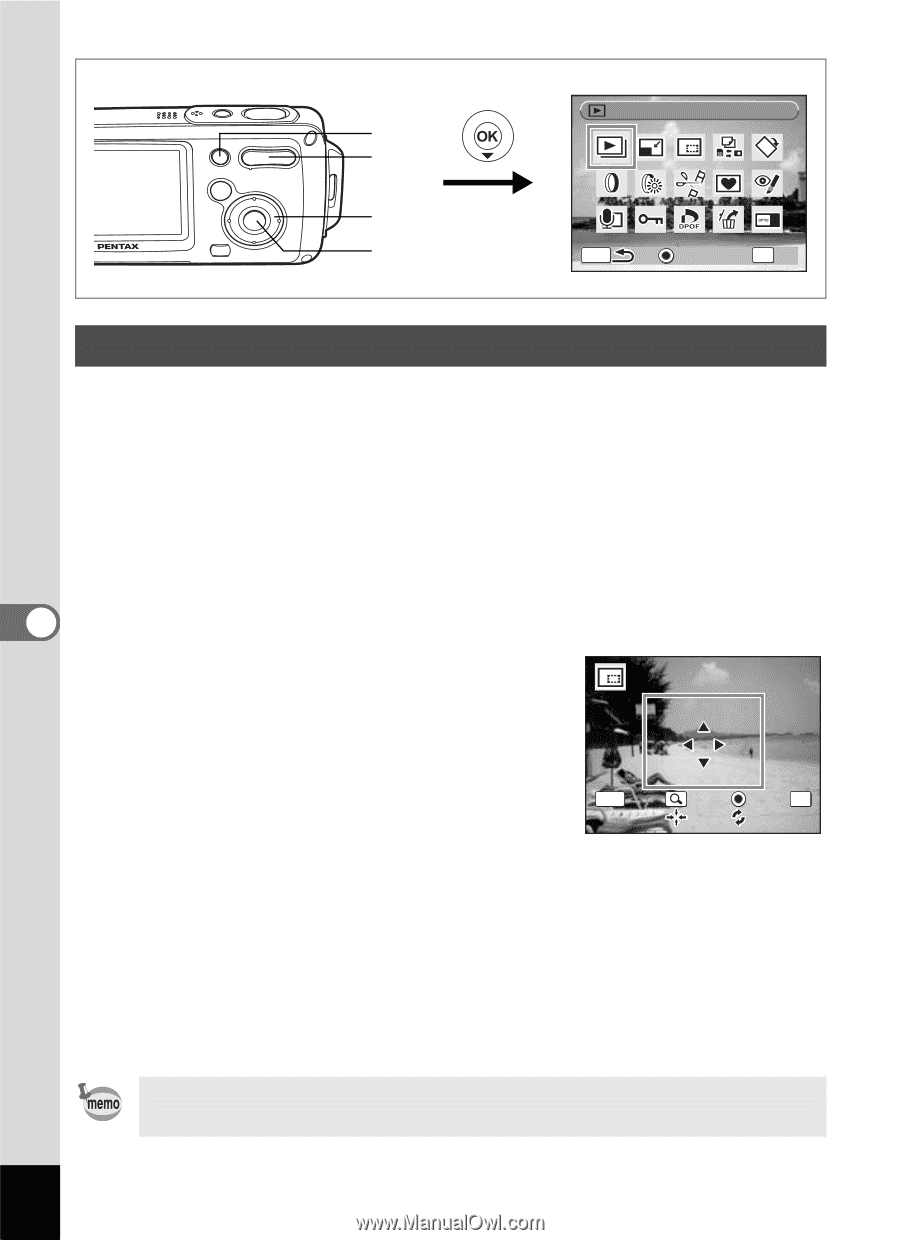
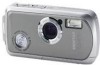
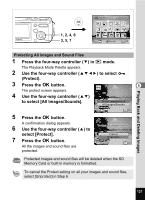
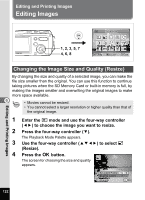
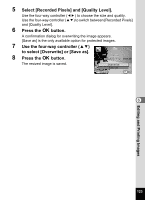
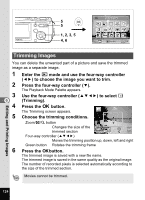
5 5 1, 2, 3, 5 4, 6 Slideshow MENU Guide OK OK Trimming Images You can delete the unwanted part of a picture and save the trimmed image as a separate image. 1 2 3 6 4 Enter the Q mode and use the four-way controller (45) to choose the image you want to trim. Press the four-way controller (3). The Playback Mode Palette appears. Use the four-way controller (2345) to select o (Trimming). Press the 4 button. The Trimming screen appears. 5 Choose the trimming conditions. Zoom/f/y button Changes the size of the MENU OK trimmed section Cancel OK Four-way controller (2345) Moves the trimming position up, down, left and right Green button Rotates the trimming frame 6 Press the 4button. The trimmed image is saved with a new file name. The trimmed image is saved in the same quality as the original image. The number of recorded pixels is selected automatically according to the size of the trimmed section. Movies cannot be trimmed. Editing and Printing Images 124
-
 1
1 -
2
-
3
-
4
-
5
-
6
-
7
-
8
-
9
-
10
-
11
-
12
-
13
-
14
-
15
-
16
-
17
-
18
-
19
-
20
-
21
-
22
-
23
-
24
-
25
-
26
-
27
-
28
-
29
-
30
-
31
-
32
-
33
-
34
-
35
-
36
-
37
-
38
-
39
-
40
-
41
-
42
-
43
-
44
-
45
-
46
-
47
-
48
-
49
-
50
-
51
-
52
-
53
-
54
-
55
-
56
-
57
-
58
-
59
-
60
-
61
-
62
-
63
-
64
-
65
-
66
-
67
-
68
-
69
-
70
-
71
-
72
-
73
-
74
-
75
-
76
-
77
-
78
-
79
-
80
-
81
-
82
-
83
-
84
-
85
-
86
-
87
-
88
-
89
-
90
-
91
-
92
-
93
-
94
-
95
-
96
-
97
-
98
-
99
-
100
-
101
-
102
-
103
-
104
-
105
-
106
-
107
-
108
-
109
-
110
-
111
-
112
-
113
-
114
-
115
-
116
-
117
-
118
-
119
-
120
-
 121
121 -
 122
122 -
 123
123 -
 124
124 -
 125
125 -
 126
126 -
 127
127 -
 128
128 -
 129
129 -
 130
130 -
 131
131 -
132
-
133
-
134
-
135
-
136
-
137
-
138
-
139
-
140
-
141
-
142
-
143
-
144
-
145
-
146
-
147
-
148
-
149
-
150
-
151
-
152
-
153
-
154
-
155
-
156
-
157
-
158
-
159
-
160
-
161
-
162
-
163
-
164
-
165
-
166
-
167
-
168
-
169
-
170
-
171
-
172
-
173
-
174
-
175
-
176
-
177
-
178
-
179
-
180
-
181
-
182
-
183
-
184
-
185
-
186
-
187
-
188
 |
 |