Pentax OPTIOWP Operation Manual - Page 71
Take the first image., Move the camera to the right and, subsequent images.
 |
UPC - 027075110694
View all Pentax OPTIOWP manuals
Add to My Manuals
Save this manual to your list of manuals |
Page 71 highlights
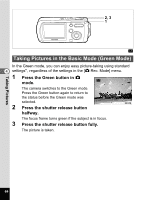
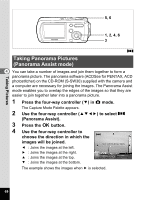
5 Take the first image. Press the shutter release button fully to take the first image. The right edge of the image appears in semi-transparent form on the left of the LCD monitor. 6 Move the camera to the right and take the second image. Move the camera until the semi-transparent image and the actual view overlap and press the shutter release button. Repeat Steps 5 and 6 to take the third and subsequent images. 38 03/25/2005 14:25 37 03/25/2005 14:25 4 The camera cannot join the images. Use the panorama software supplied with the camera (ACDSee for PENTAX, ACD photostitcher). Refer to the ACDSee for PENTAX User Guide for instructions on stitching images. Taking Pictures 69
-
 1
1 -
2
-
3
-
4
-
5
-
6
-
7
-
8
-
9
-
10
-
11
-
12
-
13
-
14
-
15
-
16
-
17
-
18
-
19
-
20
-
21
-
22
-
23
-
24
-
25
-
26
-
27
-
28
-
29
-
30
-
31
-
32
-
33
-
34
-
35
-
36
-
37
-
38
-
39
-
40
-
41
-
42
-
43
-
44
-
45
-
46
-
47
-
48
-
49
-
50
-
51
-
52
-
53
-
54
-
55
-
56
-
57
-
58
-
59
-
60
-
61
-
62
-
63
-
64
-
65
-
 66
66 -
 67
67 -
 68
68 -
 69
69 -
 70
70 -
 71
71 -
 72
72 -
 73
73 -
 74
74 -
 75
75 -
 76
76 -
77
-
78
-
79
-
80
-
81
-
82
-
83
-
84
-
85
-
86
-
87
-
88
-
89
-
90
-
91
-
92
-
93
-
94
-
95
-
96
-
97
-
98
-
99
-
100
-
101
-
102
-
103
-
104
-
105
-
106
-
107
-
108
-
109
-
110
-
111
-
112
-
113
-
114
-
115
-
116
-
117
-
118
-
119
-
120
-
121
-
122
-
123
-
124
-
125
-
126
-
127
-
128
-
129
-
130
-
131
-
132
-
133
-
134
-
135
-
136
-
137
-
138
-
139
-
140
-
141
-
142
-
143
-
144
-
145
-
146
-
147
-
148
-
149
-
150
-
151
-
152
-
153
-
154
-
155
-
156
-
157
-
158
-
159
-
160
-
161
-
162
-
163
-
164
-
165
-
166
-
167
-
168
-
169
-
170
-
171
-
172
-
173
-
174
-
175
-
176
-
177
-
178
-
179
-
180
-
181
-
182
-
183
-
184
-
185
-
186
-
187
-
188
 |
 |
69
4
Taking Pictures
5
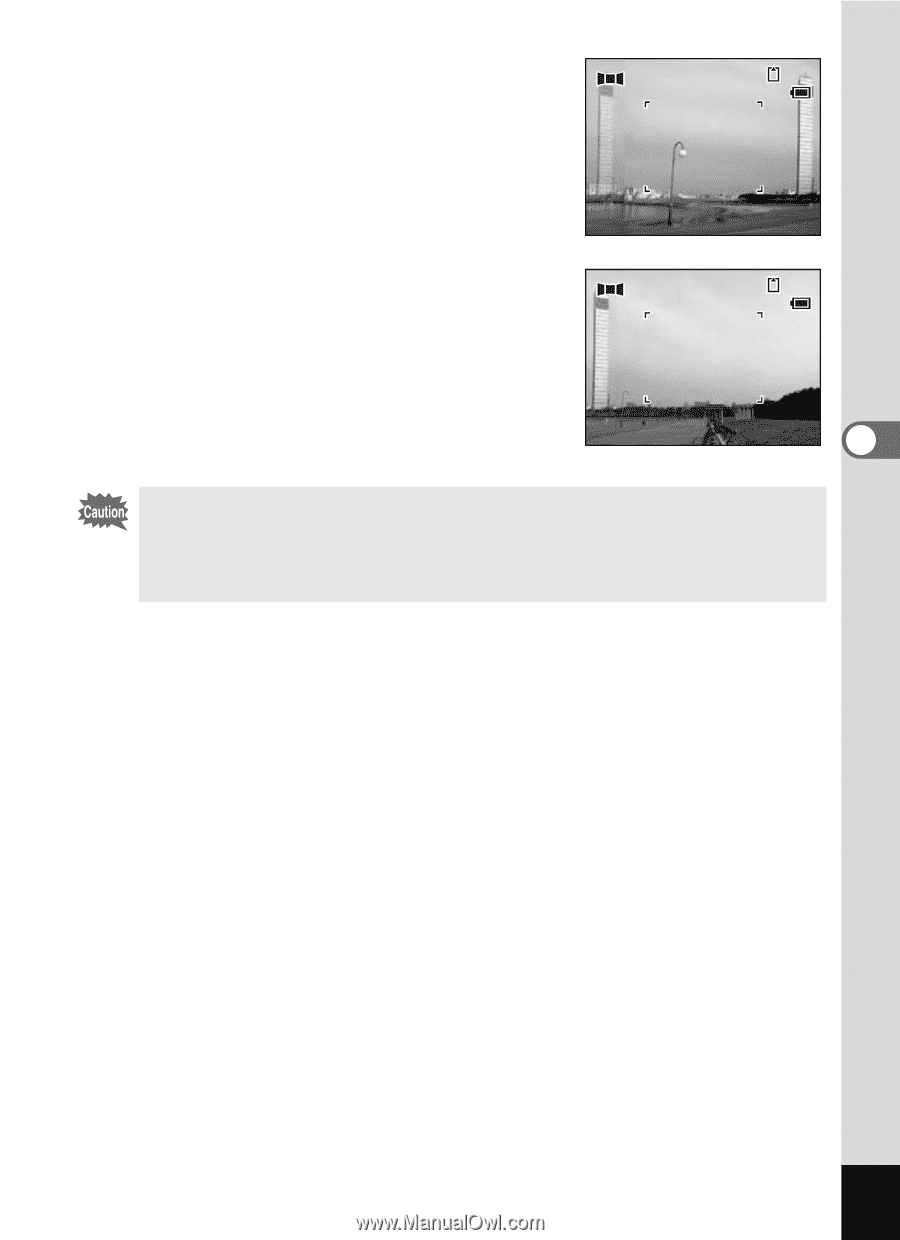
Take the first image.
Press the shutter release button fully to take
the first image. The right edge of the image
appears in semi-transparent form on the left
of the LCD monitor.
6
Move the camera to the right and
take the second image.
Move the camera until the semi-transparent
image and the actual view overlap and
press the shutter release button. Repeat
Steps 5 and 6 to take the third and
subsequent images.
The camera cannot join the images. Use the panorama software
supplied with the camera (ACDSee for PENTAX, ACD
photostitcher). Refer to the ACDSee for PENTAX User Guide for
instructions on stitching images.
38
38
38
14
14
:25
:25
14:25
03/25/2005
03/25/2005
03/25/2005
37
37
37
14
14
:25
:25
14:25
03/25/2005
03/25/2005
03/25/2005