Polaroid LDTV152 Owners Guide - Page 12
TV Set-Up - mitsubishi review
 |
UPC - 082400028051
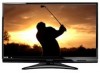
View all Polaroid LDTV152 manuals
Add to My Manuals
Save this manual to your list of manuals |
Page 12 highlights
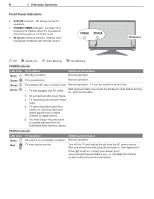
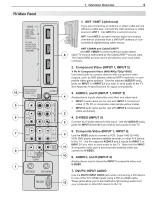
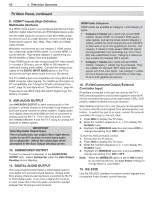
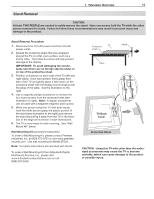
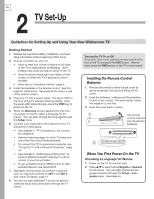
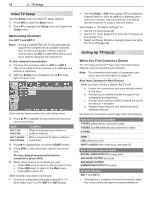
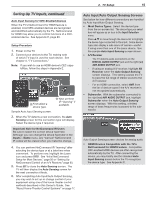
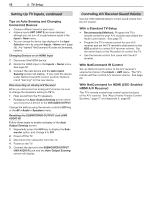
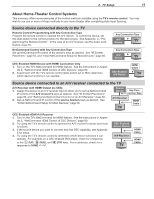
12 2 TV Set-Up Guidelines for Setting Up and Using Your New Widescreen TV Getting Started 1. Review the important safety, installation, and operating information at the beginning of this book. 2. Choose a location for your TV. • Allow at least four inches of space on all sides of the TV to help prevent overheating. Overheating may cause premature failure of the TV. • Avoid locations where light may reflect off the screen or where the TV is exposed to direct sunlight. • Refer also to "Installation Notes," page 5. 3. Install the batteries in the remote control. See this page for instructions. See page 30 for more on use of the remote control. 4. Plug your TV into a power outlet. The green LED on the front of the TV will start blinking rapidly. After the green LED stops blinking, press the POWER key to power on the TV. 5. When the Welcome screen appears the first time you power on the TV, select a language for TV menus. You can later change the language through the Setup menu. 6. Connect your audio/video (A/V) devices to the TV and perform initial setup. • See chapter 3, "TV Connections," for connection diagrams. • See the following pages for initial TV setup and use of the Auto Input Sensing feature. • To connect the TV to a personal computer, see "Using the TV with a Personal Computer," page 18 . • See chapter 6, "NetCommand IR Control," to perform NetCommand IR "learning" to set up control of your home theater. • To set up NetCommand HDMI control of CECenabled devices, see Appendix E. 7. Mitsubishi recommends you perform a channel scan for channels received on ANT 1 and ANT 2. See "Initial TV Setup" page 14. 8. You can now start watching TV or you can perform additional setup and customization through the TV menus. Turning the TV On or Off To turn the TV on or off, point the remote control at the front of the TV and press the POWER button. Alternatively, press the POWER button on the TV's control panel. Installing the Remote Control Batteries 1. Remove the remote control's back cover by gently pressing in the tab and lifting off the cover. 2. Load the batteries, making sure the polarities (+) and (-) are correct. For best results, insert the negative (-) end first. 3. Snap the cover back in place. 1 The remote control requires two AA alkaline batteries. 2 When You First Power On the TV Choosing a Language for Menus 1. Power on the TV for the first time. 2. Press to select either English or Spanish for all menus. You can later change the language selection through the Setup > Language menu. See page 44.
-
 1
1 -
2
-
3
-
4
-
5
-
6
-
 7
7 -
 8
8 -
 9
9 -
 10
10 -
 11
11 -
 12
12 -
 13
13 -
 14
14 -
 15
15 -
 16
16 -
 17
17 -
18
-
19
-
20
-
21
-
22
-
23
-
24
-
25
-
26
-
27
-
28
-
29
-
30
-
31
-
32
-
33
-
34
-
35
-
36
-
37
-
38
-
39
-
40
-
41
-
42
-
43
-
44
-
45
-
46
-
47
-
48
-
49
-
50
-
51
-
52
-
53
-
54
-
55
-
56
-
57
-
58
-
59
-
60
-
61
-
62
-
63
-
64
-
65
-
66
-
67
-
68
-
69
-
70
-
71
-
72
-
73
-
74
-
75
-
76
-
77
-
78
-
79
-
80
-
81
-
82
-
83
-
84
-
85
-
86
-
87
-
88
-
89
-
90
-
91
-
92
-
93
-
94
-
95
-
96
 |
 |
