Polaroid LDTV152 Owners Guide - Page 13
Additional TV Setup, TV Operation, TV Cleaning, Assistance - reviews
 |
UPC - 082400028051
View all Polaroid LDTV152 manuals
Add to My Manuals
Save this manual to your list of manuals |
Page 13 highlights
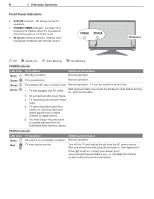
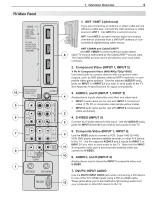
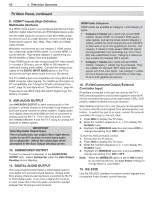
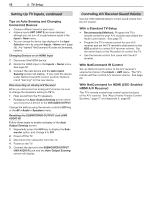
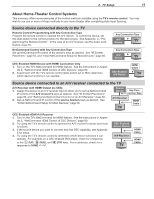
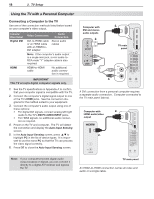
Additional TV Setup 1. Review chapter 5, "TV Menus," to customize TV operation. Press the MENU key to enter the menu system. Some examples of settings you may wish to change include: • Fav. Use an on-screen menu to create custom lists of your favorite channels from ANT 1 and ANT 2. See Setup > Edit, page 45. • Order. Rearrange the device icons in the Input Selection menu to put frequently used icons near the front. See Inputs > Order, page 50. • Name. Change the device types that appear in the Input Selection menu. See Inputs > Name options, page 50. • Parental Locks. Restrict TV viewing by program rating, by channel, or by time of day. You can also disable the control-panel buttons if you have small children. - To restrict TV use by program rating, see the Lock > Parent menu, page 52. - To lock the control-panel buttons, use the Lock > Control Panel menu, page 53. - To restrict TV use by channel, see Setup > Edit > Lock, page 45. • Video Settings. Change video adjustments to get the best picture for your viewing conditions. See "AV Menu," page 38. Note: You may wish to change the Picture Mode from the default Brilliant to either Bright or Natural, which are suitable for most home viewing. 2. To see a demo of beautiful images in high-definition from the Mitsubishi.GalleryPlayer.com collection, see page 49. 3. To program the remote control to operate A/V devices not under NetCommand control, see Appendix C, "Programming the Remote Control." 4. To set up the TV Guide Daily system, see Appendix D . 2. TV Setup 13 TV Operation 1. Review chapter 4, "TV Operation and Features," for TV features including: • Input Selection (viewing source). Select a connected program source to watch, such as a VCR, DVD player, or antenna. Press INPUT on the remote control to select from icons for the TV inputs. See "Choosing a Viewing Source," page 29. • Listings. Press GUIDE. - For ChannelView™ display of listings on ANT 1 and ANT 2, see "ChannelView Channel Listings," page 31. - If you have set up and activated the TV Guide Daily system, press the GUIDE key to display listings using TV Guide Daily. See Appendix D, • Picture Formats. Press FORMAT to cycle through picture sizes and shapes to find the one best suited to the current program. See "TV Signals and Display Formats," page 34. 2. To view still and moving digital camera images on the TV, see page 35, "Viewing Camera Files and GalleryPlayer Images." 3. To control A/V devices with NetCommand, see page 58, "Operating NetCommand-Controlled Devices." TV Cleaning See "Cleaning Recommendations," page 5. Assistance • For troubleshooting, service, and product support, see Appendix F. • For warranty information, see the TV warranty on page 92.
-
 1
1 -
2
-
3
-
4
-
5
-
6
-
7
-
 8
8 -
 9
9 -
 10
10 -
 11
11 -
 12
12 -
 13
13 -
 14
14 -
 15
15 -
 16
16 -
 17
17 -
 18
18 -
19
-
20
-
21
-
22
-
23
-
24
-
25
-
26
-
27
-
28
-
29
-
30
-
31
-
32
-
33
-
34
-
35
-
36
-
37
-
38
-
39
-
40
-
41
-
42
-
43
-
44
-
45
-
46
-
47
-
48
-
49
-
50
-
51
-
52
-
53
-
54
-
55
-
56
-
57
-
58
-
59
-
60
-
61
-
62
-
63
-
64
-
65
-
66
-
67
-
68
-
69
-
70
-
71
-
72
-
73
-
74
-
75
-
76
-
77
-
78
-
79
-
80
-
81
-
82
-
83
-
84
-
85
-
86
-
87
-
88
-
89
-
90
-
91
-
92
-
93
-
94
-
95
-
96
 |
 |
