Polaroid LDTV152 Owners Guide - Page 46
selected for Daylight Savings Time, the TV's
 |
UPC - 082400028051
View all Polaroid LDTV152 manuals
Add to My Manuals
Save this manual to your list of manuals |
Page 46 highlights
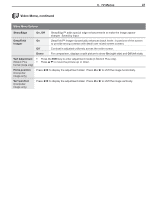
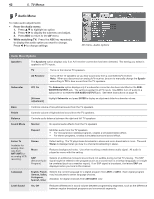
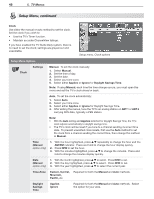
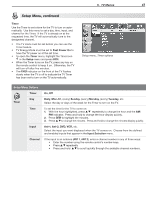
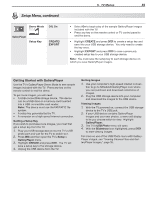
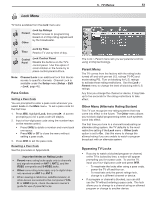
46 5. TV Menus Setup Menu, continued Clock Use either the manual or auto method to set the clock. Set the clock if you wish to: • Use the TV's Timer function. • Maintain accurate ChannelView listings. If you have enabled the TV Guide Daily system, there is no need to set the clock; settings are grayed out and unavailable. Setup menu, Clock options Setup Menu Options Clock Settings Manual. To set the clock manually: 1. Select Manual. 2. Set the time of day. 3. Set the date. 4. Select your time zone. 5. Select either Applies or Ignore for Daylight Savings Time. Note: If using Manual, each time the time change occurs, you must open this menu and set the TV's clock ahead or back. Auto. To set the clock automatically: 1. Select Auto. 2. Select your time zone. 3. Select either Applies or Ignore for Daylight Savings Time. 4. After exiting the menus, tune the TV to an analog station on ANT 1 or ANT 2 carrying XDS data, typically a PBS station. Note: • With the Auto setting and Applies selected for Daylight Savings Time, the TV's clock adjusts automatically to daylight savings time. • The TV's clock will be reset if you tune to a channel sending incorrect time data. To prevent unwanted clock resets, first use the Auto method to set the clock from a channel sending the correct time, then change the method to Manual. Time (Manual option only) 1. With the hour highlighted, press repeatedly to change the hour and the AM/PM indicator. Press and hold to change the hour display quickly. 2. Press ENTER to set the hour. 3. With the minutes highlighted, press to change the minutes. Press and hold to change the minutes display quickly. Date (Manual option only) 1. With the month highlighted, press 2. With the day highlighted, press 3. With the year highlighted, press to select. Press ENTER to set. to select. Press ENTER to set. to select the current year. Time Zone Eastern, Central, Mountain, Pacific, etc. Required for both the Manual and Auto methods. Daylight Savings Time Applies Ignore Required for both the Manual and Auto methods. Select the option for your area.
-
 1
1 -
2
-
3
-
4
-
5
-
6
-
7
-
8
-
9
-
10
-
11
-
12
-
13
-
14
-
15
-
16
-
17
-
18
-
19
-
20
-
21
-
22
-
23
-
24
-
25
-
26
-
27
-
28
-
29
-
30
-
31
-
32
-
33
-
34
-
35
-
36
-
37
-
38
-
39
-
40
-
 41
41 -
 42
42 -
 43
43 -
 44
44 -
 45
45 -
 46
46 -
 47
47 -
 48
48 -
 49
49 -
 50
50 -
 51
51 -
52
-
53
-
54
-
55
-
56
-
57
-
58
-
59
-
60
-
61
-
62
-
63
-
64
-
65
-
66
-
67
-
68
-
69
-
70
-
71
-
72
-
73
-
74
-
75
-
76
-
77
-
78
-
79
-
80
-
81
-
82
-
83
-
84
-
85
-
86
-
87
-
88
-
89
-
90
-
91
-
92
-
93
-
94
-
95
-
96
 |
 |
