Polaroid LDTV152 Owners Guide - Page 16
Setting Up TV Inputs, continued, Controlling A/V Receiver Sound Volume
 |
UPC - 082400028051
View all Polaroid LDTV152 manuals
Add to My Manuals
Save this manual to your list of manuals |
Page 16 highlights
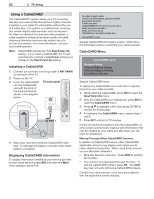
16 2. TV Setup Setting Up TV Inputs, continued Tips on Auto Sensing and Changing Connected Devices • Choose a different name for each input. • Antenna inputs (ANT 1/ANT 2) are never detected, although you can turn off unused antenna inputs in the Inputs > Name menu. • You can change the device type displayed in the Input Selection menu by using the Inputs > Name menu (page 50). Any "learned" NetCommand IR codes will be erased, however. Changing Devices on an HDMI Input 1. Disconnect the HDMI device. 2. Delete the HDMI input in the Inputs > Name menu. See page 50. 3. Connect the new device and the Auto Input Sensing screen will display. If you want the device under NetCommand IR control, perform NetCommand "learning" for the new device. Disconnecting an Analog A/V Receiver When you disconnect an analog A/V receiver, be sure to change the Speakers setting to TV to: • Hear sound from the TV speakers. • Redisplay the Auto Output Sensing screen when you reconnect a device to the AVR AUDIO OUTPUT. Change the setting using the remote control's AUDIO key or the AV > Audio > Speakers menu. Resetting the SUBWOOFER OUTPUT Jack (AVR AUDIO R) Follow these steps to enable redisplay of the Auto Output Sensing screen. 1. Repeatedly press the AUDIO key to display the Sub- woofer option and change it to Off. 2. Power off the TV. 3. Disconnect the subwoofer from the TV. 4. Power on the TV. 5. Connect the device to the SUBWOOFER OUTPUT (AVR AUDIO R) jack and the Auto Output Sensing screen will display. Controlling A/V Receiver Sound Volume Use one of the methods below to control sound volume from the A/V receiver. With a Standard TV Setup • Recommended Method: Program the TV's remote control for your A/V receiver and enable the Audio Lock feature. See page 70. • Program the TV's remote control for your A/V receiver and set the TV remote's slide switch to the AUDIO position to control A/V receiver volume. Set the switch back to the TV position to control the TV. • Use the remote control that came with the A/V receiver. With NetCommand IR Control Set up NetCommand control of the A/V receiver's volume functions in the Inputs > AVR menu. The TV's remote will then control A/V receiver volume. See page 60. With NetCommand for HDMI (CEC-Enabled HDMI A/V Receiver) The TV's remote control may control some functions of the A/V receiver. See "About Home-Theater Control Systems," page 17 and Appendix E, page 80.
-
 1
1 -
2
-
3
-
4
-
5
-
6
-
7
-
8
-
9
-
10
-
 11
11 -
 12
12 -
 13
13 -
 14
14 -
 15
15 -
 16
16 -
 17
17 -
 18
18 -
 19
19 -
 20
20 -
 21
21 -
22
-
23
-
24
-
25
-
26
-
27
-
28
-
29
-
30
-
31
-
32
-
33
-
34
-
35
-
36
-
37
-
38
-
39
-
40
-
41
-
42
-
43
-
44
-
45
-
46
-
47
-
48
-
49
-
50
-
51
-
52
-
53
-
54
-
55
-
56
-
57
-
58
-
59
-
60
-
61
-
62
-
63
-
64
-
65
-
66
-
67
-
68
-
69
-
70
-
71
-
72
-
73
-
74
-
75
-
76
-
77
-
78
-
79
-
80
-
81
-
82
-
83
-
84
-
85
-
86
-
87
-
88
-
89
-
90
-
91
-
92
-
93
-
94
-
95
-
96
 |
 |
