Polaroid LDTV152 Owners Guide - Page 15
Setting Up TV Inputs, continued
 |
UPC - 082400028051
View all Polaroid LDTV152 manuals
Add to My Manuals
Save this manual to your list of manuals |
Page 15 highlights
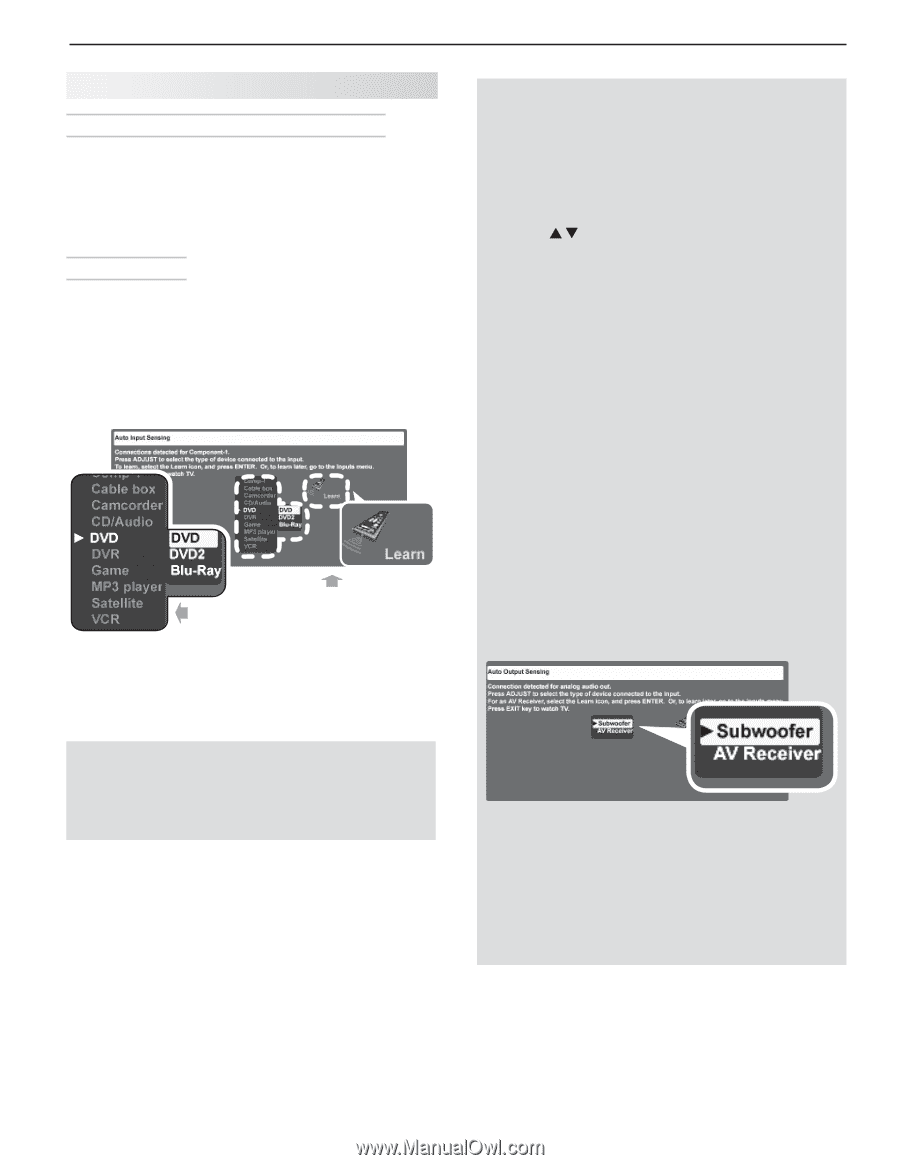
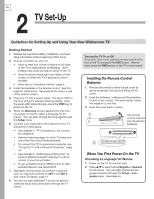
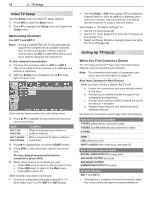
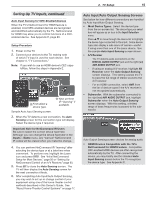
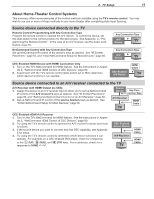
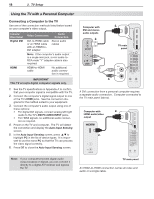
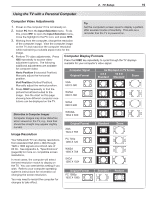
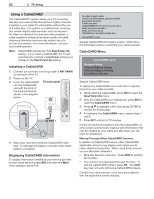
Setting Up TV Inputs, continued Auto Input Sensing for CEC-Enabled Devices When the TV's NetCommand for HDMI feature is enabled, most CEC-enabled devices are recognized and identified automatically by the TV. NetCommand for HDMI may allow you to control functions of a CECenabled device. See Appendix E, page 80. Setup Procedure 1. Power on the TV. 2. Connect your devices to the TV, making note of which TV input is used for each device. See chapter 3, "TV Connections." Note: If you wish to use an HDMI device's CEC capabilities, follow the steps in Appendix E. First select a device type. Next perform IR "learning" if available. Sample Auto Input Sensing screen. 3. When the TV detects a new connection, the Auto Sensing screen for the connection type will display. Select the device type if required. Important Note for NetCommand IR Users Be sure to select the correct device type here. Although you can change the device type later in the Inputs > Name menu, any "learned" NetCommand IR codes will be erased when you make the change. 4. You can perform NetCommand IR "learning" after selecting the device type or at a later time when convenient. To perform now, highlight the Learn icon and press ENTER. See "Initial NetCommand Setup for Most Devices," page 56 or "Setting Up NetCommand Control of an A/V Receiver," page 60. 5. Press EXIT to close the Auto Sensing screen. The TV will then display the Auto Sensing screen for the next connection it finds. 6. After completing Auto Input/Auto Output Sensing, you may wish to set up or change control of your equipment using one of the home-theater control methods described in this Owner's Guide. See "About Home-Theater Control Systems" on page 17. 2. TV Setup 15 Auto Input/Auto Output Sensing Screens See below for how different connections are handled by Auto Input/Auto Output Sensing. • Most Device Types. Select the device type from the on-screen list. The device type you select here will appear as an icon in the Input Selection menu. Press to move through the device list to highlight the device type connected to the input. Some device types also display a sub-menu of names-useful if using more than one of the same device. See the sample Auto Input Sensing screen shown. • A/V Receiver - The TV detects audio connections on the DIGITAL AUDIO OUTPUT jack and the right (red) AVR AUDIO OUTPUT jack. - If using an analog A/V receiver, highlight AV Receiver when the Auto Output Sensing screen displays. This setting causes the TV to pass the full range of stereo sound to the A/V receiver. - For an HDMI connection, select AVR from the list of device types if the A/V receiver is not recognized automatically. • Subwoofer. With the subwoofer connected to the right (red) AVR AUDIO OUTPUT jack, highlight Subwoofer when the Auto Output Sensing screen displays. With this setting, a limited range of bass frequencies is passed to the subwoofer. Auto Output Sensing screen choices for analog audio • HDMI Devices Compatible with the TV's NetCommand for HDMI Feature. Compatible CEC-enabled HDMI devices are often recognized automatically by the TV. After connecting the device, you may briefly see the standard Auto Input Sensing screen before the TV recognizes the device type. See Appendix E.
-
 1
1 -
2
-
3
-
4
-
5
-
6
-
7
-
8
-
9
-
 10
10 -
 11
11 -
 12
12 -
 13
13 -
 14
14 -
 15
15 -
 16
16 -
 17
17 -
 18
18 -
 19
19 -
 20
20 -
21
-
22
-
23
-
24
-
25
-
26
-
27
-
28
-
29
-
30
-
31
-
32
-
33
-
34
-
35
-
36
-
37
-
38
-
39
-
40
-
41
-
42
-
43
-
44
-
45
-
46
-
47
-
48
-
49
-
50
-
51
-
52
-
53
-
54
-
55
-
56
-
57
-
58
-
59
-
60
-
61
-
62
-
63
-
64
-
65
-
66
-
67
-
68
-
69
-
70
-
71
-
72
-
73
-
74
-
75
-
76
-
77
-
78
-
79
-
80
-
81
-
82
-
83
-
84
-
85
-
86
-
87
-
88
-
89
-
90
-
91
-
92
-
93
-
94
-
95
-
96
 |
 |