Ricoh InfoPrint Pro C900AFP InfoPrint Manager - Page 320
Editing configuration files, Creating a transform with bin mappings
 |
View all Ricoh InfoPrint Pro C900AFP manuals
Add to My Manuals
Save this manual to your list of manuals |
Page 320 highlights
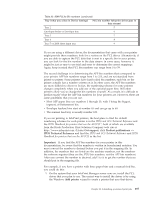
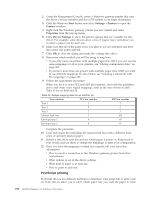
Editing configuration files There are five configuration files that come with the InfoPrint Manager PCL to AFP and PostScript to AFP transforms. For the PCL transform, they are: pcl2afp.cfg and pcl2afpd.cfg. For the PostScript transform they are: ps2afp.cfg, ps2afpd.cfg (used with InfoPrint 3000 and InfoPrint 4000 printers), and 3160d.cfg (used with all other IPDS printers). You only need to edit one of these files per data stream, depending on the printer you send your jobs to and these considerations. v Edit pcl2afpd.cfg, ps2afpd.cfg, or 3160d.cfg if you want everyone to use the same mappings. This method is recommended. v Edit pcl2afp.cfg or ps2afp.cfg if different people have to use different mappings. To edit the appropriate file: 1. On the system that your InfoPrint Manager server is installed on, locate the file. It should be in the \pcl2afp or the \ps2afp directory. 2. Open the file in a text editor such as Notepad. At the bottom of the file, you will see blocks of instructions and sample commands. 3. Modify the file according to the instructions in the file. Choose one of the options and uncomment that line, then enter your mapping numbers. If you are using the ps2afp transform, replace the inputX=... portion of the device_controls line with your identification statement from "Identifying paper trays to InfoPrint Manager" on page 300. 4. Save the file. Note: It is recommended that you save a copy of your changes in a directory outside of the InfoPrint Manager install path so that you have a copy in case you ever have to re-install or apply service to InfoPrint Manager. 5. Close the file. 6. Restart the computer to have the new settings take effect. 7. Tell your users what kind of paper is in each bin and how to print to each of them. Creating a transform with bin mappings You can use the InfoPrint Manager transforms to process print jobs with different options, including which paper bins to use. First, you create a transform using the InfoPrint Manager Administration GUI, specifying an input data stream and an output data stream. Then, you associate it with one or more printers. When you send a print job to that printer, your transform checks to see if the file is the data stream that needs to be transformed. If it does, the transform converts the file as you specified; if it is not, the transform passes the file to the logical destination. As a result, if you do not want to use the same bin mappings for all of your printers, you can create several different transforms, all with different mappings. Then, associate each transform with whichever printer or printers you want. Note: If you will be sending both PCL and PostScript jobs to the same printer, you can create two transform objects (one that accepts PCL and one that accepts PostScript) and associate them both with that printer. 302 InfoPrint Manager for Windows: Procedures
-
 1
1 -
2
-
3
-
4
-
5
-
6
-
7
-
8
-
9
-
10
-
11
-
12
-
13
-
14
-
15
-
16
-
17
-
18
-
19
-
20
-
21
-
22
-
23
-
24
-
25
-
26
-
27
-
28
-
29
-
30
-
31
-
32
-
33
-
34
-
35
-
36
-
37
-
38
-
39
-
40
-
41
-
42
-
43
-
44
-
45
-
46
-
47
-
48
-
49
-
50
-
51
-
52
-
53
-
54
-
55
-
56
-
57
-
58
-
59
-
60
-
61
-
62
-
63
-
64
-
65
-
66
-
67
-
68
-
69
-
70
-
71
-
72
-
73
-
74
-
75
-
76
-
77
-
78
-
79
-
80
-
81
-
82
-
83
-
84
-
85
-
86
-
87
-
88
-
89
-
90
-
91
-
92
-
93
-
94
-
95
-
96
-
97
-
98
-
99
-
100
-
101
-
102
-
103
-
104
-
105
-
106
-
107
-
108
-
109
-
110
-
111
-
112
-
113
-
114
-
115
-
116
-
117
-
118
-
119
-
120
-
121
-
122
-
123
-
124
-
125
-
126
-
127
-
128
-
129
-
130
-
131
-
132
-
133
-
134
-
135
-
136
-
137
-
138
-
139
-
140
-
141
-
142
-
143
-
144
-
145
-
146
-
147
-
148
-
149
-
150
-
151
-
152
-
153
-
154
-
155
-
156
-
157
-
158
-
159
-
160
-
161
-
162
-
163
-
164
-
165
-
166
-
167
-
168
-
169
-
170
-
171
-
172
-
173
-
174
-
175
-
176
-
177
-
178
-
179
-
180
-
181
-
182
-
183
-
184
-
185
-
186
-
187
-
188
-
189
-
190
-
191
-
192
-
193
-
194
-
195
-
196
-
197
-
198
-
199
-
200
-
201
-
202
-
203
-
204
-
205
-
206
-
207
-
208
-
209
-
210
-
211
-
212
-
213
-
214
-
215
-
216
-
217
-
218
-
219
-
220
-
221
-
222
-
223
-
224
-
225
-
226
-
227
-
228
-
229
-
230
-
231
-
232
-
233
-
234
-
235
-
236
-
237
-
238
-
239
-
240
-
241
-
242
-
243
-
244
-
245
-
246
-
247
-
248
-
249
-
250
-
251
-
252
-
253
-
254
-
255
-
256
-
257
-
258
-
259
-
260
-
261
-
262
-
263
-
264
-
265
-
266
-
267
-
268
-
269
-
270
-
271
-
272
-
273
-
274
-
275
-
276
-
277
-
278
-
279
-
280
-
281
-
282
-
283
-
284
-
285
-
286
-
287
-
288
-
289
-
290
-
291
-
292
-
293
-
294
-
295
-
296
-
297
-
298
-
299
-
300
-
301
-
302
-
303
-
304
-
305
-
306
-
307
-
308
-
309
-
310
-
311
-
312
-
313
-
314
-
 315
315 -
 316
316 -
 317
317 -
 318
318 -
 319
319 -
 320
320 -
 321
321 -
 322
322 -
 323
323 -
 324
324 -
 325
325 -
326
-
327
-
328
-
329
-
330
-
331
-
332
-
333
-
334
-
335
-
336
-
337
-
338
-
339
-
340
-
341
-
342
-
343
-
344
-
345
-
346
-
347
-
348
-
349
-
350
-
351
-
352
-
353
-
354
-
355
-
356
-
357
-
358
-
359
-
360
-
361
-
362
-
363
-
364
-
365
-
366
-
367
-
368
-
369
-
370
-
371
-
372
-
373
-
374
-
375
-
376
-
377
-
378
-
379
-
380
-
381
-
382
-
383
-
384
-
385
-
386
-
387
-
388
-
389
-
390
-
391
-
392
-
393
-
394
-
395
-
396
-
397
-
398
-
399
-
400
-
401
-
402
-
403
-
404
-
405
-
406
-
407
-
408
-
409
-
410
-
411
-
412
-
413
-
414
-
415
-
416
-
417
-
418
-
419
-
420
-
421
-
422
-
423
-
424
-
425
-
426
 |
 |
