Sony Ericsson Xperia Z TMobile User Guide - Page 46
Avoiding duplicate entries in the Contacts application, Adding and editing contacts, Accept
 |
View all Sony Ericsson Xperia Z TMobile manuals
Add to My Manuals
Save this manual to your list of manuals |
Page 46 highlights
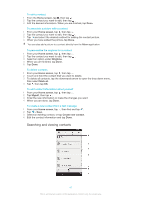
To receive contact data sent using Bluetooth™ technology 1 Make sure you have the Bluetooth™ function turned on and your device set to visible. If not, then you cannot receive data from other devices. 2 When you are asked to confirm whether you want to receive the file, tap Accept. 3 Drag down the Notification panel and tap the file you received to import the contact data. To import contacts from a SIM card 1 From your Home screen, tap , then tap . 2 Press , then tap Import contacts > SIM card. 3 If you have set up a synchronisation account, you can choose to add the SIM card contacts under that account. Or you can choose to only use these contacts on your device. Select your desired option. 4 To import an individual contact, find and tap the contact. To import all contacts, tap Import all. Avoiding duplicate entries in the Contacts application If you synchronise your contacts with a new account or import contact information in other ways, you could end up with duplicate entries in the Contacts application. If this happens, you can join such duplicates to create a single entry. And if you join entries by mistake, you can separate them again later. To link contacts 1 From your Home screen, tap , then tap . 2 Tap the contact you want to link with another contact. 3 Press , then tap Link contact. 4 Tap the contact whose information you want to join with the first contact, then tap OK to confirm. The information from the first contact is merged with the second contact, and the first contact is no longer displayed in the Contacts list. To separate linked contacts 1 From your Home screen, tap , then tap . 2 Tap the linked contact you want to edit, then tap . 3 Tap Unlink contact. 4 Tap OK. Adding and editing contacts You can create, edit and synchronise your contacts in a few simple steps. You can select contacts saved in different accounts and manage how you display them on your device. If you synchronise your contacts with more than one account, you can join contacts on your device to avoid duplicates. Some synchronisation services, for example, some social networking services, do not allow you to edit contact details. To add a contact 1 From your Home screen, tap , then tap . 2 Tap . 3 If you have synchronised your contacts with one or more accounts, select the account to which you want to add the contact, or tap Local contact if you want to keep the contact's information only on your device. 4 Enter or select the desired information for the contact. 5 When you are finished, tap Done. 46 This is an Internet version of this publication. © Print only for private use.
-
 1
1 -
2
-
3
-
4
-
5
-
6
-
7
-
8
-
9
-
10
-
11
-
12
-
13
-
14
-
15
-
16
-
17
-
18
-
19
-
20
-
21
-
22
-
23
-
24
-
25
-
26
-
27
-
28
-
29
-
30
-
31
-
32
-
33
-
34
-
35
-
36
-
37
-
38
-
39
-
40
-
 41
41 -
 42
42 -
 43
43 -
 44
44 -
 45
45 -
 46
46 -
 47
47 -
 48
48 -
 49
49 -
 50
50 -
 51
51 -
52
-
53
-
54
-
55
-
56
-
57
-
58
-
59
-
60
-
61
-
62
-
63
-
64
-
65
-
66
-
67
-
68
-
69
-
70
-
71
-
72
-
73
-
74
-
75
-
76
-
77
-
78
-
79
-
80
-
81
-
82
-
83
-
84
-
85
-
86
-
87
-
88
-
89
-
90
-
91
-
92
-
93
-
94
-
95
-
96
-
97
-
98
-
99
-
100
-
101
-
102
-
103
-
104
-
105
-
106
-
107
-
108
-
109
-
110
-
111
-
112
-
113
-
114
-
115
-
116
-
117
-
118
-
119
-
120
-
121
-
122
-
123
-
124
-
125
-
126
-
127
-
128
-
129
-
130
-
131
-
132
-
133
-
134
-
135
-
136
-
137
 |
 |