Sony Ericsson Xperia Z TMobile User Guide - Page 86
Analysing photos with faces in Album, Working with videos in Album, Delete, Home screen, Album
 |
View all Sony Ericsson Xperia Z TMobile manuals
Add to My Manuals
Save this manual to your list of manuals |
Page 86 highlights
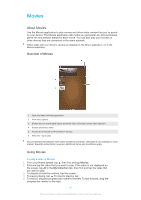
To share a photo 1 When you are viewing a photo, tap the screen to display the toolbars, then tap . 2 In the menu that opens, tap the application that you want to use to share the photo, then follow the steps to send it. To add a geotag to a photo 1 When you are viewing a photo, tap the screen to display the toolbars, then tap to open the map screen. 2 Find and tap the desired location to put the photo on the map. 3 To adjust the location of the photo, tap the location on the map to where you want to move the photo. 4 When you are finished, tap OK to save the geotag and return to the photo viewer. When a photo is geotagged, appears along with location information. You can tap this icon to view the photo on a map. To delete a photo 1 When you are viewing a photo, tap the screen to display the toolbars, then tap . 2 Tap Delete. Analysing photos with faces in Album You can analyse any photos on your device that feature people's faces. For example, you can scan photos. After running an analysis, you can then categorise the faces by people's faces. To turn on the photo analysis feature 1 From your Home screen, tap . 2 Find and tap Album > My albums > Faces. 3 Tap Activate. All photos on your device get analysed and grouped accordingly. To turn off the photo analysis feature 1 From your Home screen, tap . 2 Find and tap Album > My albums > Faces. 3 Tap , then tap Photo analysis. 4 Drag the slider to the left to turn off the photo analysis feature. To name a face 1 In the Faces tile, browse to the Unnamed faces folder and choose the face that you want to name. 2 Tap Add name. 3 Type a name, then tap OK. To edit a face name 1 When you are viewing a face in the full screen view, tap the screen to display the toolbars, then tap > Edit name tags. 2 Tap the face name to edit the name. 3 Type a name, then tap OK. Working with videos in Album Use Album to watch videos that you've taken with the camera, downloaded, or copied to your device. You can also share your videos with friends, for example, by uploading them to online services. 86 This is an Internet version of this publication. © Print only for private use.
-
 1
1 -
2
-
3
-
4
-
5
-
6
-
7
-
8
-
9
-
10
-
11
-
12
-
13
-
14
-
15
-
16
-
17
-
18
-
19
-
20
-
21
-
22
-
23
-
24
-
25
-
26
-
27
-
28
-
29
-
30
-
31
-
32
-
33
-
34
-
35
-
36
-
37
-
38
-
39
-
40
-
41
-
42
-
43
-
44
-
45
-
46
-
47
-
48
-
49
-
50
-
51
-
52
-
53
-
54
-
55
-
56
-
57
-
58
-
59
-
60
-
61
-
62
-
63
-
64
-
65
-
66
-
67
-
68
-
69
-
70
-
71
-
72
-
73
-
74
-
75
-
76
-
77
-
78
-
79
-
80
-
 81
81 -
 82
82 -
 83
83 -
 84
84 -
 85
85 -
 86
86 -
 87
87 -
 88
88 -
 89
89 -
 90
90 -
 91
91 -
92
-
93
-
94
-
95
-
96
-
97
-
98
-
99
-
100
-
101
-
102
-
103
-
104
-
105
-
106
-
107
-
108
-
109
-
110
-
111
-
112
-
113
-
114
-
115
-
116
-
117
-
118
-
119
-
120
-
121
-
122
-
123
-
124
-
125
-
126
-
127
-
128
-
129
-
130
-
131
-
132
-
133
-
134
-
135
-
136
-
137
 |
 |
