Sony RDR-VX525 Operating Instructions - Page 19
Connecting to audio L/R jacks, Connecting to a digital audio input jack - recorder
 |
UPC - 027242716056
View all Sony RDR-VX525 manuals
Add to My Manuals
Save this manual to your list of manuals |
Page 19 highlights
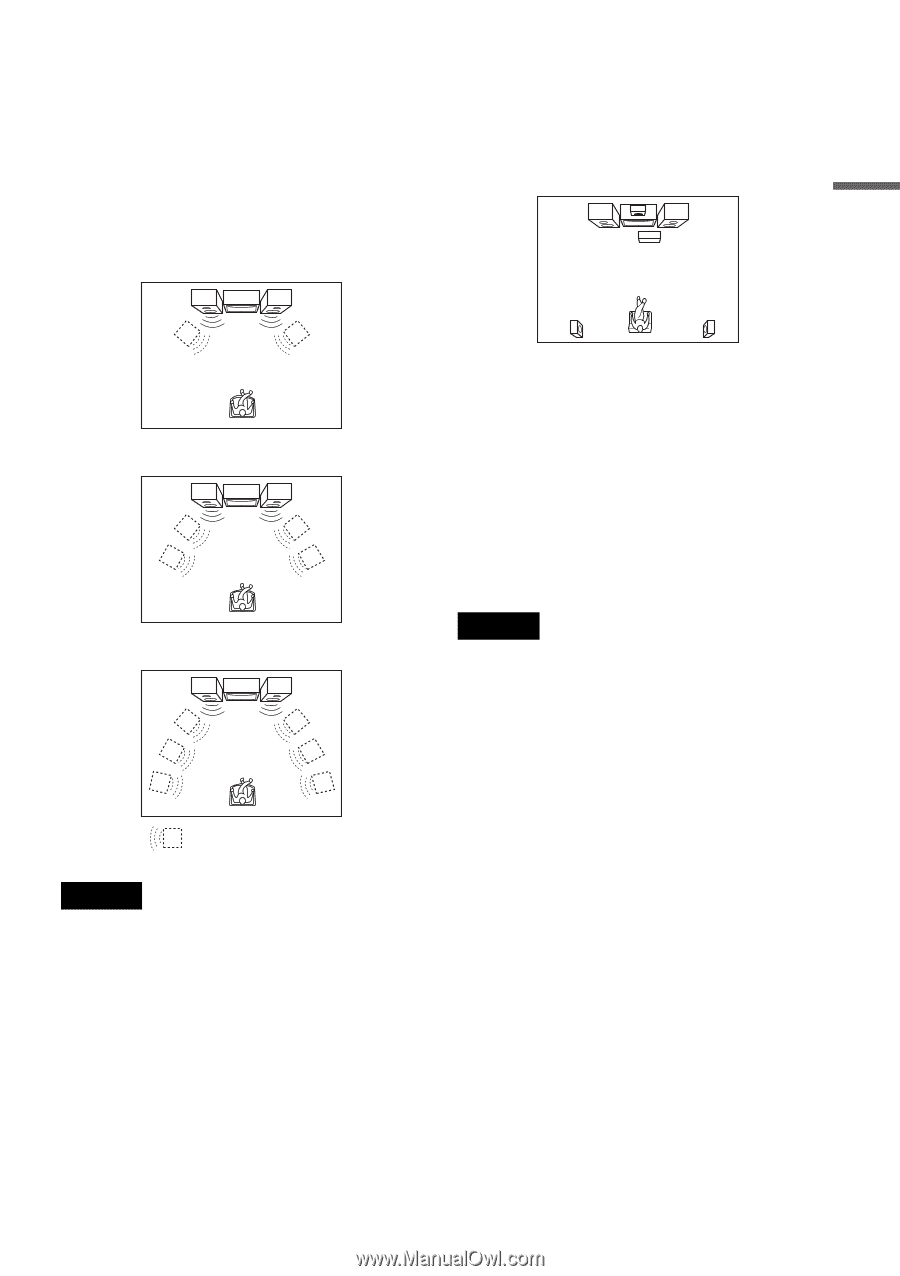
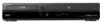
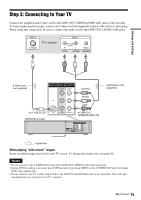
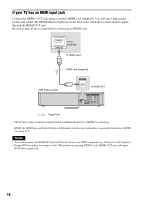
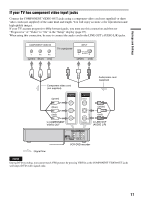
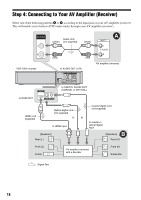
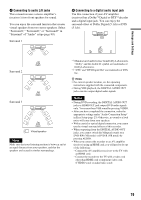
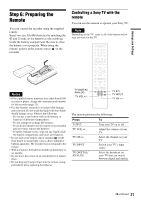
Hookups and Settings A Connecting to audio L/R jacks This connection uses a stereo amplifier's (receiver's) two front speakers for sound. You can enjoy the surround function that creates virtual speakers from two stereo speakers. Select "Surround1," "Surround2," or "Surround3" in "Surround" of "Audio" setup (page 99). Surround 1 B Connecting to a digital audio input jack Use this connection if your AV amplifier (receiver) has a Dolby*1 Digital or DTS*2 decoder and a digital input jack. You can enjoy the surround effect of Dolby Digital (5.1ch) or DTS (5.1ch). Surround 2 Surround 3 Virtual speaker Note Make sure that your listening position is between and at an equal distance from your speakers, and that the speakers are located in similar surroundings. *1 Manufactured under license from Dolby Laboratories. "Dolby" and the double-D symbol are trademarks of Dolby Laboratories. *2 "DTS" and "DTS Digital Out" are trademarks of DTS, Inc. z Hints • For correct speaker location, see the operating instructions supplied with the connected components. • During VHS playback, the DIGITAL AUDIO OUT jacks can also output digital audio signals. Notes • During DVD recording, the DIGITAL AUDIO OUT jacks or HDMI OUT jack output DVD audio signals only. You cannot hear VHS sound by pressing VIDEO. • After you have completed the connection, make the appropriate settings under "Audio Connection Setup" in Easy Setup (page 23). Otherwise, no sound or a loud noise will come from your speakers. • With a coaxial or optical digital connection, you cannot use the virtual surround effects of this recorder. • When outputting from the DIGITAL AUDIO OUT jacks, you cannot switch the bilingual sounds on a DVD-RW (VR mode) or DVD-R (VR mode) by pressing AUDIO. • When you connect the recorder to an AV amplifier (receiver) using an HDMI cord, you will need to do one of the following: - Connect the AV amplifier (receiver) to the TV with an HDMI cord. - Connect the recorder to the TV with a video cord other than HDMI cord (component video cord, S VIDEO cord, or audio/video cord). 19
-
 1
1 -
2
-
3
-
4
-
5
-
6
-
7
-
8
-
9
-
10
-
11
-
12
-
13
-
 14
14 -
 15
15 -
 16
16 -
 17
17 -
 18
18 -
 19
19 -
 20
20 -
 21
21 -
 22
22 -
 23
23 -
 24
24 -
25
-
26
-
27
-
28
-
29
-
30
-
31
-
32
-
33
-
34
-
35
-
36
-
37
-
38
-
39
-
40
-
41
-
42
-
43
-
44
-
45
-
46
-
47
-
48
-
49
-
50
-
51
-
52
-
53
-
54
-
55
-
56
-
57
-
58
-
59
-
60
-
61
-
62
-
63
-
64
-
65
-
66
-
67
-
68
-
69
-
70
-
71
-
72
-
73
-
74
-
75
-
76
-
77
-
78
-
79
-
80
-
81
-
82
-
83
-
84
-
85
-
86
-
87
-
88
-
89
-
90
-
91
-
92
-
93
-
94
-
95
-
96
-
97
-
98
-
99
-
100
-
101
-
102
-
103
-
104
-
105
-
106
-
107
-
108
-
109
-
110
-
111
-
112
-
113
-
114
-
115
-
116
-
117
-
118
-
119
-
120
-
121
-
122
-
123
-
124
-
125
-
126
-
127
-
128
-
129
-
130
-
131
-
132
-
133
-
134
-
135
-
136
-
137
-
138
-
139
-
140
-
141
-
142
-
143
-
144
-
145
-
146
-
147
-
148
-
149
-
150
-
151
-
152
-
153
-
154
-
155
-
156
-
157
-
158
-
159
-
160
 |
 |