Sony RDR-VX525 Operating Instructions - Page 24
Select OK, and press ENTER., Press ENTER. - dvd recorder manual
 |
UPC - 027242716056
View all Sony RDR-VX525 manuals
Add to My Manuals
Save this manual to your list of manuals |
Page 24 highlights
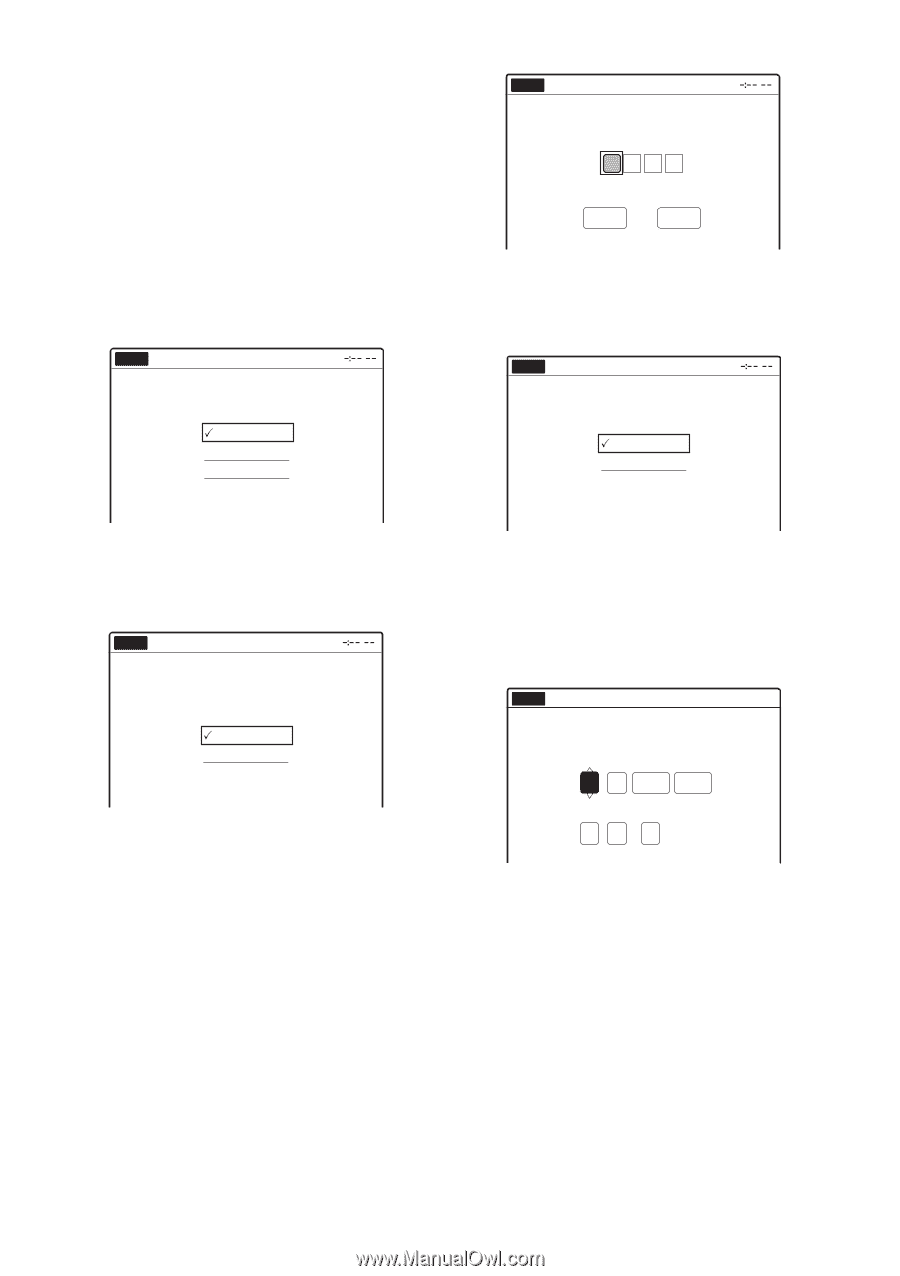
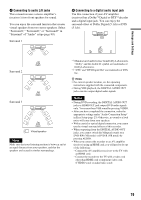
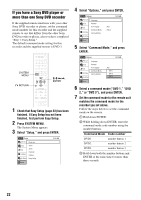
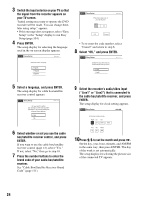
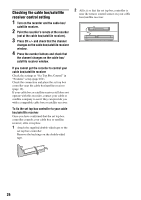
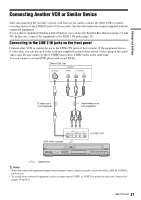
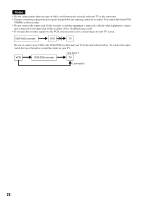
3 Switch the input selector on your TV so that the signal from the recorder appears on your TV screen. "Initial setting necessary to operate the DVD recorder will be made. You can change them later using setup." appears. • If this message does not appear, select "Easy Setup" in the "Setup" display to run Easy Setup (page 104). 4 Press ENTER. The setup display for selecting the language used in the on-screen display appears. No Disc Easy Setup Select the screen language. English Français Español No Disc Easy Setup Enter the brand code of your set top box. OK Cancel • To re-enter the code number, select "Cancel" and return to step 6. 8 Select "OK," and press ENTER. No Disc Easy Setup Select the input line that you connected the set top box to. Line1 Line2 5 Select a language, and press ENTER. The setup display for cable box/satellite receiver control appears. No Disc Easy Setup Do you want to control your set top box with this recorder? (Changes to the current setting will erase all timer settings.) Yes No 6 Select whether or not you use the cable box/satellite receiver control, and press ENTER. If you want to use the cable box/satellite receiver control (page 12), select "Yes." If not, select "No," then go to step 10. 7 Press the number buttons to enter the brand code of your cable box/satellite receiver. See "Cable Box/Satellite Receiver Brand Code" (page 121). 9 Select the recorder's audio/video input ("Line1" or "Line2") that is connected to the cable box/satellite receiver, and press ENTER. The setup display for clock setting appears. No Disc Easy Setup 12:00 AM Set the time and date manually. Month Day Year 01 01 2007 Mon Hour Min 12 : 00 AM/PM AM 10Press M/m to set the month and press ,. Set the day, year, hour, minutes, and AM/PM in the same way, then press ENTER. The day of the week is set automatically. The setup display for selecting the picture size of the connected TV appears. 24
-
 1
1 -
2
-
3
-
4
-
5
-
6
-
7
-
8
-
9
-
10
-
11
-
12
-
13
-
14
-
15
-
16
-
17
-
18
-
 19
19 -
 20
20 -
 21
21 -
 22
22 -
 23
23 -
 24
24 -
 25
25 -
 26
26 -
 27
27 -
 28
28 -
 29
29 -
30
-
31
-
32
-
33
-
34
-
35
-
36
-
37
-
38
-
39
-
40
-
41
-
42
-
43
-
44
-
45
-
46
-
47
-
48
-
49
-
50
-
51
-
52
-
53
-
54
-
55
-
56
-
57
-
58
-
59
-
60
-
61
-
62
-
63
-
64
-
65
-
66
-
67
-
68
-
69
-
70
-
71
-
72
-
73
-
74
-
75
-
76
-
77
-
78
-
79
-
80
-
81
-
82
-
83
-
84
-
85
-
86
-
87
-
88
-
89
-
90
-
91
-
92
-
93
-
94
-
95
-
96
-
97
-
98
-
99
-
100
-
101
-
102
-
103
-
104
-
105
-
106
-
107
-
108
-
109
-
110
-
111
-
112
-
113
-
114
-
115
-
116
-
117
-
118
-
119
-
120
-
121
-
122
-
123
-
124
-
125
-
126
-
127
-
128
-
129
-
130
-
131
-
132
-
133
-
134
-
135
-
136
-
137
-
138
-
139
-
140
-
141
-
142
-
143
-
144
-
145
-
146
-
147
-
148
-
149
-
150
-
151
-
152
-
153
-
154
-
155
-
156
-
157
-
158
-
159
-
160
 |
 |